Chat with us, powered by LiveChat

Introduction to AutoCAD Plant 3D Training

AutoCAD Plant 3D Logo Moving at the Speed of Business

Introduction to AutoCAD Plant 3D Training

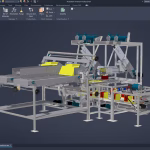
This specialised AutoCAD training course on Plant 3D, will teach you how to use, AutoCAD P&ID, AutoCAD Plant 3D and Autodesk Navisworks products to design plant equipment, P&ID and model coordination. 

Course Length: 5 Days

Prerequisites: Autodesk Inventor introduction to solid modelling or equivalent.

Training Guide Contents

Chapter 1: Introduction to AutoCAD Plant 3D

  • Lesson: Working in a Project
  • Lesson: Opening a Drawing
  • Lesson: Exploring the User Interface
  • Lesson: Managing Layers and Colors

Chapter 2: AutoCAD P&ID

  • Lesson: Creating and Adding Existing Drawings
  • Lesson: Equipment and Nozzles
  • Lesson: Piping
  • Lesson: Instruments and Instrument Lines
  • Lesson: Tagging Concepts
  • Lesson: Annotation Concepts
  • Lesson: Editing Techniques
  • Lesson: Data Manager and Reports
  • Lesson: Custom One-off Symbols
  • Lesson: Offpage Connections
  • Lesson: Generating Reports

Chapter 3: AutoCAD Plant 3D – Imperial

  • Lesson: Creating Project Folders and Drawings
  • Lesson: Steel Modeling and Editing
  • Lesson: Equipment Modeling and Editing
  • Lesson: Piping Basics
  • Lesson: Piping Editing and Advanced Topics
  • Lesson: Working with P&ID Data in Plant 3D
  • Lesson: Creating and Annotating Orthographic Views
  • Lesson: Creating Isometric Drawings

Chapter 4: Autodesk Navisworks

  • Lesson: File Handling
  • Lesson: Basic Navigation and Walkthrough
  • Lesson: Clash Detection
  • Lesson: Highlights of Scheduling and Rendering

Chapter 5: Setting Up and Administering a Plant Project

  • Lesson: Overview of Project Setup
  • Lesson: Overview of Project Structure and Files
  • Lesson: Setting Up Larger Projects
  • Lesson: Defining New Objects and Properties
  • Lesson: Customizing Data Manager
  • Lesson: Creating and Editing Drawing Templates and Data Attributes
  • Lesson: Specs and Catalogs
  • Lesson: Isometric Setup
  • Lesson: Troubleshooting
  • Lesson: Creating and Managing Report Configurations
  • Lesson: Setting Up SQL Express for AutoCAD Plant 3D

Contact Us

If you would to discuss Autodesk training courses, please contact us by calling on 1800 490 514, by filling out the form or clicking the live chat in the bottom right-hand corner.

PDF Logo small Moving at the Speed of Business

VIEW MORE

Autodesk Revit: Fundamentals for Structure

Revit 2021 Commercial New Single-user ELD Annual Subscription

Autodesk Revit: Fundamentals for Structure Training

This course will teach you how to model and detail in Autodesk Revit structural elements in a BIM environment.  Topics such as setting up levels, grids and columns, views, foundations, framing, slabs, reinforcement, analysis, construction drawings and schedules will be covered.

Course Length: 4 Days

Prerequisites: Autodesk Inventor introduction to solid modelling or equivalent.

Training Guide Contents

Chapter 1: Introduction to BIM and Autodesk Revit

  • 1 BIM and Autodesk Revit
  • 2 Overview of the Interface
  • 3 Starting Projects
  • 4 Viewing Commands

Chapter 2: Basic Sketching and Modify Tools

  • 1 Using General Sketching Tools
  • 2 Editing Elements
  • 3 Working with Basic Modify Tools
  • 4 Working with Additional Modify Tools

Chapter 3: Starting Structural Projects

  • 1 Linking and Importing CAD Files
  • 2 Linking in Revit Models
  • 3 Setting Up Levels
  • 4 Copying and Monitoring Elements
  • 5 Coordinating Linked Models

Chapter 4: Working with Views

  • 1 Modifying the View Display
  • 2 Duplicating Views
  • 3 Adding Callout Views
  • 4 Creating Elevations and Sections

Chapter 5: Structural Grids and Columns

  • 1 Adding Structural Grids
  • 2 Placing Structural Columns

Chapter 6: Foundations

  • 1 Modelling Walls
  • 2 Adding Wall Footings
  • 3 Creating Piers and Pilasters
  • 4 Adding Isolated Footings

Chapter 7: Structural Framing

  • 1 Modelling Structural Framing
  • 2 Modifying Structural Framing
  • 3 Adding Trusses

Chapter 8: Adding Structural Slabs

  • 1 Modelling Structural Slabs
  • 2 Creating Shaft Openings

Chapter 9: Structural Reinforcement

  • 1 Structural Reinforcement
  • 2 Adding Rebar
  • 3 Modifying Rebar
  • 4 Reinforcing Walls, Floors, and Slabs

Chapter 10: Structural Analysis

  • 1 Preparing Projects for Structural Analysis
  • 2 Viewing Analytical Models
  • 3 Adjusting Analytical Models
  • 4 Placing Loads

Chapter 11: Creating Construction Documents

  • 1 Setting Up Sheets
  • 2 Placing and Modifying Views on Sheets ▪ 11.3 Printing Sheets

Chapter 12: Annotating Construction Documents

  • 1 Working with Dimensions
  • 2 Working With Text
  • 3 Adding Tags
  • 4 Adding Detail Lines and Symbols
  • 5 Creating Legends

Chapter 13: Creating Details

  • 1 Setting Up Detail Views
  • 2 Adding Detail Components
  • 3 Annotating Details

Chapter 14: Scheduling

  • 1 Structural Schedules
  • 2 Graphical Column Schedules
  • 3 Working with Schedules

Appendix A: Introduction to Worksets

  • 1 Introduction to Worksets

 Appendix B: Additional Tools

  • 1 Reusing Selection Sets
  • 2 Placing Slanted Structural Columns
  • 3 Editing Wall Joins
  • 4 Creating Slab Types
  • 5 Creating Rebar Types
  • 6 Editing Plan and Section Profiles
  • 7 Working with Guide Grids on Sheets
  • 8 Revision Tracking
  • 9 Annotating Dependent Views
  • 10 Importing and Exporting Schedules
  • 11 Creating Building Component Schedules
  • 12 Creating a Repeating Detail

Appendix C: Project – Concrete Structure

  • 1 Start a Structural Project
  • 2 Create Foundation Elements
  • 3 Frame a Concrete Structure

Appendix D: Autodesk Revit Structure Certification Exam Objectives

Contact Us

If you would to discuss Autodesk training courses, please contact us by calling on 1800 490 514, by filling out the form or clicking the live chat in the bottom right-hand corner.

VIEW MORE

Autodesk Revit: Fundamentals for MEP Training

Revit 2021 Commercial New Single-user ELD Annual Subscription

Autodesk Revit: Fundamentals for MEP Training

MEP fundamentals for Autodesk Revit teaches designers how to model and document in a BIM environment HVAC networks such as air terminals, mechanical equipment, ducts and pipes, plumbing networks with fixtures and pipes, electrical circuits, equipment, devices, lighting fixtures, cable trays and conduits and then how to create construction drawings and schedules.

Course Length: 4 Days

Training Guide Contents

Chapter 1: Introduction to BIM and Autodesk Revit

  • 1 BIM and Autodesk Revit
  • 2 Overview of the Interface
  • 3 Starting Projects
  • 4 Viewing Commands

Chapter 2: Basic Sketching and Modify Tools

  • 1 Using General Sketching Tools ▪ 2.2 Inserting Components
  • 3 Selecting and Editing Elements
  • 4 Working with Basic Modify Tools
  • 5 Working with Additional Modify Tools

Chapter 3: Starting Systems Projects

  • 1 Linking and Importing CAD Files
  • 2 Linking in Revit Models
  • 3 Setting Up Levels
  • 4 Copying and Monitoring Elements
  • 5 Coordinating Linked Models
  • 6 Batch Copying Fixtures

Chapter 4: Working with Views

  • 1 Modifying the View Display
  • 2 Duplicating Views
  • 3 Adding Callout Views
  • 4 Creating Elevations and Sections

Chapter 5: Setting Up Spaces

  • 1 Preparing a Model for Spaces
  • 2 Adding Spaces
  • 3 Working with Spaces

Chapter 6: Heating and Cooling Loads Analysis

  • 1 Creating Zones
  • 2 Applying Colour Schemes
  • 3 Analysing the Heating and Cooling Loads

Chapter 7: Basic Systems Tools

  • 1 Connecting Components
  • 2 Creating Systems – Overview


Chapter 8: HVAC Networks

  • 1 Adding Mechanical Equipment and Air Terminals
  • 2 Adding Ducts and Pipes
  • 3 Modifying Ducts and Pipes

Chapter 9: Plumbing Networks

  • 1 Adding Plumbing Fixtures and Equipment
  • 2 Adding Plumbing Pipes
  • 3 Modifying Plumbing Pipes
  • 4 Adding Fire Protection Networks

Chapter 10: Advanced Systems for HVAC and Plumbing

  • 1 Creating and Modifying Systems
  • 2 Creating Automatic Layouts
  • 3 Testing Systems

Chapter 11: Electrical Systems

  • 1 About Electrical Systems
  • 2 Placing Electrical Components
  • 3 Creating Electrical Circuits
  • 4 Setting up Panel Schedules
  • 5 Adding Cable Trays and Conduit
  • 6 Testing Electrical Layouts

Chapter 12: Creating Construction Documents

  • 1 Setting Up Sheets
  • 2 Placing and Modifying Views on Sheets ▪ 12.3 Printing Sheets

Chapter 13: Annotating Construction Documents

  • 1 Working with Dimensions
  • 2 Working With Text
  • 3 Adding Detail Lines and Symbols
  • 4 Creating Legends

Chapter 14: Adding Tags and Schedules

  • 1 Adding Tags
  • 2 Working with Schedules

Chapter 15: Creating Details

  • 1 Setting Up Detail Views
  • 2 Adding Detail Components
  • 3 Annotating Details

Appendix A: Introduction to Worksets

  • 1 Introduction to Worksets

Appendix B: Additional Tools

  • 1 Building Type Settings
  • 2 Defining Colour Schemes
  • 3 Custom Duct and Piping Types
  • 4 Work with System Graphics
  • 5 Pressure Loss Reports
  • 6 Guide Grids and Sheets
  • 7 Revision Tracking
  • 8 Annotating Dependent Views
  • 9 Importing and Exporting Schedules
  • 10 Creating Building Component Schedules
  • 11 Keynoting and Keynote Legends

Appendix C: Autodesk Revit Certified Professional Exam for Mechanical Building Systems

Appendix D: Autodesk Revit Certified Professional Exam for Electrical Building Systems

Contact Us

If you would to discuss Autodesk training courses, please contact us by calling on 1800 490 514, by filling out the form or clicking the live chat in the bottom right-hand corner.

VIEW MORE

Autodesk Revit: Fundamentals for Landscape Architecture

Revit 2021 Commercial New Single-user ELD Annual Subscription

Autodesk Revit Fundamentals for Landscape Architecture Training

In this course, you will learn BIM workflows, how to model and create construction drawings in Autodesk Revit for landscape architecture. Covering topographical surfaces, Site Designer, views, hardscapes, planting components, landscape components, construction documents and schedules. 

Course Length: 4 Days

Training Guide Contents

Chapter 1: Introduction to BIM and Autodesk Revit

  • 1 BIM and Autodesk Revit
  • 2 Overview of the Interface
  • 3 Starting Projects
  • 4 Viewing Commands

Chapter 2: Basic Sketching and Modify Tools

  • 1 Using General Sketching Tools
  • 2 Editing Elements
  • 3 Working with Basic Modify Tools
  • 4 Working with Additional Modify Tools

Chapter 3: Starting Model-Based Projects

  • 1 Linking Revit Models
  • 2 Setting Up Levels
  • 3 Copying and Monitoring Elements
  • 4 Coordinating Linked Models

Chapter 4: Creating Revit Site Elements

  • 1 Starting CAD-based Projects
  • 2 Preparing a Project for Site Design
  • 3 Creating Topographical Surfaces
  • 4 Modifying Topographical Surfaces

Chapter 5: Working with Site Designer

  • 1 Preparing a Project for Site Designer
  • 2 Adding Site Designer Features
  • 3 Modifying Site Designer Features

Chapter 6: Working with Views

  • 1 Setting the View Display
  • 2 Duplicating Views
  • 3 Adding Callout Views
  • 4 Creating Elevations and Sections

Chapter 7: Modelling Hardscapes

  • 1 Modelling Hardscapes Using Walls
  • 2 Modelling Hardscapes Using Floors
  • 3 Creating Sloped Floors
  • 4 Working with Materials and Floor Types
  • 5 Modelling Stairs, Ramps and Railings

Chapter 8: Adding Planting and Other Landscape Components

  • 1 Adding Landscape Components
  • 2 Creating Planting Areas and Groups

Chapter 9: Creating Construction Documents

  • 1 Setting Up Sheets
  • 2 Placing and Modifying Views on Sheets
  • 3 Printing Sheets

Chapter 10: Annotating Construction Documents

  • 1 Working with Dimensions
  • 2 Working with Text
  • 3 Adding Tags and Symbols

Chapter 11: Working with Schedules and Legends

  • 1 Working with Schedules
  • 2 Creating Legends

Chapter 12: Creating Details

  • 1 Setting Up Detail Views
  • 2 Adding Detail Components
  • 3 Annotating Details

Contact Us

If you would to discuss Autodesk training courses, please contact us by calling on 1800 490 514, by filling out the form or clicking the live chat in the bottom right-hand corner.

VIEW MORE

Autodesk Revit: Fundamentals for Interior Design Training

Revit 2021 Commercial New Single-user ELD Annual Subscription

Autodesk Revit: Fundamentals for Interior Design Training

Interior design fundamentals for Autodesk Revit is specificlally designed to teach interior designers on how to use the BIM tools in Autodesk Revit to model walls, floors, ceilings, levels, placing families to layout interiors, space planning, materials, schedules, rendering and construction drawings.

Course Length: 3 Days

Training Guide Contents

Chapter 1: Introduction to Autodesk Revit

  • Explain BIM and how Revit fits into the BIM process
  • Describe the various User Interface components and areas
  • Define each of the Revit file types
  • Navigate around a project model

Chapter 2: Modelling Tools and Modify Options

  • Define and use Revit tools and keyboard commands to create a 3D model
  • Work with Revit Families and Types
  • Draft using nodes, snaps, and other drawings aids
  • Modify existing content using various modifying tools
  • Use various selection tools to filter for elements and information

Chapter 3: Levels and Grids

  • Create and Modify Levels and Grids
  • Link CAD files into a project
  • Link Revit Model’s into a project
  • Place Architectural Column’s

Chapter 4: Walls

  • Create, modify, and define new wall types for use in projects
  • Comprehend Instance and Type property information
  • Demonstrate how to use the Modify wall options

Chapter 5: Placing Families: Punched Openings and Components

  • Add Doors and Windows
  • Add Component Families
  • Create and Modify new or existing Revit family types for project use

Chapter 6: Views, Display Options and Settings

  • Create, modify and define various types of views in the project
  • Modify Visual Overrides for elements within a view

Chapter 7: Floors

  • Create and define new Floor Types
  • Modify existing Floor Types
  • Define floor contours and slope definitions

Chapter 8: Ceilings

  • Create and define new Ceiling Types
  • Modify existing Ceiling Types
  • Define Ceiling grid and modify spacing and rotation

Chapter 9: Curtain Walls

  • Define Curtain Walls and understand best use of the tools
  • Apply, modify, and create curtain wall grids, mullions, and panels
  • Use Curtain Walls to create Storefronts within the model

Chapter 10: Annotation: Documents & Deliverables

  • Use text, dimensions, detail items, and tags to create project deliverables
  • Establish project construction information

Chapter 11: Detailing in Revit

  • Create drafting views for use with detail creation
  • Add Views and utilize AutoCAD information for coordination
  • Define legends for Revit and understand best use of them
  • Create multiple legend types for various uses

Chapter 12: Space Planning

  • Add and arrange Room’s into new layout
  • Analyse Space locations in design
  • Define Area elements for project programming
  • Create and Refine colour fill plans for clarification

Chapter 13: Materials as Finishes

  • Navigate Materials Browser
  • Organize and assign materials to content
  • Update specified project specific materials
  • Organize Materials Library
  • Build custom project materials
  • Share custom materials library

Chapter 14: Schedules

  • Organize rooms into schedules
  • Build component lists to refine content
  • Access and allocate finishes to component materials

 Chapter 15: Lighting, Rendering and Presentations

  • Create camera views for rendering and presentation views
  • Create lighting scheme with standard and custom lighting components
  • Apply lighting groups to projects
  • Manage Rendering via dialogue window

Chapter 16: Sheets

  • Comprehend sheet use, creation, and manipulation
  • Add views and content to sheets
  • Prepare sheets for size and scale
  • Add project-specific content
  • Print in Revit

Contact Us

If you would to discuss Autodesk training courses, please contact us by calling on 1800 490 514, by filling out the form or clicking the live chat in the bottom right-hand corner.

VIEW MORE

Autodesk Revit: Fundamentals for Architecture Training

Autodesk Revit Software for BIM, Archiecture, MEP and Structural design, analysis, detailing and documentation

Autodesk Revit Fundamentals for Architecture Training

This fundamentals course for architecture will give you the BIM skills in Autodesk Revit to design architectural 3D models and construction drawings, teaching you how to design walls, doors, floors, ceilings, roof, stair, railing and ramp systems, linking in CAD files, working with views and construction documents.

Course Overview

  • 18-Hours – 9 x 2-hour sessions
  • Remote training over MS Teams
  • Sessions are recorded and download links for each session are provide for future use
  • Training for up to 1-3 People
  • Sessions can start within 7 days upon placing an order
  • Flexible sessions (i.e. consecutive or Monday, Wednesday, Friday, etc.)
  • Courses are private and topics can be customised to suit
  • Training manuals are additional $159 each for soft copy

Training Guide Contents

Introduction to BIM and Autodesk Revit

Chapter 1: Introduction to BIM and Autodesk Revit

  • 1 BIM and Autodesk Revit
  • 2 Overview of the Interface
  • 3 Starting Projects
  • 4 Viewing Commands

Chapter 2: Basic Sketching and Modify Tools

  • 1 Using General Sketching Tools
  • 2 Editing Elements
  • 3 Working with Basic Modify Tools
  • 4 Working with Additional Modify Tools

Chapter 3: Starting Architectural Projects

  • 1 Linking and Importing CAD Files
  • 2 Linking in Revit Models
  • 3 Setting Up Levels
  • 4 Creating Structural Grids
  • 5 Adding Columns Design

Development Phase

Chapter 4: Modelling Walls

  • 1 Modelling Walls
  • 2 Modifying Walls
  • 3 Adding Room Elements

Chapter 5: Working with Doors and Windows

  • 1 Inserting Doors and Windows
  • 2 Loading Door and Window Types from the Library
  • 3 Creating Additional Door and Window Sizes

Chapter 6: Working with Curtain Walls

  • 1 Creating Curtain Walls
  • 2 Adding Curtain Grids
  • 3 Working with Curtain Wall Panels
  • 4 Attaching Mullions to Curtain Grids

 Chapter 7: Working with Views

  • 1 Modifying the View Display
  • 2 Duplicating Views
  • 3 Adding Callout Views
  • 4 Creating Elevations and Sections

Chapter 8: Adding Components

  • 1 Adding Components
  • 2 Modifying Components

Chapter 9: Modelling Floors

  • 1 Modelling Floors
  • 2 Creating Shaft Openings
  • 3 Creating Sloped Floors

Chapter 10: Modelling Ceilings

  • 1 Modelling Ceilings
  • 2 Adding Ceiling Fixtures
  • 3 Creating Ceiling Soffits

Chapter 11: Modelling Roofs

  • 1 Modelling Roofs
  • 2 Creating Roofs by Footprint
  • 3 Establishing Work Planes
  • 4 Creating Roofs by Extrusion

Chapter 12: Modelling Stairs, Railings, and Ramps

  • 1 Creating Component Stairs
  • 2 Modifying Component Stairs
  • 3 Working with Railings
  • 4 Creating Ramps

Construction Documents Phase

Chapter 13: Creating Construction Documents

  • 1 Setting Up Sheets
  • 2 Placing and Modifying Views on Sheets
  • 3 Printing Sheets

 Chapter 14: Annotating Construction Documents

  • 1 Working with Dimensions
  • 2 Working With Text
  • 3 Adding Detail Lines and Symbols
  • 4 Creating Legends

Chapter 15: Adding Tags and Schedules

  • 1 Adding Tags
  • 2 Working with Schedules

Chapter 16: Creating Details

  • 1 Setting Up Detail Views
  • 2 Adding Detail Components
  • 3 Annotating Details

Appendix A: Introduction to Worksets

  • 1 Introduction to Worksets

Appendix B: Additional Tools

  • 1 Reusing Selection Sets
  • 2 Editing Wall Joins
  • 3 Wall Sweeps and Reveals
  • 4 Creating Curtain Wall Types with Automatic Grids
  • 5 Enhancing Views
  • 6 Creating Dormers
  • 7 Working with Guide Grids on Sheets
  • 8 Revision Tracking
  • 9 Route Analysis
  • 10 Annotating Dependent Views
  • 11 Importing and Exporting Schedules
  • 12 Creating Building Component Schedules
  • 13 Creating a Repeating Detail
  • 14 Keynoting and Keynote Legends

Appendix C: Autodesk Revit Architecture Certification Exam Objectives

Contact Us

If you would to discuss Autodesk training courses, please contact us by calling on 1800 490 514, by filling out the form or clicking the live chat in the bottom right-hand corner.

VIEW MORE

Autodesk Navisworks: Using Autodesk Navisworks in a BIM Workflow Training

navisworks no year lockup stacked screen 400x400 small Moving at the Speed of Business

Autodesk Navisworks: Using Autodesk Navisworks in a BIM Workflow Training

This course on Navisworks teaches users how to better predict outcomes, change management, conflicts and lower project risk using Navisworks Manage.

Course Length: 2 Days

Prerequisites: Experience using 3D CAD software.

Training Guide Contents

Chapter 1: Introduction to Autodesk Navisworks

  • 1 What Is Navisworks?
  • 2 Overview of the Interface
  • 3 Using Basic Viewing Tools

Chapter 2: Consolidate Trade Models

  • 1 Consolidating the Model
  • 2 Aligning Models

Chapter 3: Review Models

  • 1 Saving and Retrieving Views
  • 2 Sectioning the Model
  • 3 Setting View Options
  • 4 Setting Up Appearances

Chapter 4: Analyse Models

  • 1 Selecting Items
  • 2 Investigating Properties
  • 3 Using the Selection Tree
  • 4 Finding Items and Saving Search Sets
  • 5 Hiding and Unhiding Items

Chapter 5: Communication: Review and Mark Up a Model

  • 1 Using Measuring Tools
  • 2 Marking Up Scenes for Review

Chapter 6: Collaboration: Clash Detection

  • 1 Overview of the Clash Detective
  • 2 Setting Up Clash Tests
  • 3 Reviewing Clash Results
  • 4 Assigning Clash Fixes
  • 5 Clash Grouping
  • 6 Sharing Clash Test Results
  • 7 Incorporating Model Updates

Chapter 7: Practices to Prepare for Animator

Chapter 8: Communication: Animator

  • 1 Creating Tours
  • 2 Animating Objects

 Chapter 9: Construct: Project Scheduling

  • 1 Introduction to TimeLiner
  • 2 Manually Creating a Construction Simulation
  • 3 Importing an External Task List
  • 4 Combining TimeLiner and Animator
  • 5 Time-Based Clashes

Appendix A: Coordination Tools

  • 1 Creating a View in Autodesk Revit
  • 2 Setting a Project Point in Autodesk Revit
  • 3 Autodesk Civil 3D Object Enabler
  • 4 Creating an .FBX File in Autodesk InfraWorks 360
  • 5 Preparing a Corridor Model for TimeLiner
  • 6 Preparing an Autodesk Revit Model for TimeLiner

Contact Us

If you would to discuss Autodesk training courses, please contact us by calling on 1800 490 514, by filling out the form or clicking the live chat in the bottom right-hand corner.

VIEW MORE

Autodesk Inventor: Fundamentals Training

Autodesk Inventor Professional 3D mechanical CAD software

Autodesk Inventor: Introduction to Solid Modeling Training

This introductory course for Autodesk Inventor Professional covers the fundamental topics for 2D sketching, 3D part and assembly modelling, 2D detailing and bills of materials.

Course Overview

  • 16-Hours – 8 x 2-hour sessions
  • Remote training over MS Teams
  • Sessions are recorded and download links for each session are provide for future use
  • Training for up to 1-3 People
  • Sessions can start within 7 days upon placing an order
  • Flexible sessions (i.e. consecutive or Monday, Wednesday, Friday, etc.)
  • Courses are private and topics can be customised to suit
  • Training manuals are additional $159 each for soft copy

Training Guide Contents

Chapter 1: Introduction to Autodesk Inventor

  • Introduction
  • Autodesk Inventor Fundamentals
  • Getting Started
  • Autodesk Inventor Interface
  • Model Manipulation

Chapter 2: Creating the Base Feature

  • Creating a New Part File
  • Sketched Base Features
  • Editing Sketched Features

Chapter 3: Additional Sketching Tools

  • Additional Entity Types
  • Basic Editing Tools
  • Additional Constraint Tools
  • Additional Dimension Tools

Chapter 4: Advanced Sketch Editing Tools

  • Advanced Editing Tools
  • Rectangular Sketch Patterns
  • Circular Sketch Patterns
  • Sketch Preferences

Chapter 5: Sketched Secondary Features

  • Sketched Secondary Features
  • Using Existing Geometry

Chapter 6: Creating Pick and Place Features

  • Edge Chamfer
  • Constant Fillets
  • Variable Fillets
  • Face Fillets
  • Full Round Fillets
  • Holes
  • Threads
  • Editing Pick and Place Features
  • Creation Sequence

 Chapter 7: Work Features

  • Work Planes
  • Work Axes
  • Work Points

Chapter 8: Equations

  • Equations
  • Parameters

Chapter 9: Additional Features

  • Face Draft
  • Splitting a Face or Part
  • Shells
  • Ribs

Chapter 10: Model and Display Manipulation

  • Reordering Features
  • Inserting Features
  • Suppressing Features
  • Section Views
  •  Design Views

Chapter 11: Fixing Problems

  • Sketch Failure
  • Feature Failure

Chapter 12: Sweep Features

  • Sweep Features

Chapter 13: Loft Features

  • Rail and Centre Line Lofts
  • Advanced Loft Options

Chapter 14: Duplication Tools

  • Rectangular Feature Patterns
  • Circular Feature Patterns
  • Sketched Driven Patterns
  • Mirror Parts or Features
  • Manipulate Patterns and Mirror Features

Chapter 15: Feature Relationships

  • Establishing Relationships
  • Controlling Relationships
  • Investigating Relationships
  • Changing Relationships

Chapter 16: Assembly Environment

  • Assembling Components Using Constraints
  • Assemble Mini-Toolbar
  • Content Centre
  • Assembly Browser
  • Saving Files

Chapter 17: Joint Connections

  • Assembling Components Using Joints

Chapter 18: Manipulating Assembly Display

  • Moving and Rotating Assembly Components
  • Suppressing Constraints
  • Component Display
  • Selection Options in Assemblies

Chapter 19: Model Information

  • Measurement Tools
  • Model Properties

Chapter 20: Presentation Files

  • Creating Presentations
  • Storyboards
  • Snapshot Views
  • Publishing a Presentation File

Chapter 21: Assembly Tools

  • Replacing Components
  • Duplicating Components
  • Restructuring Components
  • Driving Constraints
  • Contact Solver
  • Interference
  • Error Recovery

 Chapter 22: Assembly Parts and Features

  • Assembly Parts
  • Assembly Features

Chapter 23: Assembly Bill of Materials

  • Create Virtual Components
  • Create Bill of Materials

Chapter 24: Working With Projects

  • Project Files
  • Resolving Links

Chapter 25: Drawing Basics

  • Creating a New Drawing
  • Base and Projected Views
  • Additional Drawing Views
  • Manipulating Views

Chapter 26: Detailing Drawings

  • Dimensions
  • Drawing Sheets
  • Parts List
  • Balloons
  • Styles and Standards
  • Hatching

Chapter 27: Drawing Annotations

  • Text
  • Symbols
  • Hole and Thread Notes
  • Chamfer Notes
  • Centre Marks and Centre Lines
  • Hole Tables
  • Revision Tables and Tags

Chapter 28: Customising Autodesk Inventor

  • Application Options
  • Document Settings
  • File Properties
  • Changing Part Units
  • Command Customization

 Appendix A: Sketching Options

  • Sketch Geometry Creation Options
  • Sketch Editing Options
  • Sketch Constraint Options
  • Dimension Type Options

Appendix B: Primitive Base Features

  • Primitive Base Features

Appendix C: Additional Practices I Appendix D: Effective Modelling

  • Design Considerations
  • Modelling Tips and Techniques
  • Model Investigation

Appendix E: Additional Practices II Appendix F: Autodesk Inventor Certification Exam Objectives

Contact Us

If you would to discuss Autodesk training courses, please contact us by calling on 1800 490 514, by filling out the form or clicking the live chat in the bottom right-hand corner.

VIEW MORE