Autodesk Advance Steel Training Fundamentals Course
The Autodesk® Advance Steel software is a powerful 3D modelling application that streamlines the fabrication process through the use of a 3D model, which is used to create fabrication drawings, Bill of Materials (BOM) lists, and files for Numerical Control (NC) machines. Since structural steel projects are extremely complex, the Autodesk Advance Steel software is also complex. The objective of the Autodesk® Advance Steel: Fundamentals training course is to enable you to create full 3D project models at a high level of detail and set them up in fabrication drawings. This course focuses on the basic tools that the majority of users need. You begin by learning the user interface, basic 3D viewing tools, and the standard AutoCAD® tools that are routinely used. Specific Autodesk Advance Steel objects, including structural columns, beams, bracing, plates, bolts, anchors, welds, and additional 3D objects are also covered. You will also learn about the powerful model verification tools. To complete the course, you will learn to edit and generate all of the required documentation files that enable your design to accurately and effectively communicate the final design.
Sessions are recorded and download links for each session are provide for future use
Training for up to 1-3 People
Sessions can start within 7 days upon ordering
Flexible sessions (i.e. consecutive or Monday, Wednesday, Friday, etc.)
Courses are private and topics can be customised to suit
Includes Certificate of Completion
Training manuals are additional $159 each for soft copy
Course Length: 16 Hours (4 x 4 Hour Sessions)
Topics Covered:
• Understand the process of 3D modelling and extracting 2D documentation from a model in the Autodesk Advance Steel software. • Navigate the Autodesk Advance Steel interface. • Work with 3D viewing tools. • Review helpful AutoCAD tools. • Work with the User Coordinate System (UCS). • Use the Autodesk Advance Steel Modify commands. • Add structural grids. • Create levels. • Model columns and beams and add bracing. • Create connections using the Connection Vault. • Create special parts. • Verify models using Clash Checking tools. • Modify a drawing prototype. • Work within the Drawing Style Manager.
• Create custom connections. • Create plates and add bolts, anchors, and welds. • Add grating and cladding.
• Model ladders, stairs, and railings. • Create concrete objects such as footings. • Number objects. • Extract 2D drawings from the model using Drawing Styles and Drawing Processes. • Review and modify 2D drawings using the Document Manager. • Modify 2D details with parametric dimensions. • Revise models and drawings. • Create BOM lists. • Export data to .NC and .DXF files.
Contact Us
If you would to discuss Autodesk training courses, please contact us by calling on 1800 490 514, by filling out the form or clicking the live chat in the bottom right-hand corner.
Suited for Civil Engineers and Surveyors, the Civil 3D Fundamentals training course will teach you how to organise your projects, create, edit, analyse and work with points, surfaces, corridors (roads), parcel layouts, grading, volume calculation and layout pipe networks.
Course Length: 4 Days
Training Guide Contents
Chapter 1: Introduction to Autodesk Fabrication CADmep
Support Resources for Fabrication CADmep
Overview of Fabrication Products
BIM and Fabrication
Overview of the MEP Fabrication Industry
Definitions
Chapter 2: Deployment
Installing Fabrication CADmep
Check for and Install Latest Service Packs
Setting up a Shared Database and File Structure
Migrating an Older Database
Configuring User Names and Permissions
Chapter 3: User Interface
The Service Pallet
Create a New Section
The CADmep Toolbar
Right-Click Shortcut Menus
Chapter 4: Sections
Sections
Create a New Section
Make a Section Current
Understanding How Sections Control Hanger Rod Lengths
Chapter 5: Drawing with the Attacher
Setting the Systems and Service and setting the Section
Placing Items from the Service Pallet
Understanding the Attacher Arrow
Modifying Placed Items
Rotating Items about the Attacher Arrow
Using Fix Relative
Placing an Item using Fix Relative
Placing an Item by Rotating the Attacher Arrow
Using Takeoff as Cut-In
Using Drop Into Fall
Fill Between 2 Ends
Fill with Flex
Polyline 3D Fill
Match Object Properties
Configuring the Multiple Item Properties Command
Using the Multiple Item Properties Command
Carry Over Options Settings
Filter Selection
Chapter 6: Drawing with Design Line
Set the Design Line Entry Method for Services
Fabrication CADmep Design Tools: The Design Line Toolbar
The Design Line Takeoff Menu
Using Design Line for an HVAC System
Understanding How Design Line Works
Stretching a Design Line
Using Design Line for a Plumbing System
Selecting and Activating Design Lines
The RevDesign Command
Contact Us
If you would to discuss Autodesk training courses, please contact us by calling on 1800 490 514, by filling out the form or clicking the live chat in the bottom right-hand corner.
Autodesk Storm and Sanitary Analysis Fundamentals Training
Covering relevant tools in Autodesk Civil 3D and AutoCAD Map 3D, this course teaches you an introduction to hydraflow extensions, storm and sanitary analysis, hydrology and hydraulic methods, compute peak runoff and size curvlets, use GIS data to perform hydrologic analysis, design of retention and detention ponds and sanitary sewer lift stations and force mains.
Prerequisites: Autodesk Civil 3D fundamentals or equivalent.
Training Guide Contents
Overview of relevant tools included with Civil 3D and Map 3D
Introduction of Hydraflow Extensions
Preparing data for use with Storm and Sanitary Analysis (SSA)
Explanation of hydrology and hydraulic methods available in SSA and their application
Using Rational Method to compute peak runoff and size culverts
Using SCS Curve Number Method (TR-20 and TR-55)
Using Map 3D and GIS data to perform hydrologic analysis
Using Civil 3D surface analysis tools to delineate watersheds and catchments
Exporting Civil 3D Pipe Network to SSA and importing results back into Civil 3D
Design of Retention Ponds
Design of Detention Ponds with controlled release and emergency overflows
Quantifying and matching pre-development and post-development peak flows
Design of sanitary sewer lift stations and force mains
Contact Us
If you would to discuss Autodesk training courses, please contact us by calling on 1800 490 514, by filling out the form or clicking the live chat in the bottom right-hand corner.
Autodesk Revit: Fundamentals for Structure Training
This course will teach you how to model and detail in Autodesk Revit structural elements in a BIM environment. Topics such as setting up levels, grids and columns, views, foundations, framing, slabs, reinforcement, analysis, construction drawings and schedules will be covered.
If you would to discuss Autodesk training courses, please contact us by calling on 1800 490 514, by filling out the form or clicking the live chat in the bottom right-hand corner.
MEP fundamentals for Autodesk Revit teaches designers how to model and document in a BIM environment HVAC networks such as air terminals, mechanical equipment, ducts and pipes, plumbing networks with fixtures and pipes, electrical circuits, equipment, devices, lighting fixtures, cable trays and conduits and then how to create construction drawings and schedules.
1 Using General Sketching Tools ▪ 2.2 Inserting Components
3 Selecting and Editing Elements
4 Working with Basic Modify Tools
5 Working with Additional Modify Tools
Chapter 3: Starting Systems Projects
1 Linking and Importing CAD Files
2 Linking in Revit Models
3 Setting Up Levels
4 Copying and Monitoring Elements
5 Coordinating Linked Models
6 Batch Copying Fixtures
Chapter 4: Working with Views
1 Modifying the View Display
2 Duplicating Views
3 Adding Callout Views
4 Creating Elevations and Sections
Chapter 5: Setting Up Spaces
1 Preparing a Model for Spaces
2 Adding Spaces
3 Working with Spaces
Chapter 6: Heating and Cooling Loads Analysis
1 Creating Zones
2 Applying Colour Schemes
3 Analysing the Heating and Cooling Loads
Chapter 7: Basic Systems Tools
1 Connecting Components
2 Creating Systems – Overview
Chapter 8: HVAC Networks
1 Adding Mechanical Equipment and Air Terminals
2 Adding Ducts and Pipes
3 Modifying Ducts and Pipes
Chapter 9: Plumbing Networks
1 Adding Plumbing Fixtures and Equipment
2 Adding Plumbing Pipes
3 Modifying Plumbing Pipes
4 Adding Fire Protection Networks
Chapter 10: Advanced Systems for HVAC and Plumbing
1 Creating and Modifying Systems
2 Creating Automatic Layouts
3 Testing Systems
Chapter 11: Electrical Systems
1 About Electrical Systems
2 Placing Electrical Components
3 Creating Electrical Circuits
4 Setting up Panel Schedules
5 Adding Cable Trays and Conduit
6 Testing Electrical Layouts
Chapter 12: Creating Construction Documents
1 Setting Up Sheets
2 Placing and Modifying Views on Sheets ▪ 12.3 Printing Sheets
Chapter 13: Annotating Construction Documents
1 Working with Dimensions
2 Working With Text
3 Adding Detail Lines and Symbols
4 Creating Legends
Chapter 14: Adding Tags and Schedules
1 Adding Tags
2 Working with Schedules
Chapter 15: Creating Details
1 Setting Up Detail Views
2 Adding Detail Components
3 Annotating Details
Appendix A: Introduction to Worksets
1 Introduction to Worksets
Appendix B: Additional Tools
1 Building Type Settings
2 Defining Colour Schemes
3 Custom Duct and Piping Types
4 Work with System Graphics
5 Pressure Loss Reports
6 Guide Grids and Sheets
7 Revision Tracking
8 Annotating Dependent Views
9 Importing and Exporting Schedules
10 Creating Building Component Schedules
11 Keynoting and Keynote Legends
Appendix C: Autodesk Revit Certified Professional Exam for Mechanical Building Systems
Appendix D: Autodesk Revit Certified Professional Exam for Electrical Building Systems
Contact Us
If you would to discuss Autodesk training courses, please contact us by calling on 1800 490 514, by filling out the form or clicking the live chat in the bottom right-hand corner.
Autodesk Revit Fundamentals for Landscape Architecture Training
In this course, you will learn BIM workflows, how to model and create construction drawings in Autodesk Revit for landscape architecture. Covering topographical surfaces, Site Designer, views, hardscapes, planting components, landscape components, construction documents and schedules.
Chapter 8: Adding Planting and Other Landscape Components
1 Adding Landscape Components
2 Creating Planting Areas and Groups
Chapter 9: Creating Construction Documents
1 Setting Up Sheets
2 Placing and Modifying Views on Sheets
3 Printing Sheets
Chapter 10: Annotating Construction Documents
1 Working with Dimensions
2 Working with Text
3 Adding Tags and Symbols
Chapter 11: Working with Schedules and Legends
1 Working with Schedules
2 Creating Legends
Chapter 12: Creating Details
1 Setting Up Detail Views
2 Adding Detail Components
3 Annotating Details
Contact Us
If you would to discuss Autodesk training courses, please contact us by calling on 1800 490 514, by filling out the form or clicking the live chat in the bottom right-hand corner.
This course is for Project Managers who need to work on Autodesk Revit projects. In this course you will learn how to navigate through and review the model, views and sheets sets, link in drawings and models into Autodesk Revit to coordinate, export, print and publish Revit files, collaborate with team members, working with schedules and annotate drawings.
If you would to discuss Autodesk training courses, please contact us by calling on 1800 490 514, by filling out the form or clicking the live chat in the bottom right-hand corner.
Chapter 5: Communication: Review and Mark Up a Model
1 Using Measuring Tools
2 Marking Up Scenes for Review
Chapter 6: Collaboration: Clash Detection
1 Overview of the Clash Detective
2 Setting Up Clash Tests
3 Reviewing Clash Results
4 Assigning Clash Fixes
5 Clash Grouping
6 Sharing Clash Test Results
7 Incorporating Model Updates
Chapter 7: Practices to Prepare for Animator
Chapter 8: Communication: Animator
1 Creating Tours
2 Animating Objects
Chapter 9: Construct: Project Scheduling
1 Introduction to TimeLiner
2 Manually Creating a Construction Simulation
3 Importing an External Task List
4 Combining TimeLiner and Animator
5 Time-Based Clashes
Appendix A: Coordination Tools
1 Creating a View in Autodesk Revit
2 Setting a Project Point in Autodesk Revit
3 Autodesk Civil 3D Object Enabler
4 Creating an .FBX File in Autodesk InfraWorks 360
5 Preparing a Corridor Model for TimeLiner
6 Preparing an Autodesk Revit Model for TimeLiner
Contact Us
If you would to discuss Autodesk training courses, please contact us by calling on 1800 490 514, by filling out the form or clicking the live chat in the bottom right-hand corner.
AUTODESK NAVISWORKS: FOR PROJECT MANAGERS TRAINING
This quick half day course gives Project Managers the skills to effectively navigate through a coordinated model, inspect, create and share views, mark ups and annotations.
·Utilise the varying Navigation tools in Navisworks
·Implement the Measurement tools to inform design change decisions
·Create and share Viewpoints for Design review
·Employ the Markup and Annotation tools to collaborate with team members
·Utilise Visibility and Display settings / options
Contact Us
If you would to discuss Autodesk training courses, please contact us by calling on 1800 490 514, by filling out the form or clicking the live chat in the bottom right-hand corner.
Based on assembly and multi-body part modelling, this course covers advanced and productivity topics such as constraints, iMates, iAssemblies, top-down design methodology, design accelerator, weldments and more.
If you would to discuss Autodesk training courses, please contact us by calling on 1800 490 514, by filling out the form or clicking the live chat in the bottom right-hand corner.
Tube and Pipe training instructs you on design techniques in this specialised environment in Inventor Professional where you will learn how to route flexible hose, rigid tube, rigid pipe and fittings.
Prerequisites: Autodesk Inventor introduction to solid modelling or equivalent.
Training Guide Contents
Chapter 1: Introduction to Tube and Pipe
Lesson: Introduction to Tube and Pipe
Chapter 2: Setup for Routes and Runs
Lesson: Setup for Routes and Runs
Lesson: Placing Initial Fittings
Chapter 3: Routes and Runs
Lesson: Creating Rigid Routes
Lesson: Sketching Rigid Routes
Lesson: Editing Rigid Routes
Lesson: Working with Fittings in Rigid Routes
Lesson: Flexible Hose Routes
Lesson: Leveraging Routes and Runs
Chapter 4: Fittings and Components
Lesson: Managing Libraries
Lesson: Creating Library Content
Lesson: Managing Library Content
Lesson: Creating Tube and Pipe Styles
Chapter 5: Documenting Tube and Pipe Assemblies
Lesson: Representing Tube and Pipe Designs
Lesson: Documenting Routes and Runs
Lesson: Exporting Tube and Pipe Design Data
Contact Us
If you would to discuss Autodesk training courses, please contact us by calling on 1800 490 514, by filling out the form or clicking the live chat in the bottom right-hand corner.
This course on Sheet Metal design teaches design concepts and techniques such as flanges, contour rolls, hems, folds, rips, bends, corner rounds/chamfers, where you can design sheet metal parts and multi-body parts, turn them into flat patterns for drawings and manufacturing.
If you would to discuss Autodesk training courses, please contact us by calling on 1800 490 514, by filling out the form or clicking the live chat in the bottom right-hand corner.
Prerequisites: Autodesk Inventor introduction to solid modelling or equivalent.
Training Guide Contents
Chapter 1: Introduction to Autodesk Inventor CAM
1 Getting Started with the Autodesk Inventor Interface
2 Model Manipulation in Inventor
3 Introduction to Autodesk Inventor CAM
4 The Autodesk Inventor CAM Interface
5 Simulating CAM Operations
Chapter 2: Getting Started with Autodesk Inventor CAM
1 Defining the Setup for Machining Operations
2 Tool Library
3 Face Toolpath
Chapter 3: 2D Roughing and Finishing
1 2D Adaptive Toolpath
2 2D Pocket Toolpath
3 2D Contour Toolpath
Chapter 4: Drilling
Drill Toolpath
Chapter 5: Project Exercises
Contact Us
If you would to discuss Autodesk training courses, please contact us by calling on 1800 490 514, by filling out the form or clicking the live chat in the bottom right-hand corner.
This course will teach you the fundamentals in Inventor Professional design automation using the simplified programming iLogic model to automate almost anything in Inventor.
Prerequisites: Autodesk Inventor introduction to solid modelling or equivalent.
Training Guide Contents
Chapter 1: Introduction to iLogic
Design Automation Overview
iLogic Overview
iLogic Workflow
Chapter 2: Understanding Parameters and Equations
Equations
Parameters
Chapter 3: Getting Started with iLogic
iLogic Interface
Function Overview
Rule Creation Workflow
Chapter 4: Rule Creation
Conditional Statements
Operators
Parameter Functions
Feature Functions
iProperty Functions
Chapter 5: Assembly Rules and Functions
Assembly Rules
Component Functions
Relationship Functions
iLogic Components in Inventor Assemblies
Chapter 6: Drawing Rules and Functions
Drawing Rules
Sheet Functions
Title Block Functions
View Functions
Advanced Functions
Chapter 7: Rule Triggering and Form Creation
Event Triggers
iTriggers
Forms
Chapter 8: Miscellaneous Features and Functions
Rule Options
Search and Replace
Wizards
Miscellaneous Functions
Chapter 9: Project Practices
Introduction to Projects
Appendix A: iLogic Design Copy
iLogic Design Copy
Contact Us
If you would to discuss Autodesk training courses, please contact us by calling on 1800 490 514, by filling out the form or clicking the live chat in the bottom right-hand corner.
Autodesk Inventor: electrical cable and harness Training
Based on assembly and multi-body part modelling, this course covers advanced and productivity topics such as constraints, iMates, iAssemblies, top-down design methodology, design accelerator, weldments and more.
If you would to discuss Autodesk training courses, please contact us by calling on 1800 490 514, by filling out the form or clicking the live chat in the bottom right-hand corner.
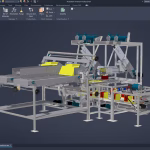
AUTODESK FACTORY DESIGN UTILITIES: ESSENTIALS TRAINING
This essential course for the Factory Design Utilities in Autodesk Product Design & Manufacturing Collection will teach you how to run process analysis simulation for factory layouts and optimisation, create intelligent 2D/3D factory layouts and assets and model coordination, clash detection and scheduling.
Course Length: 4 Days
Training Guide Contents
The Autodesk Factory Design Utilities Essentials course instructs users in the best practices of developing a factory layout consisting of architectural elements and manufacturing assets. The course is an introduction to the basic practices and principles for each of the applications that utilize the Autodesk Factory Design Utilities. The Autodesk Factory Design Utilities are utilized in the following Applications:
AutoCAD Architecture
Autodesk Inventor
The Autodesk Factory Design Utilities
Autodesk Navisworks
Specific instruction is given to each of the four applications as a factory facility layout is designed from the ground up. This course is designed for new or novice users to develop a general understanding of the factory layout process used by the Autodesk Factory Design Utilities. It is not designed to deliver complete training in any of the core applications, but to instruct users in the applicable commands generally used in factory layout design.
Prerequisites:
As an introductory course, Autodesk Factory Utilities Essentials, does not assume prior knowledge of any 3D modeling or CAD software.
Students do need to be experienced with the Windows operating system and a background in drafting of 3D parts is recommended.
A familiarity with basic AutoCAD commands is assumed.
Contact Us
If you would to discuss Autodesk training courses, please contact us by calling on 1800 490 514, by filling out the form or clicking the live chat in the bottom right-hand corner.
Autodesk Civil 3D: Transportation Beyond the Basics Training
Suited for Civil 3D users who want to learn advanced design techniques, specifically for Corridor design. This course will go into assemblies, cul de sacs, roundabout and multi-region corridors deisgn.
Course Length: 1 Day
Prerequisite: Introduction to Civil 3D or equivalent
Training Guide Contents
Upon completion of the course, students will be able to:
Review Workflows for Transportation Projects
Build Advanced Corridors: such as Cul de Sacs, Intersections, and Roundabouts
Work with Road Rehabilitation Assemblies and Corridors
Troubleshoot and resolve corridor issues; such as Bowties and dropping to 0
Contact Us
If you would to discuss Autodesk training courses, please contact us by calling on 1800 490 514, by filling out the form or clicking the live chat in the bottom right-hand corner.
AUTODESK CIVIL 3D: PIPE NETWORK ESSENTIALS TRAINING
This course focuses on Gravity and Pressure Pipe Network design in Civil 3D where you will learn how to create and modify parts lists, pipe and structure and their settings.
Course Length: 1 Day
Prerequisites: Introduction to Civil 3D or equivalent
Training Guide Contents
Upon completion of the course, students will be able to:
Create Parts Lists and adjust Pipe and Structure Settings
Create and Edit Gravity and Pressure Pipe Networks
Create Non-Road Corridors; such as Pipe Trenches
Annotate Pipe Networks
Contact Us
If you would to discuss Autodesk training courses, please contact us by calling on 1800 490 514, by filling out the form or clicking the live chat in the bottom right-hand corner.
If you would to discuss Autodesk training courses, please contact us by calling on 1800 490 514, by filling out the form or clicking the live chat in the bottom right-hand corner.