Connected Structural Design with Autodesk Product Design & Manufacturing Collection


Connected Structural Design with Autodesk Product Design & Manufacturing Collection
Transforming Structural Design with Autodesk Product Design & Manufacturing Collection
The Autodesk Product Design and Manufacturing Industry Collection is a comprehensive set of software tools for designing and manufacturing products across various industries. This collection includes software for 3D design, engineering, and production, and it’s ideal for product designers and manufacturers. In this blog post, we will explore the connected structural design tools in Autodesk Inventor and how they can be used to design and analyse structures. We will also discuss how the structural designs from Inventor can be used in Plant 3D to design production plants, oil and gas projects, and how to export dwg or adsk file formats to AutoCAD.
Structural Design and Analysis Tools in Autodesk Inventor
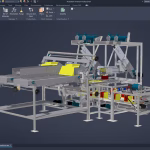
Autodesk Inventor offers a range of structural design and analysis tools that enable users to create complex structures with ease. The software comes equipped with frame generator, sheet metal, and assembly modeling environment to facilitate the design of structural elements. These tools are ideal for designers and engineers who need to create robust and reliable structures.
Exporting dwg or adsk File Formats to AutoCAD
Autodesk Inventor offers the ability to export designs in dwg or adsk file formats to AutoCAD. This feature enables users to work with the designs in AutoCAD, which is useful for designers who need to create 2D drawings or for those who prefer working in AutoCAD. The process of exporting designs is straightforward and requires only a few clicks.
Structural Design in Plant 3D
Plant 3D is a specialized toolset of AutoCAD that allows users to design and analyse production plants, oil and gas projects, and other industrial structures. Users can utilise structural designs created in Inventor in Plant 3D to design various elements such as pipe supports, equipment, and structural steel. This feature enables designers to create a comprehensive 3D model that includes all the structural and mechanical elements of a plant.

Frame Generator
Frame Generator is a powerful tool in Autodesk Inventor that enables users to design and create structural frames with ease. This tool allows users to create complex frame structures using pre-defined structural shapes or custom shapes. The tool also provides the ability to create structural members with different cross-sections and apply various constraints to optimize the frame’s strength and stability.
Frame Analysis
Frame Analysis is a feature in Autodesk Inventor that allows users to analyse and optimize frame structures. This feature provides a comprehensive set of tools for analysing frames, including calculating the frame’s natural frequencies, calculating the stresses and displacements, and evaluating the frame’s stability. The tool also provides the ability to modify the frame’s design and re-run the analysis to optimise the frame’s performance.
Simulation
Autodesk Inventor offers simulation tools that enable users to simulate various types of mechanical and structural behavior, including structural analysis, motion analysis, and dynamic simulation. These tools allow users to evaluate the structural and mechanical performance of their designs, identify potential issues, and optimize their designs for better performance.
Nastran Structural Simulation Analysis
Nastran Structural Simulation Analysis is a comprehensive simulation tool in Autodesk Inventor that allows users to simulate and analyse complex mechanical and structural behaviour. This tool provides advanced simulation capabilities for analysing stress, deformation, vibration, and other mechanical behaviours. The tool also provides the ability to perform finite element analysis (FEA) to optimize designs for better performance.
Structural Design Workflow
The workflow from designing a structural design in Inventor to performing a frame analysis and Nastran structural analysis study involves several steps, which are as follows:
Step 1: Designing the Structural Design in Inventor
The first step is to create the structural design in Autodesk Inventor using tools such as Frame Generator, Sheet Metal, or Assembly Modelling Environment. The design can include various elements, such as beams, columns, braces, and trusses.
Step 2: Preparing the Model for Analysis
Once the structural design is created, the next step is to prepare the model for analysis. This involves assigning material properties, loads, and boundary conditions to the model. Material properties include properties such as modulus of elasticity, Poisson’s ratio, and density, while loads and boundary conditions can include forces, moments, supports, and constraints.
Step 3: Performing a Frame Analysis
The next step is to perform a frame analysis to evaluate the structural behaviour of the design. In Autodesk Inventor, Frame Analysis can be performed using the Frame Analysis Environment. This environment allows users to perform various types of analysis, including static, modal, and buckling analysis. Frame Analysis can be used to calculate natural frequencies, stresses, and deformations of the structure.
Step 4: Performing a Nastran Structural Analysis Study
If more advanced analysis is required, a Nastran Structural Analysis Study can be performed. Nastran is a finite element analysis software that is integrated into Autodesk Inventor. This tool provides advanced simulation capabilities for analysing stress, deformation, and other mechanical behaviours. It can also be used to perform more complex analyses, such as dynamic and thermal analysis.
Step 5: Optimizing the Design
Once the analysis is complete, the next step is to optimize the design based on the results of the analysis. This can involve modifying the structural design or adjusting the loads and boundary conditions to improve the performance of the design.
Step 6: Iterating the Process
Finally, the design process is iterated, with the model being adjusted and re-analysed until an optimal design is achieved. This can involve going back to Step 2 and re-defining the loads and boundary conditions, or adjusting the design in Inventor and re-analysing in the Frame Analysis or Nastran Structural Analysis Study environment.
In summary, the workflow from designing a structural design in Inventor to performing a Frame Analysis and Nastran Structural Analysis Study involves several steps, including preparing the model for analysis, performing the analysis, optimizing the design, and iterating the process until an optimal design is achieved. These tools in Inventor allow for the creation of complex structures and ensure their mechanical behaviour is analysed and optimized for performance.
Ready to get your Structural Design Connected?
Discover how Autodesk Product Design & Manufacturing Collection can streamline your workflow, increase productivity, and optimise your design process.
Get up to 20% Off Software or Services!
Contact us to find out how much money you can save on software, training or other services. Fill out the form below, by live chat, phone or email.
P: 1800 490 514 | E: [email protected]

Connected Design with Product Design & Manufacturing Collection
Click a link below to learn more about Connected Design using the Autodesk Product Design & Manufacturing Collection