1800 490 514 [email protected]

Autodesk Plant 3D vs Inventor: A Comprehensive Overview of DWG Workflows and Differences
autodesk inventor vs advance steel

Autodesk Plant 3D vs Inventor: A Comprehensive Overview of DWG Workflows and Differences

Autodesk Plant 3D vs Inventor

When it comes to CAD software, Autodesk offers a range of powerful tools tailored to specific industries. Two of the most popular among these are Autodesk Inventor and Plant 3D. Understanding the differences between these applications and their respective workflows is essential for professionals aiming to maximise their design efficiency.

This post provides a detailed comparison of Autodesk Inventor and Plant 3D, including a table that highlights their key differences, along with an in-depth analysis of their functionalities, workflows, and interoperability with other Autodesk tools.

Overview of Each Software

  • Inventor: Optimised for Small-Scale Mechanical Systems

Autodesk Inventor is ideal for projects involving detailed mechanical parts, assemblies, and compact systems. Its parametric 3D modelling capabilities allow engineers to create precise mechanical designs with intricate detail. The software’s tube and piping module is specifically designed for smaller piping projects, such as systems that can fit on the back of a truck.

However, while Inventor excels at mechanical design, it lacks built-in tools for process-specific tasks like P&ID creation. For projects that involve piping and instrumentation diagrams, users must create P&IDs manually, which can slow down the design process for larger, more complex systems.

  • Plant 3D: Designed for Large-Scale Process Plants

Autodesk Plant 3D is built for large, interconnected systems, particularly in industries like oil and gas, chemical processing, and water treatment. With its integrated AutoCAD P&ID tool, Plant 3D allows users to create P&IDs directly within the software. These P&IDs can be linked to 3D models, ensuring that any changes are reflected across the entire design, making the process more efficient and reducing the risk of errors.

Plant 3D also excels in plant-wide piping systems and isometric drawing generation essential for large-scale projects involving extensive piping runs and standardised equipment.

Key Differences Between Inventor and Plant 3D

The following table summarises the primary differences between Autodesk Inventor and Plant 3D:

FeatureAutodesk InventorAutodesk Plant 3D
Project SizeSmall mechanical systemsLarge plants, long pipe runs, extensive equipment layouts
Piping SystemsTube and Piping module for small-scale designsComprehensive plant-wide piping systems
P&ID IntegrationP&IDs must be created manuallyAutoCAD P&ID integrated, linked to 3D models
3D Equipment ModellingMechanical parts and compact assembliesPlant-scale equipment and piping systems
InteroperabilityExport 3D equipment to DWG, integrate with VaultSeamless catalogue management, isometrics generation
Collaboration ToolsAutodesk Vault for version controlIntegrated project management and collaboration tools
Isometric DrawingsNot natively supportedAutomatic generation from 3D models
Material ManagementFocused on mechanical parts and assembliesBOM for piping and equipment management
User InterfaceAdvanced 3D modelling environmentIntuitive interface for process design

DWG Workflows in Inventor and Plant 3D

DWG Workflows in Inventor:
  • File Creation: Users create 3D models in Inventor, which can be saved as DWG files for further editing in AutoCAD or for sharing with other stakeholders. This interoperability ensures that designs can be easily communicated and modified.
  • 2D Drawings: Inventor allows users to generate detailed 2D drawings from 3D models, ensuring that all views, dimensions, and annotations are accurately represented in DWG format. This feature is crucial for manufacturing processes where precise specifications are required.
  • Collaboration: The ability to export DWG files promotes collaboration with professionals who may not have access to Inventor but work within AutoCAD. This flexibility allows teams to work more efficiently, leveraging the strengths of each software.
DWG Workflows in Plant 3D:
  • P&ID Development: Plant 3D users can create P&IDs, which are saved as DWG files, serving as the blueprint for piping and instrumentation layouts. This foundational step is essential for any plant design project, as it establishes the functional layout of systems.
  • 3D Model Generation: The software allows users to create 3D models of piping systems and equipment that can be directly generated in DWG format. This feature streamlines the process of documentation and sharing, ensuring that all team members have access to the most up-to-date designs.
  • Isometric Drawings: Plant 3D supports the automatic generation of isometric drawings from 3D models, which are essential for piping layouts. This capability not only saves time but also reduces errors that can occur when manually creating these drawings.

Interoperability With Advance Steel and AutoCAD

Both Autodesk Plant 3D and Inventor offer interoperability with Advance Steel and AutoCAD, enhancing their usability across different engineering disciplines.

  • Advance Steel: While primarily for structural detailing, Advance Steel can take advantage of models created in Inventor and layouts from Plant 3D. This interoperability is beneficial for projects that require mechanical and structural components, enabling seamless integration of designs.
  • AutoCAD: As the foundational software, AutoCAD serves as a common platform for DWG files. Both Inventor and Plant 3D can export to and import from AutoCAD, allowing seamless collaboration across various teams. This interoperability ensures that design updates are easily shared and implemented, promoting efficiency in the overall workflow.

Integrating Inventor with Plant 3D: The Power of BIM

For projects that require mechanical equipment design and plant-wide piping systems, Autodesk provides a robust solution through BIM content publishing tools. With these tools, engineers can design 3D equipment in Inventor and seamlessly integrate that content into Plant 3D.

This integration is particularly valuable for professionals working on multidisciplinary projects. For example, custom-designed mechanical equipment created in Inventor can be published as BIM content and incorporated into the Plant 3D catalogue ensuring consistency and eliminating the need for rework between platforms.

Real-world Applications

Understanding the differences between Autodesk Plant 3D and Inventor also involves examining their applications in real-world scenarios.

  1. Manufacturing and product design: In industries such as automotive and aerospace, Autodesk Inventor is widely used to design mechanical components. Engineers leverage their parametric modelling capabilities to create complex assemblies, conduct simulations, and manage changes efficiently. The ability to export detailed 2D drawings in DWG format allows for effective communication with manufacturing teams.
  2. Process Plant Design: For industries like oil and gas, water treatment, and chemical processing, Autodesk Plant 3D is the go-to solution. The ability to create detailed P&IDs, generate 3D models of piping systems, and automatically produce isometric drawings streamlines the design process. Collaboration tools enable multidisciplinary teams to work cohesively, ensuring that every aspect of the plant design is accounted for.

Experience the Difference Between Autodesk Plant 3D and Inventor

Both Autodesk Inventor and Plant 3D are powerful tools, each designed for specific industries and applications. Inventor excels in mechanical design and manufacturing, while Plant 3D focuses on process and plant design. The choice between these two software options largely depends on the industry, project requirements, and desired workflows.

Understanding the differences in their DWG workflows, interoperability with other Autodesk products, and unique features is crucial for professionals aiming to enhance their design processes. By leveraging the strengths of each application, users can ensure that their designs are efficient, accurate, and tailored to their specific needs. Whether you are involved in mechanical design or plant engineering, choosing the right software is essential for success in today’s competitive landscape.

Get the best prices on Autodesk software.

Get skilled up and enroll in an Autodesk training course

Setup, libraries, programming and consulting services

Contact Us

Contact us to find out how we can help your business. Fill out the form below, by live chat, phone or email.

P: 1800 490 514 |  E: [email protected]

Connected Design

Design Consulting Autodesk Gold Partner
about design consulting Moving at the Speed of Business

VIEW MORE

Autodesk Inventor vs. Advance Steel: A Detailed Comparison

autodesk inventor vs advance steel

Autodesk Inventor vs. Advance Steel: A Detailed Comparison

autodesk inventor vs advance steel

Choosing the right design software can make or break a project, especially when you’re dealing with complex structures or intricate mechanical systems. If you’re in the engineering or construction world, you’ve likely heard the debate about Autodesk Inventor vs Advance Steel—two industry-leading tools, each designed to tackle different challenges.

In this comprehensive comparison, we’ll explore the strengths of both software packages, breaking down their features and applications so you can make an informed decision. Whether you’re building next-generation machinery or detailing a steel structure for a high-rise building, understanding these tools’ capabilities will ensure you’re leveraging the best technology for your needs.

So, if you’re ready to elevate your engineering or construction projects, let’s dive into the intricate details that set Autodesk Inventor vs Advance Steel apart. Buckle up—this deep dive will give you the insights you need to choose wisely and maximise efficiency, accuracy, and innovation in your next project.

Overview of Autodesk Inventor

Autodesk Inventor is a comprehensive 3D CAD software primarily used for mechanical design. It supports a wide range of applications, from product design to manufacturing, enabling engineers to create highly detailed models, prototypes, and documentation.

Key Features of Autodesk Inventor for Steel Design and Fabrication
  • Parametric Modelling: Inventor’s parametric design capabilities allow engineers to define and manipulate relationships between elements, facilitating easy updates and modifications throughout the design process.
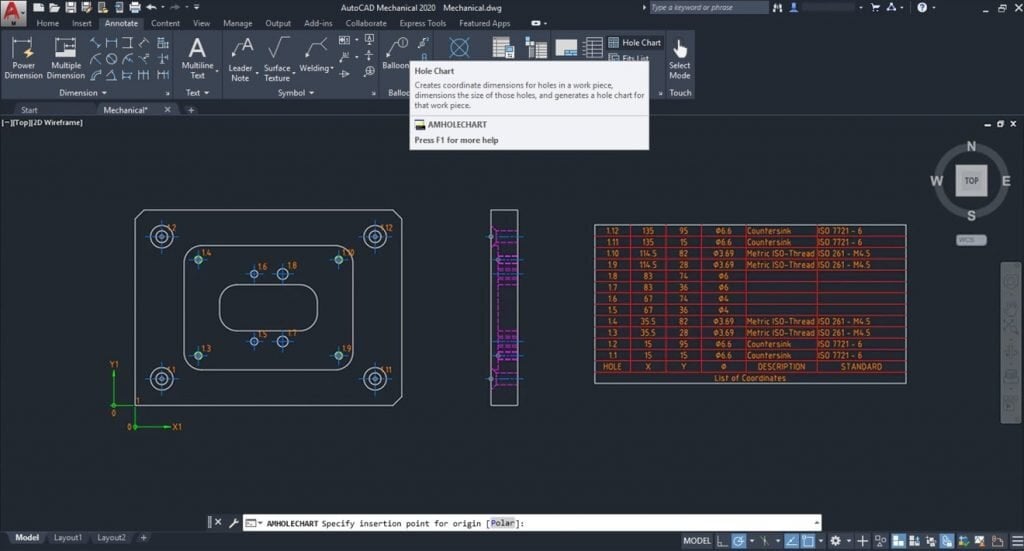
  • Frame Generator: This tool simplifies the creation of structural frames. Users can quickly generate accurate frame designs using pre-configured components, which is particularly useful in fabricating steel structures. Frame Generator: This tool simplifies the creation of structural frames. Users can quickly generate accurate frame designs using pre-configured components, which is particularly useful in fabricating steel structures. However, Inventor’s Frame Generator lacks the advanced editing and automation functions that Advance Steel offers for creating connections, cuts, trims, notches, and more.
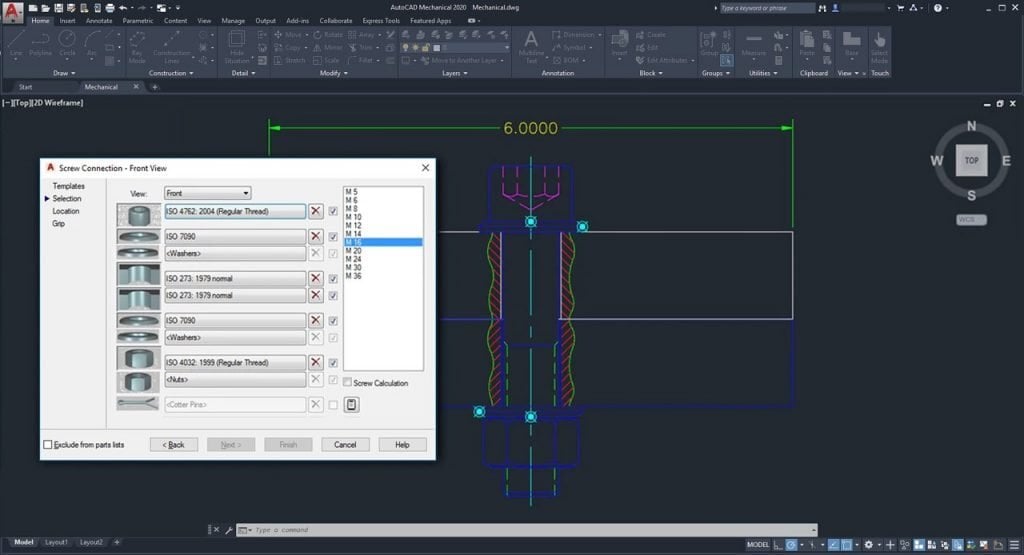
  • Large Content Library: Inventor includes an extensive library of components such as fasteners, structural shapes, and other mechanical parts, enabling efficient design workflows without the need to create standard components from scratch.
  • Integrated Simulation: Engineers can run simulations directly within Inventor to assess stress, motion, and deflection. This feature helps optimise designs before manufacturing, reducing the need for physical prototypes.
  • Sheet Metal Design: Both Inventor and Advanced Steel have sheet metal tools. In Inventor the module is called Sheet Metal and in Advance Steel, it’s referred to as Folded Plate.
  • Automated Documentation: Using the integration with the iLogic design automation programming environment, you can automate manufacturing drawings, complete with dimensions, annotations, and BOMs (Bills of Materials), ensuring consistency and reducing manual errors.
Ideal Use Cases for Autodesk Inventor
  • Architectural Fabrication: Inventor has the flexible 3D modelling tools to design fabricated products that are aesthetic, ergonoic or organic in design, where as Advance Steel is better suited for straight lines and industrial projects.
  • Mechanical Engineering: Inventor is well-suited for designing mechanical systems and components that require precision and the ability to simulate real-world performance.
  • Product Development: Its comprehensive toolset allows for detailed product design, from concept to final prototype.
  • Structural Fabrication: Although primarily a mechanical tool, Inventor can handle structural steel design, making it versatile for mixed mechanical and structural projects.

Overview of Advance Steel

Advance Steel is a specialised software focused on structural steel detailing. It integrates seamlessly with BIM (Building Information Modelling) workflows, providing tools for automating the creation of detailed fabrication drawings, models, and documentation required for steel construction.

Key Features of Advance Steel
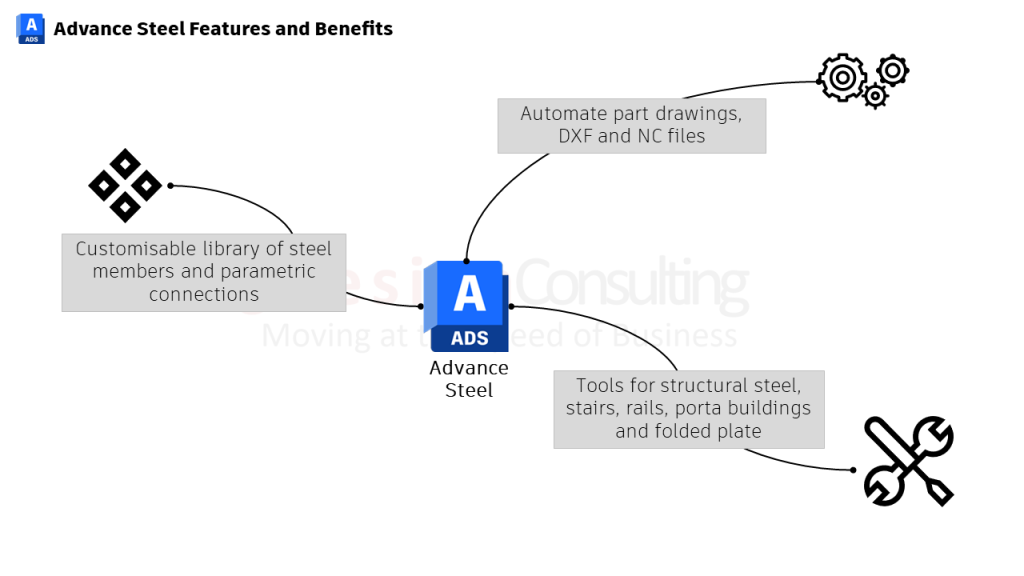
  • Specialised Steel Detailing Tools: Advance Steel is purpose-built for structural detailing, offering tools that cater specifically to the needs of steel fabricators and structural engineers. These tools include advanced steel editing and automation functions for making cuts, trims, and notches.
  • Automatic Fabrication Drawings: The software can automatically generate comprehensive fabrication drawings, reducing the time from design to production and ensuring all structural elements are accurately detailed.
  • Connection Libraries: Advance Steel includes a vast library of pre-configured steel connections, making it easier to apply standardised joints in structural designs. Users can also create custom connections to meet specific project requirements. Inventor, on the other hand, lacks this advanced parametric connection library.
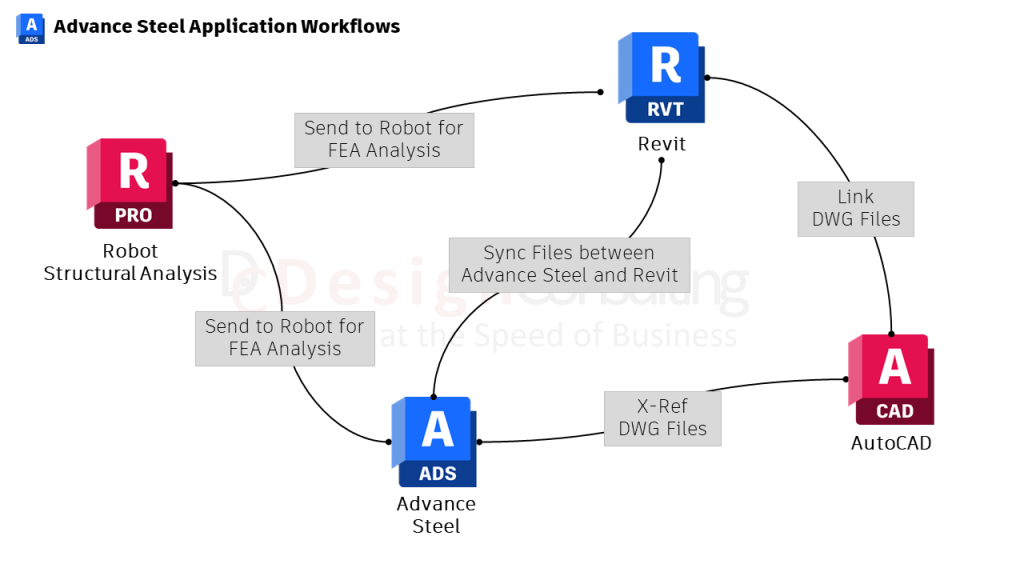
  • BIM integration: Advance Steel syncs seamlessly with Revit, while Inventor also offers BIM integration, including the ability to export to Revit as RVT or RFA files.
  • Efficient Material Management: The software automates the generation of BOMs, cut lists, and material takeoffs, streamlining the process of inventory management and cost estimation in construction projects.
  • Advanced Documentation and Revision Control: Advance Steel’s documentation features are tightly integrated with the model, ensuring that changes to the design automatically update all associated drawings and documentation.
Ideal Use Cases for Advance Steel
  • Structural Engineering: Advance Steel is ideal for engineers who focus on the design, detailing, and documentation of steel structures.
  • Steel Fabrication: The software’s automation capabilities make it invaluable for fabricators who require precise and efficient production workflows.
  • Construction Projects: Its BIM integration and detailed documentation support complex construction projects involving structural steel.

Feature Comparison of Overlapping Tools

Both Autodesk Inventor and Advance Steel offer tools that overlap in the realm of metal design, particularly in frame generation and sheet metal design. Here’s a detailed comparison of these features:

Frame Generation and Steel Editing
  • Autodesk Inventor Frame Generator:
    • Allows users to create structural frames quickly using predefined components.
    • Supports basic bolted connections and weldments.
    • Limitations: Lacks connection library and advanced editing capabilities and automation for cuts, trims, and notches compared to Advance Steel.
  • Advance Steel Steel Editing:
    • Offers advanced tools for creating and modifying steel structures, including automated functions for cuts, trims, and notches.
    • Includes a parametric connection library that automatically adjusts connection sizes based on member dimensions.
    • Strengths: Provides comprehensive tools for stairs, rails, and portal buildings, which Inventor does not offer.
Sheet Metal Design
  • Inventor Sheet Metal Design:
    • Provides tools for creating and manipulating sheet metal parts, including folding and cutting.
    • Applications: Ideal for industries requiring detailed sheet metal fabrication.
Automation and Documentation
  • Inventor Automation:
    • Has a 2D/3D automation for drawing environments and exporting DXF files.
    • Complexity: 3D automation and basic 2D automation are relatively easy, fully automating part drawings can be complex
  • Advance Steel Automation:
    • Provides robust automation for part drawings, DXF files for laser/plasma cutters, and NC1 G-code for beamline machines.
    • Efficiency: Streamlines the documentation process, making it faster and more reliable.

Autodesk Inventor vs Advance Steel: Key Differences


FeatureAutodesk InventorAdvance Steel
Focus3D Mechanical DesignStructural Steel Detailing
Primary ApplicationProduct Development, Mechanical Systems, FabricationSteel Structures, Construction Projects
IndustryProduct Design, Industrial MachineryConstruction, Structural Engineering
Modelling CapabilitiesParametric Mechanical ComponentsDetailed Steel Structures and Connections
Simulation ToolsIntegrated for Mechanical PartsNone. Need to export to Robot or other FEA packages
BIM SupportNo bidirectional Sync tool with Revit but offers many sync workflows and import/export capabilitiesSyncs with Revit and Robot structural analysis
DocumentationAutomated Manufacturing DrawingsAutomated Fabrication Drawings
Steel Editing ToolsFrame GeneratorAdvanced Steel Editing and Automation
Connection LibrariesLimitedVast Parametric Connection Library
Specialised ToolsSheet Metal DesignFolded Plates, Stairs, Rails, Portal Buildings
Drawing AutomationComplex to set upAutomated through a Dedicated Tool
Fabrication AutomationDXF ExportDXF, NC1(G-Code Export)

Autodesk Inventor vs Advance Steel: Choosing the Right Tool for Your Needs

When to Use Autodesk Inventor

Inventor is the optimal choice for projects that require detailed mechanical design, particularly in industries like automotive, aerospace, and product development. It provides the necessary tools for creating, testing, and refining mechanical parts and assemblies, making it ideal for engineers who need to model complex components and simulate their behaviour under various conditions. In addition to its robust design capabilities, Inventor excels in modeling complex shapes with curvature, making it especially useful for designs that require intricate and organic geometries. Its frame generator and sheet metal design tools can also be beneficial for certain structural steel projects.

When to Use Advance Steel

Advance Steel is the go-to software for professionals in structural engineering and steel fabrication. Its specialised tools and BIM integration make it essential for efficiently detailing and documenting steel structures in construction projects. It is particularly beneficial for fabricators who need to automate drawing production and ensure compliance with industry standards. Advance Steel’s advanced steel editing tools, parametric connection library, and specialised features like folded plate, stairs, rails, and portal buildings make it the superior choice for complex structural steel projects. However, while Advance Steel excels in structural steel detailing, it may not be the best option for projects involving curved shapes. 

This means that for architectural applications requiring curvature, Inventor is the better tool, whereas, for industrial applications, Advance Steel proves to be the superior choice.

Autodesk Inventor and Advance Steel integration

While both tools are better at certain tasks, you can still integrate both tools and combine their tool sets to create more detailed designs. Here’s how it works.

Steps to Convert IFC Components into Advance Steel Members:
    1. Import the IFC File:
      Use the Import function in Advance Steel to bring the IFC file into your project.
      Go to Home > Import > IFC and select the IFC file.
      The IFC components will be imported into Advance Steel as 3D solids, and they won’t initially be recognized as standard Advance Steel members like beams or columns.
    2. Inspect the Imported Geometry:
      After importing the IFC file, inspect the components to understand the structural elements (e.g., beams, columns, plates) that need to be converted into Advance Steel members.
      Use the Object Inspector or Properties panel to check the dimensions and placement of each component.
    3. Convert Geometry to Advance Steel Objects:
      To convert IFC objects (such as solids) into parametric Advance Steel members, you can use the “Convert to Advance Steel Object” feature:
      • Beams and Columns: For linear objects that represent beams or columns, you can use the Beam Conversion Tool to convert them into standard Advance Steel beams.
        Use the “Advance Steel Beams” command to recreate the IFC solid as a native Advance Steel beam. This will allow you to assign profiles and cross-sections, as well as work with connections and detailing tools.
      • Plates: If the IFC model contains plates or sheet elements, you can convert these into Advance Steel plates using the Plate Tool. This lets you add cuts, bolts, and welding details.
    1. Assign Structural Properties:
      After converting the geometry to Advance Steel members, assign the appropriate material, section type, and structural properties to each member.
      You can also apply Advance Steel’s intelligent connections (e.g., bolt groups, welds, stiffeners) to the converted members.
    2. Refine the Model:
      Depending on the complexity of the IFC import, some components might require further manual adjustments or reconstruction to align with Advance Steel’s parametric modeling system.
      For example, custom connection types from IFC may need to be rebuilt using Advance Steel’s native tools for connections.
    3. Save the Converted Model:
      Once the conversion is complete, save the model as an Advance Steel project. You can now take advantage of Advance Steel’s automated detailing, fabrication drawings, and BOM generation features for your newly converted members.

Unlock Your Design Potential—Choose the Right Tool for Success

Autodesk Inventor vs Advance Steel is a debate that is likely to continue, given how powerful both tools are. Inventor excels in mechanical design and product development, offering robust simulation and modelling capabilities. Advance Steel, on the other hand, is unparalleled in its ability to streamline structural steel detailing and integrate seamlessly with BIM workflows.

So, based on your requirements and the demands of the projects you’re working on, make sure to choose the right product that will help you deliver great results. If your focus is on mechanical design and product development, Inventor is the clear choice. But if you’re working on complex structural steel projects that require advanced detailing, automation, and BIM integration, Advance Steel is the superior option.

Get the best prices on Autodesk software.

Get skilled up and enroll in an Autodesk training course

Setup, libraries, programming and consulting services

Contact Us

Contact us to find out how we can help your business. Fill out the form below, by live chat, phone or email.

P: 1800 490 514 |  E: [email protected]

Connected Design

Design Consulting Autodesk Gold Partner
about design consulting Moving at the Speed of Business

VIEW MORE

Master Autodesk Software with Design Consulting’s Tailored Training Courses

Autodesk Software with Design Consulting’s Tailored Training Courses

Master Autodesk Software with Design Consulting’s Tailored Training Courses

Autodesk Software with Design Consulting’s Tailored Training Courses

Whether you’re just starting out or looking to refine your expertise, mastering Autodesk software is key to staying competitive and bringing your creative visions to life. But let’s face it—learning complex software on your own can be daunting. That’s where Design Consulting comes in.

At Design Consulting, we understand that everyone’s learning journey is different. That’s why we’ve developed a range of Autodesk training courses designed to meet you where you are, whether you’re a beginner eager to learn the basics or a seasoned professional ready to tackle advanced features. Our courses are more than just learning sessions—they’re opportunities to gain confidence, boost your productivity, and take your skills to the next level.

What Makes Our Training Unique?

What sets Design Consulting apart is our commitment to making training accessible, flexible, and tailored to your specific needs. All our courses are conducted online in short, focused sessions, making it easier for you to fit learning into your busy schedule. Whether you’re a freelancer working from home or part of a larger team, you’ll appreciate the convenience of remote learning.

One of the biggest benefits of our approach is the private nature of our courses. If you enrol as a team, the session is exclusively yours, allowing you and your colleagues to learn together at no extra cost. This not only makes our training cost-effective but also ensures that the content is highly relevant to your specific projects and goals. Plus, each session is recorded and provided as a downloadable resource, so you can revisit the material whenever you need a refresher.

We’re not just teaching software—we’re providing you with insightful content and helping you master the tools that will drive your success.

A Glimpse into Our Course Offerings

Our range of Autodesk training courses covers all the essentials—and more. Here’s a snapshot of what we offer:

AutoCAD Training

    • AutoCAD Fundamentals: New to AutoCAD? This course will get you up and running with the basics, teaching you how to create precise 2D drawings with confidence.
    • AutoCAD Advanced Training: For those who want to go beyond the basics, this course dives into advanced tools and techniques to help you tackle complex projects.

Revit Training

    • Revit Fundamentals for Architecture: This course is your gateway to understanding Revit, focusing on its architectural applications. You’ll learn how to create detailed designs, generate documentation, and collaborate in a BIM environment.
    • Revit Collaboration Tools: Designed for teams, this course explores the collaboration features within Revit, ensuring your project data is shared and managed efficiently.

Inventor Training

    • Inventor Professional Sheet Metal Design: Specializing in sheet metal? This course covers everything you need to know to create complex parts and assemblies in Autodesk Inventor.
    • Inventor Advanced Assembly Modelling: Take your assembly modelling skills to the next level with this advanced course, perfect for managing large and intricate designs.

Civil 3D Training

    • Civil 3D Fundamentals: This course is perfect for beginners looking to get acquainted with the basics of Civil 3D, providing a solid foundation in civil engineering design.
    • Civil 3D Transportation: Focused on transportation design? Learn how to create and analyse roadways, highways, and intersections using Civil 3D.
    • Civil 3D Pipe Network: This course is all about underground utilities, teaching you how to design and model pipe networks with precision.

Fusion 360 Training

    • Fusion 360 Essentials for Existing CAD Users: Transitioning from another CAD platform? This course will help you get comfortable with Fusion 360’s unique features and workflows.
    • Fusion 360 Parametric Modelling: Discover the power of parametric modelling in Fusion 360 and learn how to create flexible, modifiable designs with ease.

Advance Steel Training

    • Autodesk Advance Steel Training – Fundamentals: This course introduces the fundamentals of structural steel detailing, focusing on the tools and workflows within Autodesk Advance Steel.

Vault Training

    • Autodesk Vault Basic Training Course: Learn the core principles of using Autodesk Vault with AutoCAD and Inventor, including Vault server components and best practices.
    • Autodesk Vault Professional Training Course: A more advanced course, this covers comprehensive server settings and Vault management best practices for complex design environments.

Tailored Training That Works for You

We know that learning isn’t a one-size-fits-all process. That’s why our Autodesk courses are fully customisable. Whether you’re looking to brush up on specific skills or need a comprehensive deep dive into a particular software, our courses can be tailored to meet your exact needs. This level of customisation is especially valuable for companies looking to upskill their teams in the most relevant and practical ways possible.

And because our sessions are private, you have the freedom to ask questions, focus on specific challenges, and work through real-world examples that matter to you. It’s all about providing a learning experience that’s not only effective but also directly applicable to your day-to-day work.

Ready to Get Started?

If you’re serious about advancing your skills and maximising your efficiency with Autodesk software, Design Consulting is here to help. Our training courses are designed to be more than just lessons—they’re stepping stones to greater success in your career. Whether you’re working on your own or as part of a team, we’ve got the tools, expertise, and flexibility to help you reach your goals.

So why wait? Dive into our course offerings and start your journey toward mastering Autodesk today. With Design Consulting by your side, the future of your design projects looks brighter than ever.

Get the best prices on Autodesk software.

Get skilled up and enroll in an Autodesk training course

Setup, libraries, programming and consulting services

Contact Us

Contact us to find out how we can help your business. Fill out the form below, by live chat, phone or email.

P: 1800 490 514 |  E: [email protected]

Connected Design

Design Consulting Autodesk Gold Partner
about design consulting Moving at the Speed of Business

VIEW MORE

Design Consulting Joins NVIDIA Inception Program to Propel Innovation in Architecture, Engineering, Construction, and Manufacturing

Design Consulting Joins NVIDIA Inception Program

Design Consulting Joins NVIDIA Inception Program to Propel Innovation in Architecture, Engineering, Construction, and Manufacturing

Design Consulting Joins NVIDIA Inception Program

Melbourne, Australia – September 3, 2024

Design Consulting, a leading Australian technology service provider specialising in the Architecture, Engineering, Construction, and Manufacturing (AEC&M) sectors, is proud to announce its acceptance into the prestigious NVIDIA Inception program. This milestone will enable Design Consulting to leverage NVIDIA’s cutting-edge technology to further enhance its innovative solutions in visualisation, automation, and digital asset management.

Empowering the Future of AEC&M Industries

As a trusted partner for AEC&M professionals, Design Consulting has consistently delivered advanced software solutions and services that drive productivity and efficiency. By joining the NVIDIA Inception program, Design Consulting aims to expand its capabilities, particularly in the areas of AI-powered visualisation, interactive configurators, and batch rendering. These enhancements will empower clients to streamline their design processes, reduce costs, and bring their creative visions to life with unprecedented speed and accuracy.

Harnessing NVIDIA’s AI and GPU Technology

NVIDIA Inception is an accelerator program designed to nurture startups and innovative companies by providing access to state-of-the-art AI technology, technical expertise, and go-to-market support. As a member of this program, Design Consulting will gain access to NVIDIA’s deep learning resources, GPU hardware, and development tools. This collaboration will enable Design Consulting to integrate advanced AI-driven features into its existing suite of solutions, including:

  • Interactive Configurators: Real-time, AI-powered configurators that allow users to explore different design options and visualise outcomes instantly.
  • Batch Rendering: Accelerated rendering processes that can handle complex visualisations with multiple variations, ensuring faster project turnarounds.
  • Virtual Reality (VR) and Augmented Reality (AR) Solutions: Enhanced immersive experiences for clients in the AEC&M sectors, facilitating better decision-making and collaboration.

“We are thrilled to join the NVIDIA Inception program and excited about the possibilities it opens up for our company and our clients,” said Damien Jovica, Director of Design Consulting. “By integrating NVIDIA’s AI and GPU technologies, we are poised to take our solutions to the next level, helping our clients achieve their goals with greater efficiency and creativity.”

About Design Consulting

Design Consulting is a 100% Australian-owned technology service provider dedicated to the Architecture, Engineering, Construction, and Manufacturing sectors. The company offers a wide range of software solutions, 3D printers, and services designed to enhance productivity and efficiency. As an authorised reseller of leading software vendors such as Autodesk, Bluebeam, and IMAGINiT, Design Consulting is committed to delivering the highest quality products and services to its clients across Australia.

For more information about Design Consulting and its participation in the NVIDIA Inception program, please visit www.designconsulting.com.au or contact:

Contact Information:

Design Consulting
502/44 Lakeview Drive, Scoresby VIC 3179
Phone: 1800 490 514
Email: [email protected]
Website: www.designconsulting.com.au

Caption for social media

We’re excited to announce that Design Consulting has joined the NVIDIA Inception program! This partnership will drive innovation in the AEC&M sectors through cutting-edge AI and GPU technology. Learn more about what this means for our clients: [Link to Press Release]

Get the best prices on Autodesk software.

Get skilled up and enroll in an Autodesk training course

Setup, libraries, programming and consulting services

Contact Us

Contact us to find out how we can help your business. Fill out the form below, by live chat, phone or email.

P: 1800 490 514 |  E: [email protected]
Connected Design

Design Consulting Autodesk Gold Partner
about design consulting Moving at the Speed of Business

VIEW MORE

Elevate Your Vault Efficiency with JP Pro

Vault Efficiency with JP Pro

Elevate Your Vault Efficiency with JP Pro

Vault Efficiency with JP Pro

Did you know that companies automating their workflows can achieve productivity improvements of up to 30%? In the competitive realm of engineering and design, where efficiency is paramount, leveraging the right tools is crucial for success. For professionals utilising Autodesk Vault Professional, JP Pro emerges as a powerful job processor designed to streamline file processing and enhance overall productivity.

JP Pro for Autodesk Vault Professional simplifies publishing various file types—from 3D models to Office documents—while improving collaboration and communication across teams. This blog post explores how JP Pro can transform the Vault Professional experience, detailing its features, benefits, and practical applications. Whether your goal is to automate file publishing, improve compliance, or reduce errors, JP Pro, based on Autodesk Job Processor, is the tool that can elevate productivity and drive operational excellence.

Vault Efficiency with JP Pro

Understanding JP Pro for Autodesk Vault Professional: Key Features and Benefits

1. Automating File Publishing

One of JP Pro’s significant advantages is its ability to automate file publishing based on lifecycle changes. When a file undergoes a state change—such as revision or approval—JP Pro for Autodesk Vault Professional can automatically publish the updated files in various formats, including 2D/3D PDFs, DXF, and Excel. This automation not only saves time but also ensures teams are always working with the most current information.

For instance, when a design engineer makes a critical revision to a part file, JP Pro for Autodesk Vault Professional can automatically publish the updated model as a 3D PDF, DXF flat pattern, and Excel BOM. This seamless integration between design and production allows teams to start planning and tooling without delay, significantly reducing lead times.

2. Versatile File Formats

JP Pro supports a wide range of file types, making it a versatile solution for diverse project needs. Users can publish:

    • 3D Models: Export in formats like STEP or IGES for part or assembly files.
    • 2D Drawings: Generate PDF, DWG drawings, or DXF files of sheet metal flat patterns.
    • Bills of Materials (BOM): Export to Excel or CSV for easy integration with other systems.
    • Office Documents: Publish Word, Excel, and PowerPoint files in PDF format.

In addition, JP Pro can publish/export any file that an AutoCAD or Inventor user can publish/export manually. This means that whether you’re working with 3D models in Inventor or 2D drawings in AutoCAD, JP Pro ensures your files are published in the correct format without the need for manual intervention.

This flexibility allows teams to share information seamlessly, regardless of the software tools used. For example, a project manager can publish a set of Inventor assembly files as STEP models, which can then be imported into simulation software for analysis. By providing a common file format, JP Pro for Autodesk Vault Professional enables cross-functional collaboration and eliminates the need for time-consuming file conversions.

3. Enhanced Collaboration

Collaboration is essential for successful project execution, and JP Pro significantly enhances this aspect. The platform allows any user with access to Vault—whether in CAD or not—to publish files on demand. This democratisation of publishing tasks empowers team members to take ownership of their responsibilities without waiting for specific individuals to handle file updates.

Moreover, JP Pro can send email notifications to relevant stakeholders whenever a file is published or undergoes a change, ensuring everyone is kept informed. This level of transparency fosters a culture of accountability and engagement among team members.

4. Unique Filenames and Organisation

Effective file management is crucial, especially when dealing with large projects and multiple revisions. JP Pro allows users to publish files with unique filenames based on file properties or attributes. This capability helps maintain organised project folders and reduces confusion when multiple versions of a file exist.

For instance, when publishing a revised product design, users can set the filename to include the part number, revision letter, and date. This practice ensures that everyone is working with the correct file and minimises the risk of using outdated information. Additionally, organising published files into specific folders that align with project hierarchies makes it easier to locate and retrieve files as needed.

5. Reducing Errors and Improving Compliance

Manual processes are often prone to errors, leading to costly mistakes. JP Pro mitigates this risk by automating repetitive tasks that are typically error-prone. By ensuring files are consistently published and updated according to predefined rules, JP Pro enhances compliance with industry standards and internal protocols.

One of the significant challenges in managing CAD files, especially when working with sheet metal parts in an assembly, is the manual export of every part file. With DXF exports, this process can be highly time-consuming. Moreover, when a revision is required, the process needs to be repeated, adding to the workload and increasing the risk of errors. JP Pro for Autodesk Vault Professional automates this entire process, ensuring that every update or revision is handled seamlessly, saving valuable time and reducing manual effort.

Managing CAD file revisions and their associated export file formats, such as PDFs, DWGs, and DXFs, presents a unique set of challenges. With each revision, there is a risk of using outdated files, leading to costly mistakes. JP Pro addresses this issue by automating the publication process, ensuring that every file is up-to-date and correctly versioned. This not only improves compliance but also enhances team efficiency by eliminating the need for manual checks and updates.

In regulated industries, where documentation accuracy is critical, JP Pro plays a vital role. By automating the publishing of design files, BOMs, and quality documentation, organisations can maintain a robust audit trail and reduce the likelihood of human error. This not only protects the company’s reputation but also instil confidence in stakeholders regarding the integrity of the products.

Revolutionise Your Workflow with JP Pro for Autodesk Vault Professional

JP Pro for Autodesk Vault Professional is a transformative solution for professionals using Autodesk Vault Professional. By automating file publishing, enhancing collaboration, and reducing errors, JP Pro empowers teams to focus on innovation and quality. Organisations looking to optimise their workflows will find JP Pro to be an invaluable tool for achieving operational excellence.

Not using Vault yet? See how Vault can save you time and money by visiting our Autodesk Vault page. As the future of efficient engineering and design unfolds, JP Pro stands at the forefront, ready to streamline processes and elevate productivity. Organisations are encouraged to explore the capabilities of JP Pro and discover how it can transform their project management practices.

Get the best prices on Autodesk software.

Get skilled up and enroll in an Autodesk training course

Setup, libraries, programming and consulting services

Contact Us

Contact us to find out how we can help your business. Fill out the form below, by live chat, phone or email.

P: 1800 490 514 |  E: [email protected]

Connected Design

Design Consulting Autodesk Gold Partner
about design consulting Moving at the Speed of Business

VIEW MORE

Understanding Autodesk Fusion 360 Manage: Integration with CAD Software and Data Management Solutions

Autodesk Fusion 360 Manage

Understanding Autodesk Fusion 360 Manage: Integration with CAD Software and Data Management Solutions

Autodesk Fusion 360 Manage

Autodesk Fusion 360 Manage is a robust cloud-based Product Lifecycle Management (PLM) platform designed to enhance collaboration and efficiency across various design and engineering processes. By integrating seamlessly with Autodesk’s suite of CAD software—including Fusion 360, Inventor, and AutoCAD—Fusion 360 Manage provides a comprehensive solution for managing product data and workflows. Additionally, it connects with data management solutions like Autodesk Vault, Upchain, and Prodsmart, creating a cohesive ecosystem that streamlines product development.

This blog post delves into the intricacies of Autodesk Fusion 360 Manage, its integration capabilities, and the benefits these integrations offer.

What is Autodesk Fusion 360 Manage?

Autodesk Fusion 360 Manage is a cloud-based PLM solution that connects people, processes, and data throughout the product life cycle. It offers a wide range of functionalities, including:

  • Project Management: Fusion 360 Manage allows teams to plan, execute, and monitor projects effectively. Users can create tasks, assign resources, and track progress in real-time, ensuring that projects stay on schedule.
  • Change Management: The platform provides tools to manage engineering changes, ensuring that all stakeholders are informed and changes are documented and approved systematically.
  • Bill of Materials (BOM) Management: Autodesk Fusion 360 Manage allows users to create, manage, and track BOMs, ensuring that all components are accounted for throughout the product life cycle.
  • Collaboration Tools: With built-in collaboration features, teams can share information, communicate effectively, and work together seamlessly, regardless of their physical location.

By providing a centralised platform for collaboration and data management, Fusion 360 Manage enables teams to work together efficiently, leading to faster product development cycles and improved quality.

Integration with CAD Software

1. Fusion 360

The integration of Fusion 360 with Autodesk Fusion 360 Manage is one of the most significant advantages of the platform. Fusion 360 is a powerful 3D CAD, CAM, and CAE tool that allows users to design, simulate, and manufacture products. The integration provides several key benefits:

    • Real-Time Collaboration: Users can manage design data directly within the PLM environment, facilitating real-time collaboration on design changes. This ensures all stakeholders can access the latest information, reducing the risk of errors and miscommunication.
    • Design Iteration Tracking: Autodesk Fusion 360 Manage allows teams to track design iterations effectively. Users can see the history of changes made to designs, making it easier to revert to previous versions if needed.
    • Centralised Data Management: All design data, including models, drawings, and simulations, can be stored and managed within Fusion 360 Manage. This centralisation simplifies data retrieval and ensures that everyone is working with the most current information.

2. Inventor

For users of Autodesk Inventor, Autodesk Fusion 360 Manage provides powerful tools to manage complex assemblies and parts. The integration between Inventor and Fusion 360 Manage offers:

    • Enhanced Control Over Assemblies: Users can manage large-scale projects with confidence, knowing that they have a clear overview of the design hierarchy and dependencies. This visibility helps teams coordinate their efforts and avoid conflicts.
    • Revision Management: Autodesk Fusion 360 Manage allows users to manage revisions and changes to Inventor files systematically. This ensures that all changes are documented and approved, reducing the risk of errors in the final product.
    • Seamless Data Exchange: The integration enables seamless data exchange between Inventor and Fusion 360 Manage, ensuring that design data is always up-to-date and accessible to all team members.

3. AutoCAD

AutoCAD is one of the most widely used CAD software applications, particularly for 2D design and drafting. The integration of AutoCAD with Autodesk Fusion 360 Manage provides several advantages:

    • Document Management: AutoCAD users can manage drawings and related documents within the PLM framework. This ensures that all design data, including 2D drawings, specifications, and supporting documents, are organised and accessible from a single location.
    • Version Control: Fusion 360 Manage offers robust version control features, allowing users to track changes to AutoCAD files and ensure everyone is working with the latest version.
    • Collaboration on Designs: The integration facilitates collaboration among team members working on AutoCAD designs, enabling them to share feedback and make changes in real-time.

Integration with Autodesk Vault

Autodesk Vault is a data management solution that ensures secure storage, version control, and tracking of design data. Although there is no native integration between Vault and Fusion 360 Manage, third-party tools like CoolOrange PowerPLM bridge this gap effectively, enabling organisations to leverage the strengths of both platforms.

How CoolOrange PowerPLM Works

PowerPLM allows for seamless data exchange and process synchronisation between Vault and Fusion 360 Manage. It acts as a bridge, enabling the transfer of data and workflows between the two systems. Key functionalities of PowerPLM include:

    • Item and Process Transfers: PowerPLM automates the transfer of items and processes between Vault and Fusion 360 Manage, ensuring that data is accurately and efficiently transferred between the two platforms. This enhances data integrity and collaboration by eliminating manual data entry and reducing the risk of errors.
    • Sample Workflows: PowerPLM provides predefined workflows that can be customised to suit specific organisational needs. For example, it can automatically create items in Fusion 360 Manage when items in Vault change states or synchronise Engineering Change Orders (ECOs) between both systems. This ensures that design changes are reflected across platforms, maintaining consistency and accuracy throughout the product development process.
    • Bidirectional Synchronisation: The tool enables bidirectional synchronisation between Vault and Fusion 360 Manage. This means that changes made in one system can be automatically reflected in the other, keeping both platforms up-to-date and reducing the risk of data discrepancies.

Benefits of Integrating Vault with Fusion 360 Manage

The integration of Autodesk Vault with Fusion 360 Manage through PowerPLM provides numerous benefits:

    • Improved Data Integrity: By automating data transfers and synchronisation, organisations can maintain high data integrity, ensuring that all stakeholders are working with accurate and up-to-date information.
    • Streamlined Workflows: The integration simplifies workflows by reducing the need for manual data entry and minimising the risk of errors. Teams can focus on their core tasks rather than spending time on administrative duties.
    • Enhanced Collaboration: With all design data accessible from both Vault and Fusion 360 Manage, teams can collaborate more effectively, leading to improved communication and faster decision-making.

Integration with Upchain and Prodsmart

While specific details on the integration of Fusion 360 Manage with Upchain and Prodsmart were not highlighted in the search results, both platforms are known for enhancing collaboration and data management in product development.

Upchain

Upchain is a cloud-based PLM solution that connects teams and data across the supply chain. Its integration with Fusion 360 Manage would likely facilitate better visibility and control over product data, enabling teams to collaborate more effectively and make informed decisions throughout the product life cycle. Key features of Upchain include:

    • Centralised Data Repository: Upchain provides a centralised repository for all product data, making it easy for teams to access the information they need when they need it.
    • Real-Time Collaboration: Teams can collaborate in real-time, sharing feedback and making changes to designs quickly. This agility is crucial in today’s fast-paced product development environment.
    • Enhanced Visibility: Upchain offers tools for tracking project progress and monitoring key performance indicators (KPIs), providing teams with insights into their workflows and helping them identify areas for improvement.

Prodsmart

Prodsmart is a manufacturing execution system (MES) that provides insights into production processes. Integrating Fusion 360 Manage with Prodsmart can improve efficiency and data-driven decision-making throughout the manufacturing lifecycle. Key benefits of this integration include:

    • Real-Time Production Data: By connecting design data from Fusion 360 Manage with real-time production data from Prodsmart, organisations can optimise their manufacturing processes and identify bottlenecks.
    • Data-Driven Decision Making: The integration allows teams to make informed decisions based on real-time data, improving productivity and quality.
    • Streamlined Manufacturing Processes: By aligning design and manufacturing data, organisations can streamline their processes, reducing lead times and improving overall efficiency.

The Importance of Integration in Product Development

The integration of Fusion 360 Manage with various CAD software and data management solutions is crucial for modern product development. Here are some reasons why these integrations are essential:

1. Enhanced Collaboration

In today’s globalised world, teams often work across different locations and time zones. Integrating PLM with CAD software and data management solutions enables real-time collaboration, ensuring that all stakeholders can access the latest information and contribute to the project regardless of their location. This collaborative environment fosters innovation and accelerates product development.

2. Improved Data Management

Autodesk Fusion 360 Manage

Managing product data effectively is critical for successful product development. Integrating Fusion 360 Manage with tools like Autodesk Vault, Upchain, and Prodsmart ensures that all data is organised, accessible, and up-to-date. This reduces the risk of errors, minimises data silos, and enhances overall data integrity.

3. Streamlined Workflows

Integrations help streamline workflows by automating data transfers and synchronising processes. This reduces the need for manual data entry and minimises the risk of errors, allowing teams to focus on their core tasks and improving overall efficiency.

4. Better Decision-Making

Autodesk Fusion 360 Manage

Access to accurate and up-to-date data is essential for informed decision-making. By integrating various systems, organisations can ensure decision-makers have access to the information they need to make timely and effective decisions, ultimately leading to better project outcomes.

Ready to Transform Your Product Development Process?

Autodesk Fusion 360 Manage is a powerful PLM solution that offers seamless integration with Autodesk’s suite of CAD software and data management solutions. By connecting with tools like Fusion 360, Inventor, AutoCAD, Vault, Upchain, and Prodsmart, Fusion 360 Manage provides a comprehensive platform for managing product lifecycles and optimising product development processes. These integrations enhance collaboration, streamline workflows, and improve data integrity, enabling organisations to bring products to market faster and with greater success.

For design professionals looking to stay ahead of the curve, understanding and leveraging these integrations is crucial. By adopting a fully integrated approach to product development, organisations can achieve new levels of efficiency and innovation, setting themselves apart in today’s competitive market.

Get the best prices on Autodesk software.

Get skilled up and enroll in an Autodesk training course

Setup, libraries, programming and consulting services

Contact Us

Contact us to find out how we can help your business. Fill out the form below, by live chat, phone or email.

P: 1800 490 514 |  E: [email protected]

Connected Design

Design Consulting Autodesk Gold Partner
about design consulting Moving at the Speed of Business

VIEW MORE

Unlocking the Power of Automation with iLogic and Dynamo Programming Services

Programming services

Unlocking the Power of Automation with iLogic and Dynamo Programming Services

Programming services

At Design Consulting, we understand the importance of efficiency and precision in today’s fast-paced design and construction environment. That’s why we specialise in enhancing these aspects through advanced programming services for Autodesk applications. Two of our standout services are iLogic for Inventor and Dynamo for Revit. In this post, I’ll delve into how these tools can revolutionise your workflow and why we are your go-to partner for implementing them.

What is iLogic?

iLogic is a powerful automation tool within Autodesk Inventor that allows you to create rules-driven designs. It simplifies complex tasks by embedding engineering knowledge and design intent directly into the Inventor models. With iLogic, you can automate repetitive tasks, ensure consistency, and reduce errors.

Key Features of iLogic:

  • Automated Design Changes: iLogic enables you to create models that automatically adjust to changes in parameters. This dynamic adaptability is crucial for custom manufacturing and product development.
  • Automated 2D Drawings: Through a set of rules, drawing sheets, views and dimensions can be automated.
  • Configuration Management: By using rules, you can manage multiple configurations of a product, ensuring each variation meets your specific requirements.
  • Integration with Excel: iLogic can read and write data to and from Excel, making it easier to handle complex calculations and data management tasks.
  • Enhanced Customisation: Build forms for configuration, automate bill of materials management, and create custom commands to streamline your workflow.

What is Dynamo?

Programming services

Dynamo is a visual programming tool that works seamlessly with Autodesk Revit. It enables designers and engineers to create custom workflows and automate tasks, enhancing the capabilities of Revit without the need for extensive coding knowledge.

Key Features of Dynamo:

  • Visual Programming Interface: Dynamo’s node-based interface allows you to create programs by connecting pre-built blocks, making it accessible even to those with no programming background.
  • Enhanced Design Exploration: With Dynamo, you can explore complex geometries and design alternatives quickly and efficiently.
  • Data Management: Automate data extraction, manipulation, and reporting processes, improving accuracy and saving time.
  • Interoperability: Dynamo scripts can interact with various data sources and applications, providing a versatile platform for complex workflows.

Benefits of Using iLogic and Dynamo

Both iLogic and Dynamo offer significant benefits to design professionals:

  • Increased Productivity: Automation reduces the time spent on repetitive tasks, allowing designers to focus on more creative and high-value activities.
  • Improved Accuracy: By embedding rules and automating data handling, these tools minimise the risk of human error.
  • Cost Efficiency: Streamlined workflows and reduced errors translate to lower project costs and faster delivery times.
  • Customisation: Tailor the tools to your specific needs, ensuring they align perfectly with your project requirements.

How Our Programming Services Can Help

At Design Consulting, we offer specialised programming services to help you leverage the full potential of iLogic and Dynamo. Here’s how we can assist you:

iLogic Programming Services:

  • Custom Rule Creation: We can develop custom iLogic rules tailored to your unique design requirements, ensuring your models adapt dynamically to parameter changes.
  • Training and Support: Our team provides comprehensive training sessions, helping your staff become proficient in using iLogic for everyday tasks.
  • Integration Services: We seamlessly integrate iLogic with your existing systems and workflows, maximising the tool’s efficiency and effectiveness.

Dynamo Programming Services:

  • Workflow Automation: We create custom Dynamo scripts that automate tedious tasks, from data extraction to complex geometric manipulations.
  • Training Workshops: Learn how to use Dynamo’s visual programming interface through hands-on workshops led by our experienced professionals.
  • Script Development: Whether you need simple automation or complex data management solutions, we can develop scripts that meet your specific needs.

Transform Your Workflow: Embrace the Future with iLogic and Dynamo

Harnessing the power of iLogic and Dynamo can transform your design and engineering processes, leading to increased productivity, accuracy, and cost savings. Our expertise in these tools ensures you get tailored programming services that meet your specific needs. Whether you’re looking to automate complex workflows, enhance your data management, or simply improve your design efficiency, Design Consulting is here to help you every step of the way.

Contact us today to discover how our iLogic and Dynamo programming services can elevate your projects to new heights.

Get the best prices on Autodesk software.

Get skilled up and enroll in an Autodesk training course

Setup, libraries, programming and consulting services

Contact Us

Contact us to find out how we can help your business. Fill out the form below, by live chat, phone or email.

P: 1800 490 514 |  E: [email protected]

Connected Design

Design Consulting Autodesk Gold Partner
about design consulting Moving at the Speed of Business

VIEW MORE

Comprehensive Comparison of BIM Collaborate and BIM Collaborate Pro

BIM Collaborate Pro

Comprehensive Comparison of BIM Collaborate and BIM Collaborate Pro

BIM Collaborate Pro

Building Information Modeling (BIM) has revolutionised the architecture, engineering, and construction (AEC) industries by fostering enhanced collaboration and coordination among project stakeholders. Autodesk, a leader in BIM solutions, offers two significant tools: BIM Collaborate (BC) and BIM Collaborate Pro (BCP). Although both platforms aim to enhance project collaboration, they cater to distinct needs and offer varied functionalities. This comprehensive comparison explores the features, benefits, and use cases of these two platforms to help you determine which is best suited for your needs.

What is BIM Collaborate?

BC is a cloud-based platform available with Autodesk Construction Cloud that is tailored to streamline document management, design coordination, and project administration. It centralises project information, allowing teams to collaborate seamlessly from any location. Key features include automated clash detection, design review tools, and advanced analytics, making it ideal for teams seeking robust collaboration without the need for real-time co-authoring.

What is BIM Collaborate Pro?

BCP builds on the capabilities of BIM Collaborate by incorporating real-time co-authoring and advanced collaboration tools, specifically designed for Autodesk software such as Revit, Civil 3D, and Plant 3D. This platform is geared towards larger teams and complex projects that demand simultaneous collaboration on models, enabling multiple users to work on the same design file concurrently.

Key Differences Between BIM Collaborate and BIM Collaborate Pro

Feature
BIM Collaborate
BIM Collaborate Pro
Cloud-based Document Management
Yes
Yes
Automated Clash Detection
Yes
Yes
Project Administration
Yes
Yes
Advanced Analytics
Yes
Yes
Design Review and Coordination
Yes
Yes
Robust Access Controls
Yes
Yes
Democratized Access to Design Data
Yes
Yes
Revit Issues Add-in
Yes
Yes
Sandboxed Coordination Spaces
Yes
Yes
Revit Cloud Worksharing
No
Yes
Collaboration for Civil 3D
No
Yes
Collaboration for Plant 3D
No
Yes
Real-time Co-authoring
No
Yes
Project Timeline Visualization
Yes
Yes
Valuable Project Insights
Yes
Yes

Detailed Feature Analysis and Comparison

  • Cloud-based Document Management

BC offers a comprehensive cloud-based document management system, enabling teams to centralise project data and access documents from any location. This feature ensures that all team members are working with the latest information.

On the other hand, BCP enhances document management by adding real-time collaboration capabilities. Users can work on shared documents simultaneously, facilitating quicker issue resolution and more dynamic project updates.

  • Automated Clash Detection

Both platforms feature automated clash detection, essential for identifying design conflicts before construction begins.

BC allows users to run clash detection scans and generate reports to highlight conflicts, crucial for maintaining project timelines and budgets, whereas BCP not only includes clash detection but also supports real-time collaboration on clashes. Users can view and address issues as they arise, speeding up decision-making and minimising rework.

  • Advanced Analytics

Advanced analytics tools are available in both BC and BCP, offering valuable insights into project performance and the impact of changes. BC provides comprehensive analytics dashboards that allow users to track project progress and manage resource allocation effectively. These dashboards enable teams to generate detailed reports, helping them assess the effects of changes across various disciplines. Building on this foundation, BCP enhances the analytics experience with real-time data visualisation. This capability allows teams to identify trends and address issues as they emerge, ensuring timely interventions and more informed decision-making.

  • Design Review and Coordination

Design review and coordination are crucial for aligning all stakeholders on project goals. BC features intuitive markup tools that enable users to annotate designs and track issues seamlessly. Design reviews can be conducted via a web browser, simplifying the feedback collection process and making it accessible to all team members. On the other hand, BCP takes design review to the next level by adding real-time capabilities. This enhancement allows multiple users to provide feedback simultaneously, significantly improving communication and efficiency throughout the review process.

  • Real-time Co-authoring

A standout feature of BCP is its real-time co-authoring capability, which sets it apart from BC, which requires users to check out files for edits, potentially causing delays. On the other hand, BCP allows multiple users to work on the same model simultaneously. Changes made by one user are instantly visible to others, facilitating seamless collaboration and reducing the time required for design iterations. This real-time co-authoring capability enhances teamwork and accelerates project timelines.

  • Collaboration for Specific Software

BCP offers specialised collaboration tools for various Autodesk software, making it highly suitable for complex projects. For instance, it includes cloud worksharing for Revit models, which facilitates seamless collaboration among architects and engineers. Additionally, it enhances collaboration on site designs and grading plans for civil engineering teams using Civil 3D. For industrial projects, it supports real-time collaboration on piping and instrumentation diagrams with Plant 3D. In contrast, BC lacks these specialised tools, making it less suitable for teams that rely heavily on these specific applications.

  • Robust Access Controls

Both BC and BCP provide robust access controls to protect sensitive project data. BC allows administrators to set user permissions, controlling who can view, edit, and share project information. BCP builds on these access control features by adding the ability to manage permissions in real time. This ensures that data security is maintained during collaborative sessions, allowing teams to work confidently without compromising sensitive information.

  • Sandboxed Coordination Spaces

Sandboxed coordination spaces are a feature available in both platforms, enabling teams to explore design options without affecting the main project. BC supports the creation of isolated environments for testing changes, which is particularly useful for evaluating different design scenarios. Enhancing this capability, BCP allows for real-time collaboration within sandboxed spaces. This feature enables teams to discuss and resolve issues while exploring various design alternatives, fostering innovation and improving overall project outcomes.

  • Project Timeline Visualization

Effective project management requires clear visualisation of project timelines and milestones. BIM Collaborate includes tools such as Gantt charts and milestone tracking to help teams understand deadlines and dependencies. BIM Collaborate Pro offers these same visualisation tools but with the added benefit of real-time updates based on collaborative inputs. This ensures that all team members are aware of changes as they occur, promoting better coordination and timely adjustments to project schedules.

  • Valuable Project Insights

Both platforms provide valuable insights into project performance, helping teams identify trends and make informed decisions. BIM Collaborate offers analytics tools that track common issues and assess project performance over time. In contrast, BIM Collaborate Pro provides enhanced insights with real-time data visualisation. This capability makes it easier to spot potential problems and opportunities for improvement, allowing teams to proactively address issues and optimise project outcomes.

When to Use BIM Collaborate?

BC is ideal for:

  • Small to Medium-Sized Projects: Suitable for teams that do not need extensive real-time collaboration features.
  • Document Management Focus: Projects prioritising document management and design coordination.
  • Budget Constraints: Organisations seeking a cost-effective solution.
 

When to Use BIM Collaborate Pro?

BCP is best for:

  • Large Teams and Complex Projects: Ideal for teams needing real-time collaboration and coordination across multiple disciplines.
  • Integrated Workflows: Projects involving Autodesk software applications like Revit, Civil 3D, and Plant 3D.
  • Remote Collaboration: Organisations with distributed teams needing real-time co-authoring capabilities.

Integration with Other Autodesk Tools

Both BIM Collaborate and BIM Collaborate Pro integrate with other Autodesk tools:

  • Autodesk Revit: Both support Revit, with Pro offering advanced cloud work sharing.
  • Autodesk Civil 3D: Pro facilitates effective collaboration on site designs.
  • Autodesk Plant 3D: Pro supports industrial design collaboration.
  • Autodesk Navisworks: Both can be used with Navisworks for project visualisation and coordination.
 

Make the Right Choice for Your BIM Needs

Both BC and BCP play vital roles in enhancing collaboration within the AEC industry. While BC offers a strong foundation for document management and design coordination, BCP enhances the experience with real-time co-authoring and specialised tools for Autodesk applications.

When selecting between the two, consider your project size, team structure, and specific collaboration needs. Understanding the differences and capabilities of each platform will enable teams to make informed decisions, leading to more efficient project execution and better outcomes.

Embracing a cloud-based BIM solution is a step towards modernising your project workflows and enhancing collaboration throughout all phases of construction.

Contact Us

Contact us to find out how we can help your business. Fill out the form below, by live chat, phone or email.

P: 1800 490 514 |  E: [email protected]
Connected Design

Design Consulting Autodesk Gold Partner
about design consulting Moving at the Speed of Business

VIEW MORE

Optimising Product Designs with Autodesk Inventor Nastran

Autodesk Inventor Nastran

Optimising Product Designs with Autodesk Inventor Nastran

Imagine a world where product designs are perfected before they ever reach the prototyping stage. Engineers and designers can foresee and resolve potential issues early, ensuring their creations are innovative, reliable, and cost-effective. This is the transformative potential of simulation-driven design, made possible by Autodesk Inventor Nastran.

The importance of early-stage simulation is underscored by an Aberdeen Group report, which reveals more than half of the respondents preferred to consolidate their simulation vendors in the early stage with powerful virtual simulation tools like Autodesk Inventor Nastran. 

In this blog post, let’s delve into Autodesk Inventor Nastran, exploring its benefits, capabilities, and the ways it is reshaping the future of product development.

What is Autodesk Inventor Nastran?

Autodesk Inventor Nastran is a powerful finite element analysis (FEA) tool integrated directly into Autodesk Inventor CAD software. It enables designers and engineers to perform a wide range of simulation studies on their product designs, helping them optimise performance, reduce development time and costs, and deliver higher-quality, more reliable products.

FEA is a numerical technique used to analyse the behaviour of complex structures and systems under various loads and conditions. By creating a digital model of a product and subjecting it to simulated stresses, forces, and other environmental factors, engineers can gain valuable insights into how the design will perform in the real world.

Inventor Nastran seamlessly integrates this powerful FEA technology into the Inventor CAD environment, allowing designers to analyse and optimise their designs without leaving the familiar Inventor interface. This streamlined workflow eliminates the need to switch between multiple software tools, saving time and improving productivity.

What Types of Simulation Studies Can Be Performed with Inventor Nastran?

Inventor Nastran allows you to conduct a variety of simulation studies, including:

. Linear, Prestress, and Nonlinear Static Analysis :

Understand how your design will respond to various static loads and stresses.

. Normal and Prestress Modes :

Analyse the natural vibration modes of your design, including the effects of prestress.

. Linear and Nonlinear Buckling : 

Identify potential buckling issues that could compromise the structural integrity of your design.

. Direct, Modal, and Nonlinear Transient Response : 

Simulate the dynamic behaviour of your design under time-varying loads.

. Impact Analysis : 

Assess how your design will withstand sudden impacts or collisions.

. Direct, Modal Frequency Response : 

Understand how your design will respond to harmonic excitations.

. Random Response : 

Analyse the response of your design to random vibrations.

. Shock/Response Spectrum : 

Simulate the effects of shock and vibration events on your design.

. Multi-Axial and Vibration Fatigue : 

Predict the fatigue life of your design under complex loading conditions.

. Linear and Nonlinear Steady State Heat Transfer : 

Analyse the thermal behaviour of your design.

. Nonlinear Transient Heat Transfer : 

Simulate the dynamic thermal response of your design.

. Explicit Dynamics: 

Perform advanced simulations of high-speed events, such as impacts or explosions.

. Explicit Quasi-Static : 

Analyse the behaviour of your design under quasi-static loading conditions.

These simulation capabilities enable you to thoroughly evaluate your product designs, identifying and addressing potential issues before they become costly problems during physical prototyping or manufacturing.

How Can Simulation Studies Help Optimise Product Designs?

Simulation studies with Autodesk Inventor Nastran help optimise product designs in several ways:

1. Identifying and Addressing Potential Issues :

Simulating the behaviour of your design under various loads and conditions uncovers potential problems, such as stress concentrations, deformations, or fatigue failures, allowing you to make informed design decisions and implement necessary changes before investing in physical prototypes.

2. Reducing Over-Engineering :

Simulation studies ensure your designs are fit for purpose by optimising material use and eliminating unnecessary features or components. This not only reduces manufacturing costs but also improves the overall efficiency and performance of your products.

3. Accelerating the Design Process: 

Rapid design iterations and simulations save time and resources compared to physical prototyping and testing. By identifying and resolving issues early in the design phase, you can significantly shorten the product development cycle and bring your innovations to market faster.

4. Improving Product Quality and Performance : 

Informed design decisions based on accurate simulation results lead to better-performing and more reliable products. This can translate into increased customer satisfaction, reduced warranty claims, and a stronger competitive position in the market.

5. Enhancing Collaboration and Communication : 

Simulation results can be easily shared with stakeholders, including cross-functional teams, management, and customers. This facilitates better decision-making, improves overall project management, and helps ensure that the final product meets all necessary performance and compliance requirements.

How Does Inventor Nastran Integrate with Autodesk Inventor?

Inventor Nastran is tightly integrated with Autodesk Inventor CAD software, allowing you to perform simulation studies directly within the Inventor environment. This streamlined workflow eliminates the need to switch between multiple software tools, saving time and improving productivity.

The integration also enables you to import and export results to and from other Autodesk applications, such as Autodesk CFD for fluid flow and thermal analysis, or Autodesk Moldflow for plastic part simulation. This cross-application integration ensures a comprehensive design validation process, helping you meet all necessary performance and compliance requirements.

By leveraging the synergy between Inventor Nastran and Inventor CAD software, you can create a seamless, end-to-end product development process that combines the power of simulation with the flexibility and ease of use of a leading CAD platform.

What Are the Benefits of Using Inventor Nastran for Product Design Optimisation?

Using Inventor Nastran for product design optimisation provides several key benefits:

1. Reduced Development Time and Costs :

Simulation studies help identify and address issues early in the design process, reducing the need for physical prototyping and testing. This can lead to significant cost savings and faster time-to-market for your products.

2. Improved Product Quality and Performance:

Accurate simulation results enable informed design decisions, leading to better-performing and more reliable products. This can translate into increased customer satisfaction, reduced warranty claims, and a stronger competitive position in the market.

3. Increased Innovation and Competitiveness : 

The ability to rapidly iterate and optimise designs allows you to bring innovative products to market faster than your competitors. By leveraging the power of simulation, you can explore more design options, test the limits of your ideas, and deliver truly differentiated products to your customers.

4. Enhanced Collaboration and Communication : 

Simulation results can be easily shared with stakeholders, facilitating better decision-making and improving overall project management. This helps ensure that the final product meets all necessary performance and compliance requirements while aligning with the needs and expectations of your customers.

What’s the Difference Between Inventor Professional and Autodesk Inventor Nastran?

While both products offer some similar features, there are some notable differences between them.
Linear stress analysis
Feature
Inventor Professional
Nastran In-CAD
Yes
Yes
Nonlinear stress analysis
Yes
Yes
Modal analysis
Yes
Yes
Buckling analysis
Yes
Yes
Thermal analysis
Yes
Yes
Fatigue analysis
Yes
Yes
Drop test analysis
Yes
Yes
Frequency response analysis
No
Yes
Random vibration analysis
No
Yes
Shock response spectrum analysis
No
Yes

In addition to these differences, there are also some differences in product licences. Autodesk Inventor Professional is available as a standalone product, allowing users to purchase it separately from other Autodesk software. In contrast, Autodesk Inventor Nastran In-CAD is only available as part of the Autodesk Product Design & Manufacturing Collection, which is a suite of design, engineering, and manufacturing tools that also includes Inventor Professional. This means that users who require the advanced analysis capabilities of Nastran In-CAD must also purchase the entire collection, which may be a consideration for some customers.

Unlock the Full Potential of Simulation-Driven Design

Inventor Nastran is a game-changer in product design optimisation. By harnessing the power of simulation, you can unlock new levels of innovation, reduce development costs, and deliver products that exceed customer expectations.

Do not settle for subpar designs or lengthy development cycles. Embrace the future of product design with Autodesk Inventor Nastran and revolutionise the way you bring your ideas to life. Get in touch with our team to learn more about Inventor Nastran and purchase the Autodesk PDM collection.

Contact Us

Contact us to find out how we can help your business. Fill out the form below, by live chat, phone or email.

P: 1800 490 514 |  E: [email protected]
Connected Design

Design Consulting Autodesk Gold Partner
about design consulting Moving at the Speed of Business

VIEW MORE

Marvellous Mechanical Drafting with Autodesk AutoCAD Mechanical

Autodesk AutoCAD Mechanical

Marvellous Mechanical Drafting with Autodesk AutoCAD Mechanical

Autodesk AutoCAD Mechanical

Did you know that the global CAD software market was valued at $9.3 billion in 2019 and is projected to grow at a rate of 6.6% annually, reaching $18.7 billion by 2030? This growth is driven by the increasing complexity of design requirements and the need for more efficient and accurate tools in industries like manufacturing and automotive.

In this environment, what if you could cut your design time nearly in half while simultaneously reducing errors and enhancing the quality of your work? This is not just a dream but a reality with Autodesk AutoCAD Mechanical, a specialised toolset within AutoCAD that is revolutionising the field of mechanical drafting.

AutoCAD Mechanical is not just another CAD software; it’s a comprehensive solution tailored specifically for mechanical engineering. It combines the robust capabilities of AutoCAD with libraries of standards-based parts and tools designed to automate common mechanical CAD tasks. This powerful combination allows engineers and designers to save countless hours on design and rework, freeing them to focus on innovation and problem-solving.

In this blog post, we’ll explore the marvels of mechanical drafting with AutoCAD Mechanical, delving into its features, benefits, and the impressive productivity gains it offers.

Productivity Gains with Autodesk AutoCAD Mechanical

A productivity study commissioned by Autodesk highlighted the significant time savings and efficiency improvements offered by the Mechanical toolset in AutoCAD. The study compared the time required to complete various design tasks using Autodesk AutoCAD Mechanical vs AutoCAD

Here are some key findings from the study: 

  • Faster Design and Rework: The Mechanical toolset reduces the total time required for 2D CAD work by approximately 55%. This is achieved through automation and the availability of standardised parts and functions.
  • Reduced Risk of Errors: Standardised functions and parts not only speed up the design process but significantly reduce the risk of errors. This leads to higher accuracy and consistency in designs.
  • Enhanced Efficiency: Common design tasks, such as searching for project data, inserting standard and supplier parts, and structuring data, are all streamlined with the Mechanical toolset. This efficiency frees up valuable time for more critical aspects of design.
Advantages of Using Autodesk AutoCAD Mechanical
Autodesk AutoCAD Mechanical

AutoCAD Mechanical offers numerous advantages that significantly enhance the efficiency and effectiveness of mechanical drafting. Here are some key benefits:

  1. Intelligent Layer Management: The Mechanical toolset in AutoCAD simplifies the task of managing layers by automatically placing items on the correct layer, colour, and linetype as you create your drawing. This system can be easily customised based on your company’s requirements, ensuring consistency and accuracy in your designs. Customisable layer types include text and hatching, centerlines and construction lines, hidden lines, symbols and notes, and title borders.
  2. Time Savings and Efficiency: AutoCAD Mechanical substantially reduces the time required to complete various tasks. For instance, preparing existing data, creating new concepts, and structuring data are significantly faster with the Mechanical toolset, resulting in up to 45% time savings. Similarly, tasks such as detailing and optimising new designs, calculating forces, and modifying parts are completed much quicker compared to basic AutoCAD, often saving up to 80% of the time.
  3. Enhanced Calculation Functions: The toolset offers robust calculation functions, allowing users to perform analysis on 2D geometry subject to static loads. This includes calculating stress and deformation in a plane or cross-section with individual forces and stretching loads. These capabilities are crucial for ensuring the structural integrity and performance of mechanical parts.
  4. Automated Updates and Synchronisation: The Mechanical toolset ensures that any change made to a component automatically updates all related components. This feature is particularly beneficial in complex assemblies where changes to one part must be reflected across the entire design. This automation reduces the likelihood of errors and ensures that all parts of the design remain consistent.
  5. Comprehensive Standard Parts Library:  Autodesk AutoCAD Mechanical includes a vast library of over 100,000 pre-drawn standard features such as undercuts, keyways, and thread ends, and more than 8,000 pre-drawn holes including through holes, blind holes, counterbored holes, countersunk holes, and oblong holes. These features automatically clean up the insertion area in the drawing, eliminating the need for manual editing and significantly speeding up the design process.
  6. Efficient Production Drawing Creation: The toolset makes creating production drawings for parts and assemblies much more efficient. Automated and associative parts lists and bills of materials (BOMs) update automatically as the design changes. This ensures that all documentation is up-to-date and accurate, facilitating smoother transitions to manufacturing and reducing production delays.
  7. Power Commands: AutoCAD Mechanical’s Power Commands utilise object information to accelerate user operations such as editing and copying objects. This feature allows users to bypass traditional pull-down menus, toolbars, and tablet locations, using the objects themselves as command menus. This intuitive interface streamlines the design process and enhances productivity.
  8. Specialised Drafting Tools: The toolset includes over 30 options for rectangle, arc, and circle creation, nearly automatic centerline creation and updating, speciality lines for breakout views and section lines, and a full suite of construction lines for aligning drafting views. These specialised tools are designed specifically for mechanical drafting, providing more precise and efficient ways to create detailed and accurate drawings.
  9. Foreground/Background Management: AutoCAD Mechanical simplifies the management of foreground and background elements in a drawing. It automatically redraws geometry to show hidden or dashed lines of parts obstructed by other parts in a design. Hidden lines update automatically when changes occur, eliminating the need for manual redrawing due to design changes. This feature ensures that designs are always clear and accurate, reducing the time and effort required to update 2D designs.

These advantages make Autodesk AutoCAD Mechanical an indispensable tool for mechanical engineers and designers, enabling them to produce high-quality, precise, and efficient designs with less effort and in less time. Whether you’re working on simple components or complex assemblies, the Mechanical toolset offers the functionality and flexibility needed to meet the demands of modern mechanical design.

Embrace the Future of Mechanical Drafting with Autodesk AutoCAD Mechanical

Autodesk AutoCAD Mechanical is a powerful toolset that revolutionises mechanical drafting by enhancing productivity, reducing errors, and automating routine tasks. Whether you’re designing complex machinery, optimising existing designs, or calculating forces in a mechanism, AutoCAD Mechanical provides the tools and features you need to work more efficiently and accurately.

By incorporating AutoCAD Mechanical into your workflow, you can significantly cut down on design and rework time, allowing you to focus on innovation and quality. Embrace the marvels of mechanical drafting with AutoCAD Mechanical and take your engineering projects to new heights.

Contact Us

Contact us to find out how we can help your business. Fill out the form below, by live chat, phone or email.

P: 1800 490 514 |  E: [email protected]
Connected Design

Design Consulting Autodesk Gold Partner
about design consulting Moving at the Speed of Business

VIEW MORE

AutoCAD vs. Autodesk Advance Steel: Choosing the Right Tool for Your Design Needs

Autodesk Advance Steel Integration

AutoCAD vs. Autodesk Advance Steel: Choosing the Right Tool for Your Design Needs

Imagine you’ve just spent hours meticulously designing a product in AutoCAD, only to realise there might be a more efficient tool for your specific needs. You’re not alone. With the ever-evolving landscape of computer-aided design (CAD) software, many professionals find themselves at a crossroads, wondering if they’re using the optimal solution for their projects.

Enter the AutoCAD vs. Autodesk Advance Steel debate. These two Autodesk powerhouses each bring unique strengths to the table, but which one is right for you? Whether you’re an architect sketching the next skyline-defining structure or a steel fabricator planning intricate industrial components, choosing the right CAD software can dramatically impact your workflow and output.

In this article, we’ll dive deep into the world of AutoCAD and Autodesk Advance Steel, comparing their features, applications, and market positions. By the end, you’ll have a clear understanding of which tool aligns best with your design needs, potentially saving you countless hours and resources in the long run. So, are you ready to optimise your CAD experience? Let’s get started.

Advance Steel Features and Benefits Moving at the Speed of Business

Understanding the Basics

AutoCAD is renowned for its versatility, catering to a broad user base that includes architects, engineers, drafters, and designers across diverse industries such as construction, manufacturing, and product design. It offers robust 2D and 3D CAD capabilities, making it a go-to solution for professionals who require flexibility in their design work and need to create detailed technical drawings across different disciplines. AutoCAD’s general-purpose nature allows it to be used for a wide range of applications, from architectural blueprints to mechanical parts design, making it an essential tool for many design professionals.

Autodesk Advance Steel is a specialised software designed for structural engineers, steel detailers, and fabricators working on steel construction projects. It excels in creating detailed 3D models of steel structures, generating fabrication drawings, and producing bills of materials with high efficiency. The software’s automated features and steel-specific tools significantly reduce design time, making it invaluable for large-scale steel fabrication projects. By focusing on the specific needs of steel fabrication, Advance Steel offers features that streamline workflows and improve accuracy, ensuring that steel projects are completed efficiently and to exact standards.

Key Differences Between AutoCAD and Autodesk Advance Steel

1. Purpose and Specialisation

AutoCAD is a general-purpose 2D and 3D CAD software used across various industries for drafting and modelling. Its versatility makes it suitable for a wide range of applications, from architectural design to engineering and product development. In contrast, Autodesk Advance Steel is a specialised software designed specifically for steel fabrication, detailing, and structural engineering. This specialisation allows Advance Steel to provide tools and features tailored to the needs of steel professionals, ensuring that projects are completed with precision and efficiency.

2. Modelling Capabilities

AutoCAD offers both 2D and 3D drafting and modelling tools, making it a versatile choice for professionals in various fields. It can handle everything from simple sketches to complex 3D models, providing flexibility for different design needs. Advance Steel, however, is purpose-built for 3D modelling of steel structures and components. It adheres to global steel standards, ensuring designs meet industry requirements. This focus on steel modelling allows Advance Steel to provide more accurate and efficient tools for creating detailed steel structures.

3. Automation and Efficiency

While AutoCAD provides some automation features, much of the drawing and detailing work is done manually, which can be time-consuming for large projects. Advance Steel, on the other hand, offers extensive automation specifically for steel fabrication. It can automatically produce detailed fabrication drawings in minutes, significantly reducing project timelines from weeks to days. The software includes a library of common connections and allows users to save custom connections for future use, enhancing efficiency and consistency across projects.

4. Drawing Production

In AutoCAD, most drawings and details are created manually, which can be labour-intensive and prone to errors. Advance Steel utilises purpose-built templates for creating drawings, tailored for steel fabrication. These templates account for different styles, processes, and views, streamlining the drawing process and ensuring consistency. Users can modify these templates to match their company standards, enhancing the software’s adaptability and efficiency.

5. Ease of Use for Steel Work

Advance Steel simplifies steel modelling with user-friendly features. Basic steel modelling is as straightforward as drawing lines in AutoCAD, with the added benefit of automated setup of layers and organisation of elements. This ease of use maximises efficiency in steel detailing, allowing users to focus on design rather than software intricacies. AutoCAD, while versatile, may require more manual setup and management, making it less efficient for steel-specific tasks compared to Advance Steel.

6. Integration and Workflow

Both AutoCAD and Advance Steel can be used in conjunction, but they follow different workflows. Models created in Autodesk Advance Steel can be exported and imported into AutoCAD or Autodesk Inventor for further work in mixed design environments. This integration allows for seamless collaboration between different software, enhancing workflow efficiency and ensuring that all aspects of a project are covered. AutoCAD’s general-purpose nature makes it adaptable to various workflows, but Advance Steel’s specialised features offer a more streamlined process for steel projects.

Advance Steel Application Workflows Moving at the Speed of Business

7. Learning Curve

AutoCAD, with its broad application scope, may require more time to master all its features. Its versatility means that users must familiarise themselves with a wide range of tools and capabilities. Advance Steel, being more specialised, can be learned more quickly for steel-specific work. Some users report being able to handle significant projects after just a few days of training, thanks to the software’s focused feature set and user-friendly design.

8. Document Management

Advance Steel offers more integrated document management for steel projects. Changes made to parts can be quickly updated in parts lists using the “Force Update” option, ensuring that all project documentation is accurate and up to date. This level of integration simplifies project management and reduces the risk of errors. AutoCAD, while offering robust documentation capabilities, may require more manual updates and management, making it less efficient for complex steel projects.

Practical Applications and User Scenarios

AutoCAD’s versatility makes it an ideal choice for professionals who work on diverse projects across multiple industries. Whether you are an architect designing residential buildings, an engineer drafting mechanical parts, or a product designer creating prototypes, AutoCAD provides the flexibility and comprehensive toolset needed for a wide range of applications. Its general-purpose capabilities make it an invaluable asset for any professional who requires a reliable and adaptable CAD solution.

Autodesk Advance Steel Integration

Advance Steel is the go-to solution for professionals focused on steel fabrication and structural engineering. Its specialised tools and efficiency are unmatched for those involved in large-scale steel construction projects. Structural engineers, steel detailers, and fabricators benefit from its ability to create detailed 3D models, generate fabrication drawings quickly, and produce accurate bills of materials. Companies that require interoperability with other Building Information Modeling (BIM) software and need to conform to global steel standards will find Advance Steel particularly beneficial.

AutoCAD or Autodesk Advance Steel, Make the Right Choice For Your Needs

Choosing between AutoCAD and Advance Steel ultimately depends on your specific needs and the nature of your projects. Both AutoCAD and Advance Steel are powerful tools within the Autodesk suite, each designed to cater to distinct professional needs. By understanding their unique capabilities and how they align with your project requirements, you can make an informed decision that enhances your design process and overall productivity.

That said, if you’re involved in large-scale steel construction, our recommendation is Autodesk Advance Steel, as its specialised tools can drastically reduce design time and improve workflow efficiency.

If you want to learn more about Autodesk Advance Steel and Autodesk’s other fabrication tools, click here.

Contact Us

Contact us to find out how we can help your business. Fill out the form below, by live chat, phone or email.

P: 1800 490 514 |  E: [email protected]
Connected Design

Design Consulting Autodesk Gold Partner
about design consulting Moving at the Speed of Business

VIEW MORE

The Comprehensive Guide to Autodesk Fabrication Software: CADmep, CAMduct, and ESTmep

Autodesk Fabrication software

The Comprehensive Guide to Autodesk Fabrication Software: CADmep, CAMduct, and ESTmep

Autodesk Fabrication software

Autodesk Fabrication software products, including CADmep, CAMduct, and ESTmep, are powerful tools that enable MEP professionals to generate accurate estimates, create detailed models, and drive fabrication using manufacturer-specific content. 

These tools are essential for MEP professionals, helping them produce more accurate estimates and competitive bids, which are crucial for project success and cost management. In this comprehensive guide, let’s explore the features and workflow between these software solutions.

Understanding Autodesk Fabrication Software

Autodesk Fabrication software
Autodesk Fabrication CADmep

Autodesk Fabrication CADmep is a drafting, detailing, and fabrication software tool that enables mechanical, electrical, and plumbing (MEP) contractors to deliver more accurate and detailed models compliant with MEP standards and protocols. CADmep works within AutoCAD, providing a familiar environment while offering advanced tools specific to MEP detailing.

Autodesk Fabrication CAMduct

Autodesk Fabrication CAMduct is a comprehensive software tool designed for manufacturers and fabricators of HVAC systems. It offers a robust set of features for ductwork fabrication, including a vast library of 3D parametric fixtures and fittings to streamline the fabrication process. CAMduct is particularly adept at connecting directly to cutting machines, enhancing efficiency and reducing waste.

Autodesk Fabrication ESTmep

For cost estimation, Autodesk Fabrication ESTmep provides an indispensable tool for contractors and estimators. It allows users to create accurate, competitive bids based on detailed MEP building systems data. The software supports more informed decision-making with its detailed cost estimates and helps track project status from estimation through to completion.

Benefits of Integrating Fabrication Software with BIM

Building Information Modelling (BIM) has revolutionised how architects, engineers, and construction professionals plan, design, construct, and manage buildings and infrastructure. By integrating them with Autodesk Fabrication software, companies can experience even more benefits with BIM solutions, including:

  1. Improved Collaboration: Integrating BIM with Autodesk Fabrication software like CADmep, CAMduct, and ESTmep facilitates better collaboration among stakeholders. Information flows seamlessly from design to fabrication and installation, ensuring all team members are on the same page.

  2. Enhanced Accuracy: The precision of BIM models is carried through to the fabrication stage, minimising errors and the need for reworks, thus saving time and cost.

  3. Streamlined Workflow: BIM integration allows for a smoother workflow from the initial design to the final construction phase, improving overall project efficiency and output quality.
Connecting Fabrication Software to Revit

Connecting Autodesk Fabrication software to Revit enhances the BIM workflow further. This connection allows for:

  • Direct importation of detailed models from Revit into the Fabrication software for refinement and fabrication.

  • Utilisation of Revit models to create more accurate estimates and manufacturing data in ESTmep and CAMduct.

This integration ensures that the detailed models used in the design phase are leveraged throughout the project lifecycle, from estimation through to fabrication and installation.

Linking CAMduct with Fabrication Machinery

The connection of CAMduct to fabrication machinery underscores Autodesk’s commitment to streamlining production processes. CAMduct comes with features that facilitate direct communication with manufacturing machines, thus enabling:

  • Automated machine programming, which reduces manual inputs and errors.

  • Optimised cutting paths that decrease material waste and time.

  • Real-time data exchange from the software to the machine, ensuring that any design updates are immediately reflected in the production cycle.

Want to Learn More?

To deepen your understanding of Autodesk Fabrication tools and their applications, we recommend exploring the following resources:

  1. Autodesk Official Website: Visit Autodesk’s official page for detailed product descriptions, updates, and support materials for all their fabrication software.


  2. Autodesk YouTube Channel: Check out Autodesk’s YouTube channel for tutorials, user experiences, and expert talks that provide insights into the practical usage of CADmep, CAMduct, and ESTmep.


  3. Design Consulting Blog: Keep an eye on our blog for regular updates, tips, tricks, and in-depth articles about Autodesk products and industry best practices.


  4. Autodesk Community Forums: Join discussions on the Autodesk forums to connect with other users, share experiences, and get answers to your specific questions from a community of experts.


  5. Webinars and Live Events: Participate in webinars and live events hosted by Autodesk and industry leaders. These sessions are great opportunities to learn about new features, network with professionals, and discuss industry trends.

Improve Your Fabrication Workflows With Autodesk Fabrication solutions by Leveraging Design Consulting’s Expertise

Autodesk’s Fabrication software suite—CADmep, CAMduct, and ESTmep—provides powerful tools that, when integrated with BIM processes, especially Revit, can significantly improve the efficiency and accuracy of construction projects. Embracing these tools with the support of Design Consulting’s expert setup and training services will equip your team with the skills needed to succeed.

At Design Consulting, we not only provide Autodesk Fabrication software but also specialise in bespoke setup and training services. Whether you are new to Autodesk products or looking to enhance your team’s proficiency, we have tailored solutions that can meet your needs.

When you work with us, you gain access to:

  • Experienced Instructors: Our certified experts have in-depth knowledge of Autodesk products and are skilled in adult education techniques.

  • Customised Training: We offer training sessions customised to your specific project requirements and team’s skill level.

  • Ongoing Support: Post-training, we provide continuous support to address any issues and ensure your team is getting the most out of the software.

Ready to transform your fabrication processes? Contact Design Consulting today to learn more about our Autodesk Fabrication software solutions and professional training services.

Contact Us

Contact us to find out how we can help your business. Fill out the form below, by live chat, phone or email.

P: 1800 490 514 |  E: [email protected]

Connected Design

Design Consulting Autodesk Gold Partner
about design consulting Moving at the Speed of Business

VIEW MORE

AutoCAD Map 3D: The Perfect Mapping Tool for Engineering and GIS Professionals

AutoCAD Map 3D is a powerful GIS software that allows CAD professionals to create, edit, and visualize geospatial data. It is a comprehensive toolset that includes everything you need to work with maps, 3D models, and other spatial data.
AutoCAD Map 3D GIS Mapping software

AutoCAD Map 3D: The Perfect Mapping Tool for Engineering and GIS Professionals

AutoCAD Map 3D is a powerful GIS software that allows CAD professionals to create, edit, and visualize geospatial data. It is a comprehensive toolset that includes everything you need to work with maps, 3D models, and other spatial data.

AutoCAD Map 3D is a geographic information system (GIS) software that is part of the AutoCAD family of products. It is designed for CAD professionals who need to work with geospatial data. AutoCAD Map 3D includes a comprehensive toolset for creating, editing, and visualizing maps, 3D models, and other spatial data.

Features and Benefits

AutoCAD Map 3D includes a wide range of features for working with geospatial data, including:

  • Data management tools for importing, exporting, and managing spatial data
  • 2D and 3D drafting tools for creating and editing maps and models
  • Visualisation tools for creating interactive maps and 3D models
  • Analysis tools for performing spatial analysis
  • Collaboration tools for sharing data and projects with others

There are many benefits to using AutoCAD Map 3D, including:

  • Increased productivity: AutoCAD Map 3D can help you save time and improve your workflow by providing a comprehensive toolset for working with geospatial data.
  • Improved accuracy: AutoCAD Map 3D can help you create more accurate maps and models by providing a variety of tools for data management, drafting, and visualisation.
  • Enhanced collaboration: AutoCAD Map 3D can help you collaborate with others more effectively by providing tools for sharing data and projects.
  • Increased flexibility: AutoCAD Map 3D is a flexible software that can be used for a variety of purposes, including engineering, construction, and environmental planning.

AutoCAD Map 3D Vs AutoCAD and AutoCAD LT

AutoCAD Map 3D is a more powerful and feature-rich version of AutoCAD than AutoCAD LT and AutoCAD. AutoCAD Map 3D includes all of the features of AutoCAD LT and AutoCAD, plus a number of additional features for working with geospatial data.

FeatureAutoCAD Map 3DAutoCAD LTAutoCAD
Data managementYesNoNo
2D and 3D draftingYesYesYes
VisualizationYesNoNo
AnalysisYesNoNo
CollaborationYesNoNo

The right version of AutoCAD for you depends on your specific needs. If you only need to:

  • Work with geospatial data, then AutoCAD Map 3D is the best choice.
  • Create basic 2D drawings, then AutoCAD LT is a good option.
  • Create basic 3D models or 2D drawings and don’t need any of the advanced features of AutoCAD Map 3D, then AutoCAD is the best choice.

Connecting AutoCAD Map 3D with other apps

AutoCAD Map 3D can be used with other Autodesk apps to create a more comprehensive and integrated workflow. For example, AutoCAD Map 3D can be used with AutoCAD Civil 3D to create 3D models of infrastructure projects. AutoCAD Map 3D can be used with Autodesk 3ds Max to create photorealistic renderings of maps and models.

AutoCAD Map 3D can be connected to a variety of GIS mapping data sources, including:

  • Shapefiles: Shapefiles are a common format for storing vector data. AutoCAD Map 3D can import and export shapefiles.
  • Geodatabases: Geodatabases are a powerful format for storing spatial data. AutoCAD Map 3D can connect to geodatabases hosted on a variety of platforms, including Microsoft SQL Server, Oracle, and IBM DB2.
  • Raster datasets: Raster datasets are a format for storing gridded data. AutoCAD Map 3D can import and export raster datasets.
  • Web services: Web services are a way to access spatial data over the internet. AutoCAD Map 3D can connect to web services that are hosted on a variety of platforms, including ArcGIS Online and Google Maps.

To connect AutoCAD Map 3D to a GIS mapping data source, you can use the following steps:

  1. Open AutoCAD Map 3D.
  2. Click the Map tab.
  3. In the Data Sources panel, click the Add button.
  4. Select the type of data source you want to connect to.
  5. Enter the connection information for the data source.
  6. Click the Connect button.

Once you have connected AutoCAD Map 3D to a GIS mapping data source, you can view and edit the data in AutoCAD Map 3D. You can also use AutoCAD Map 3D to perform spatial analysis on the data.

Here are some of the benefits of connecting AutoCAD Map 3D with GIS mapping data sources:

  • You can access a wider range of spatial data.
  • You can perform more complex spatial analysis.
  • You can share your work with others more easily.
  • You can collaborate with others more effectively.

If you need to work with geospatial data, then connecting AutoCAD Map 3D with GIS mapping data sources is a great way to improve your workflow and productivity.


Tailored Functionality

Organisations can customise AutoCAD for their industries, empowering teams to build and run discipline-specific routines and workflows.

Autodesk AutoCAD 2024 Specialised Toolset Moving at the Speed of Business

AutoCAD Map 3D 2024

Coordinate System Update

AutoCAD Map 3D 2024 supports the new coordinate systems in the following categories:

  • SnakeGrid EWR2
  • NAD83(CSRS) / Alberta 3TM

Refer to the 2024 Help file for further information 

Discover the Right CAD Tool for Your Engineering Needs

Choosing between AutoCAD and AutoCAD Mechanical? Our free eBook offers a detailed comparison to help you make the best choice for your design projects. Gain insights into key features, pricing, and real-world applications.

Download the eBook now to make an informed decision and optimise your workflow.

Ready to get AutoCAD 2024?

Discover how Autodesk AutoCAD 2024 can streamline your workflow, increase productivity, and optimise your design process. 

Get up to 20% Off Software or Services!

Contact us to find out how much money you can save on software, training or other services. Fill out the form below, by live chat, phone or email.

P: 1800 490 514 |  E: [email protected]

Connected Design

Buy Autodesk AutoCAD 2024

AutoCAD 2024 Brochures

PDF Icon
AutoCAD 2024 Brochure
PDF Icon
AutoCAD LT 2024 Brochure
PDF Icon
AutoCAD vs AutoCAD LT 2024

VIEW MORE

AutoCAD Vs AutoCAD LT

AutoCAD vs Plant 3D: Which Software is Right For You?
AutoCAD vs AutoCAD LT Which product is right for you? Learn the differences between these two Autodesk products

Benefits of using AutoCAD vs. AutoCAD LT

AutoCAD® allows users to achieve a level of productivity for design creation that is not matched with AutoCAD LT®. 

Autodesk commissioned a study that explored the productivity and commercial differentiations between AutoCAD and AutoCAD LT when performing tasks ranging from creating geometry to creating plans and elevations, extracting object data, and applying and monitoring CAD standards.

Results showed that AutoCAD could allow a user to generate designs up to 3.9 times quicker* compared with AutoCAD LT, when these tasks were performed by an experienced AutoCAD user.

How AutoCAD Saves More Time Compared to AutoCAD LT

Parametric constraints – Time savings with AutoCAD up to 33%. AutoCAD offers complete geometric and dimensional constraint creation, editing, and management of parametric constraints.

Plans and elevations – Time savings with AutoCAD up to 46%. The 3D modeling tools in AutoCAD allow for easy manipulation to generate 2D plan and elevation objects.

Isometric drafting – Time savings with AutoCAD up to 61%. AutoCAD makes it easy to view 3D objects in isometric views and has visual styles that can be set to hide hidden detail.

Data extraction – Time savings with AutoCAD up to 90%. AutoCAD provides the functionality to extract data and create tables automatically, either in the drawing or in a Microsoft Excel® file.

CAD standards – Time savings with AutoCAD up to 81%. AutoCAD provides CAD standard functionality with a highly efficient method of checking standards against new and existing DWG files.

Text edting (Express Tools) – Time savings with AutoCAD up to 80%. AutoCAD includes Express Tools with advanced workflows when changing and manipulating text.

AutoLISP – Time savings with AutoCAD up to 50%. AutoLISP functionality is available in AutoCAD and AutoCAD LT. Direct access to AutoLISP editors only from AutoCAD
saves time when editing the application.

Markup Import and Markup Assist – Time savings with AutoCAD up to 71%. Using machine learning, AutoCAD can interpret handwritten annotation and suggest conversions to AutoCAD objects, saving time and reducing errors.

Smart Blocks: Placement and Replacement – Time savings with AutoCAD up to 40%.
The Smart Blocks: Replacement tool in AutoCAD provides a simple interface where multiple blocks can be selected and replaced by a chosen block in one operation.

Application programming interface (API) and
the app store – AutoCAD offers an API not available in AutoCAD LT that allows users to automate tedious and time-consuming tasks. AutoCAD users are also able to purchase and download apps in the Autodesk App Store and develop apps to benefit
AutoCAD users on your team.

Autodesk AutoCAD vs AutoCAD LT 2024 Highlights Video

Tailored Functionality

Organisations can customise AutoCAD for their industries, empowering teams to build and run discipline-specific routines and workflows.

Autodesk AutoCAD 2024 Specialised Toolset Moving at the Speed of Business
AutoLISP, a staple feature of AutoCAD desktop, now enables customizations to automate a sequence of commands in AutoCAD on the web 

AutoLISP

AutoCAD LT now includes AutoLISP

Leverage thousands of previously written programs created for use in AutoCAD-based programs. AutoCAD LT supports AutoLISP Source (LSP) files, compiled LSP files, Fast-load AutoLISP (FAS), and Visual LISP Applications (VLX) files.

Markup Import & Markup Assist

Faster cross-platform markup workflows through expanded machine learning capabilities & essential experience improvements 

Faster cross-platform markup workflows through expanded machine learning capabilities & essential experience improvements 

Markup Import Markup Assist​ Moving at the Speed of Business

AutoCAD 2024 Vs AutoCAD LT 2024

AutoCAD 2024 offers more advanced features for 3D modeling, customisation with add-on apps and APIs, rendering, and CAD standards, among other features, while AutoCAD LT 2024 is a more affordable version that still offers many of the essential features for 2D drafting, annotation, and automation. 

FeaturesAutoCAD 2024AutoCAD LT 2024
Find and replace blocks based on other blocks in your drawingYesNo
Stay informed of relevant file changes with details of multi-user activities in a DWG fileYesNo
Utilise AutoLISP programs to automate repetitive tasks and enhance workflowsYesYes
Extend AutoLISP programs with third-party automation libraries, and utilize specialised editors to write and debug programsYesNo
Create and edit 2D geometryYesYes
Annotate drawings with traces, text, dimensions, leaders & tablesYesYes
Customize the ribbon and tool palettesYesYes
Attach and import data from PDF filesYesYes
Share and use data from DGN files, Navisworks, & Bing MapsYesYes
Create and edit 3D models with solids, surfaces, & mesh objectsYesNo
Customize with add-on apps and APIsYesNo
Extract object data to tablesYesNo
Create renderings with lighting, materials, & visual stylesYesNo
Apply and monitor CAD standardsYesNo
Automate counting objects and blocksYesYes
Share drawings with colleagues directly from AutoCAD or AutoCAD LTYesYes
Import feedback and incorporate changes with a click of a buttonYesNo
Learn new features and workflows to work faster with My InsightsYesNo

What's New in Specialised Toolsets

AutoCAD Architecture and MEP 2024

AEC3DPRINT

With AEC3DPRINT command, you can natively export the AEC objects to an STL file format that’s compatible with 3D printing without converting to 3D solids.

Enhanced Design Center Content

New MVBlocks and block references are available in Design Center.

More than 200 new MVBlocks and block references are added to the AutoCAD Architecture (US Imperial) and AutoCAD Architecture (US Metric) content packs for Design Center. The added content is available in metric profile for non-English languages. The content includes external lighting, bathroom accessories, furniture, site, kitchen fittings, and more.

Enhanced Design Center Content Moving at the Speed of Business

Refer to the 2024 Help file for further information 

AutoCAD Mechanical 2024

ANSI/ASME Standard Revision Update

The section line symbol within AutoCAD Mechanical is updated to support the AWS Y14.3 – 2012 standard revision. To support AWS Y14.3 – 2012, all aspects of the section line symbol are revised to correspond with AWS Y14.3 – 2012.

AutoCAD Mechanical continues to support the AWS Y14.3 – 2003 standard revision to allow documents created in previous releases to be opened, edited, and saved without updating the section line symbol standard. By supporting AWS Y14.3 – 2012 and AWS Y14.3 – 2003, you can annotate new and as-built designs using the required standard revision.

ISO Standard Revision Update for Taper and Slope Symbols

The taper and slope symbol within AutoCAD Mechanical is updated to support the ISO 3040:2016(E) standard revision. To support the ISO 3040:2016(E), all aspects of the taper and slope symbol is revised to correspond with ISO 3040:2016(E).

AutoCAD Mechanical continues to support the ISO 3040:2009(E) standard revision to allow documents created in previous releases to be opened, edited, and saved without updating the taper and slot symbol standard. By supporting ISO 3040:2016(E) and ISO 3040:2009(E), you can annotate new and as-built designs using the required standard revision.

Refer to the 2024 Help file for further information 

AutoCAD Plant 3D 2024

Ortho Bill of Materials (BOM)

The Ortho Table Setup dialog box includes simplified options and more table capabilities for orthographic drawings. You can now add the Bill of Materials (BOM) for piping, equipment, steel, as well as nozzle and spool lists into ortho drawings.

Spec and Catalog Editor Enhancements

The Edit Parts and Edit Properties functions are enhanced in both Spec and Catalog Editors.

Edit parts within a selected parts family for inclusion in a spec sheet or catalog.

The Edit Parts and Edit Properties functions are enhanced in both Spec and Catalog Editors. Edit parts within a selected parts family for inclusion in a spec sheet or catalog.

Refer to the 2024 Help file for further information 

Pipe Spec Viewer Enhancements

View all parts available for a specific size in the selected spec. Use the search box to look for specific components in the Pipe Spec Viewer.

Any changes to the size and spec lists are both updated in Pipe Spec Viewer and the Part Insertion panel on the ribbon.

Ortho Single-Line Piping Enhancements

In this release, ortho single-line piping offers more enhancements including a new interface for some piping criteria providing better control when you display piping in a single-line representation in orthographic drawings.

AutoCAD Map 3D 2024

Coordinate System Update

AutoCAD Map 3D 2024 supports the new coordinate systems in the following categories:

  • SnakeGrid EWR2
  • NAD83(CSRS) / Alberta 3TM

Refer to the 2024 Help file for further information 

AutoCAD Electrical 3D 2024

Pipe Spec Viewer Enhancements

Create a schematic symbol table from schematic reports.

The schematic report lists the symbols used in the project along with its description in a table. You can also surf through a particular symbol that is used in various locations of the project.

Wire Type Synchronisation

Wire type can now be synchronized for all wires in the network with the same signal code across the drawings.

In previous releases, when you update the type of the wire connected to the source arrows, the destination wire type was not updated. In AutoCAD Electrical 2024 toolset, when the wire type is updated at the source arrow, all wires in the network are updated to the same wire type of the source. New wire layers are created along with its properties if the destination drawing doesn’t contain the new wire type.

Refer to the 2024 Help file for further information 

Discover the Right CAD Tool for Your Engineering Needs

Choosing between AutoCAD and AutoCAD Mechanical? Our free eBook offers a detailed comparison to help you make the best choice for your design projects. Gain insights into key features, pricing, and real-world applications.

Download the eBook now to make an informed decision and optimise your workflow.

Ready to get AutoCAD 2024?

Discover how Autodesk AutoCAD 2024 can streamline your workflow, increase productivity, and optimise your design process. 

Get up to 20% Off Software or Services!

Contact us to find out how much money you can save on software, training or other services. Fill out the form below, by live chat, phone or email.

P: 1800 490 514 |  E: [email protected]

Connected Design

Buy Autodesk AutoCAD 2024

AutoCAD 2024 Brochures

PDF Icon
AutoCAD 2024 Brochure
PDF Icon
AutoCAD LT 2024 Brochure
PDF Icon
AutoCAD vs AutoCAD LT 2024

VIEW MORE

Civil 3D Vs Infraworks – Workflows and Differences

Learn about the key differences and workflows in Civil 3D vs Infraworks

Civil 3D Vs Infraworks - Workflows and Differences

Civil 3D and Infraworks are two of the most popular civil engineering design software programs on the market. They offer a wide range of features and capabilities that can help civil engineers to design, analyze, and visualize infrastructure projects. However, there are some key differences between the two programs that can affect the best workflow for a particular project.

In this blog post, we will compare and contrast Civil 3D and Infraworks in terms of their features, capabilities, workflows, and pricing. We will also discuss the SEO keywords that are relevant to this topic.

Features and Capabilities

Civil 3D is a powerful CAD software program that offers a wide range of features for civil engineering design. It includes tools for 2D and 3D drafting, surface modeling, land development, pipe networks, storm drainage, and much more. Civil 3D also integrates with other Autodesk products, such as AutoCAD and Autodesk Map 3D, to provide a comprehensive civil engineering design solution.

Infraworks is a conceptual design software program that is designed to help civil engineers to visualize infrastructure projects in the context of their surroundings. It includes tools for creating 3D models of terrain, buildings, and other infrastructure elements. Infraworks also allows users to simulate the impact of different design decisions on the environment and traffic flow.

Workflows between Civil 3D and Infraworks

Civil 3D and Infraworks can be used in a variety of workflows, depending on the specific needs of the project. However, there are some general differences in the way that the two programs are typically used.

Civil 3D is often used for detailed design and documentation of infrastructure projects. It is a good choice for projects that require precise measurements and calculations. Civil 3D can also be used for construction staking and as-built documentation.

Infraworks is often used for conceptual design and planning of infrastructure projects. It is a good choice for projects that require a high level of visualization and collaboration. Infraworks can also be used to create preliminary cost estimates and to identify potential environmental impacts.

Autodesk Civil 3D Lidar imaging capabilities

Here is a table that summarizes the key differences between Civil 3D and Infraworks:

2D and 3D draftingYesYes
Surface modelingYesYes
Land developmentYesYes
Pipe networksYesYes
Storm drainageYesYes
Traffic modelingYesNo
Environmental impact analysisNoYes
VisualizationYesYes
CollaborationYesYes
Cost estimationYesNo
As-built documentationYesNo

As you can see, Civil 3D and Infraworks have a lot of overlap in terms of the commands and features that they offer. However, there are also some key differences between the two programs.

Civil 3D is better suited for detailed design and documentation of infrastructure projects. It offers a wider range of features and capabilities for these tasks, such as traffic modeling and cost estimation.

Infraworks is better suited for conceptual design and planning of infrastructure projects. It is designed to help civil engineers to visualize infrastructure projects in the context of their surroundings. It also offers features for environmental impact analysis and collaboration.

The best program for a particular project will depend on the specific needs of the project. If you are looking for a program that offers a wide range of features and capabilities for detailed design and documentation, then Civil 3D is a good choice. If you are looking for a program that is designed for conceptual design and planning, then Infraworks is a good choice.

Design Consulting Infraworks Moving at the Speed of Business
FeatureCivil 3DInfraworks
PurposeDetailed design and documentationConceptual design and planning
FeaturesWider range of features and capabilitiesMore focused on visualization and collaboration
CostMore expensiveLess expensive
Best forProjects that require precise measurements and calculationsProjects that require a high level of visualization and collaboration

Working between Civil 3D and Infraworks

You can import and export data between Civil 3D and Infraworks in a few different ways:

  • Import an Infraworks model into Civil 3D. To do this, open Civil 3D and click on the Insert tab. In the InfraWorks panel, click Open InfraWorks Model. In the Open InfraWorks Model dialog box, browse to the location of the Infraworks model that you want to import and click Open.
  • Export a Civil 3D drawing to Infraworks. To do this, open Civil 3D and click on the Export tab. In the Export panel, click InfraWorks. In the Export to InfraWorks dialog box, browse to the location where you want to save the Infraworks file and click Save.
  • Link a Civil 3D drawing to an Infraworks model. To do this, open Civil 3D and click on the Data Sources tab. In the Data Sources panel, click Add. In the Add Data Source dialog box, select the InfraWorks DWG option and click Next. In the Select InfraWorks DWG dialog box, browse to the location of the Infraworks DWG file that you want to link to and click Open.

The specific steps for importing, exporting, and linking data between Civil 3D and Infraworks may vary depending on the specific version of the software that you are using. For more detailed instructions, please refer to the documentation for Civil 3D and Infraworks.

Here are some additional tips for importing, exporting, and linking data between Civil 3D and Infraworks:

  • When importing an Infraworks model into Civil 3D, you can choose to import the entire model or a specific selection of objects.
  • When exporting a Civil 3D drawing to Infraworks, you can choose to export the entire drawing or a specific selection of objects.
  • When linking a Civil 3D drawing to an Infraworks model, you can choose to link the entire drawing or a specific selection of objects.
  • It is important to make sure that the coordinate systems of the Civil 3D drawing and the Infraworks model are the same. If the coordinate systems are not the same, you may experience problems when importing, exporting, or linking data between the two programs.
  • It is also important to make sure that the versions of Civil 3D and Infraworks that you are using are compatible. If the versions are not compatible, you may experience problems when importing, exporting, or linking data between the two programs.

Which Program should I Use and When?

You can import and export data between Civil 3D and Infraworks in a few different ways:

  • Import an Infraworks model into Civil 3D. To do this, open Civil 3D and click on the Insert tab. In the InfraWorks panel, click Open InfraWorks Model. In the Open InfraWorks Model dialog box, browse to the location of the Infraworks model that you want to import and click Open.
  • Export a Civil 3D drawing to Infraworks. To do this, open Civil 3D and click on the Export tab. In the Export panel, click InfraWorks. In the Export to InfraWorks dialog box, browse to the location where you want to save the Infraworks file and click Save.
  • Link a Civil 3D drawing to an Infraworks model. To do this, open Civil 3D and click on the Data Sources tab. In the Data Sources panel, click Add. In the Add Data Source dialog box, select the InfraWorks DWG option and click Next. In the Select InfraWorks DWG dialog box, browse to the location of the Infraworks DWG file that you want to link to and click Open.

The specific steps for importing, exporting, and linking data between Civil 3D and Infraworks may vary depending on the specific version of the software that you are using. For more detailed instructions, please refer to the documentation for Civil 3D and Infraworks.

Here are some additional tips for importing, exporting, and linking data between Civil 3D and Infraworks:

  • When importing an Infraworks model into Civil 3D, you can choose to import the entire model or a specific selection of objects.
  • When exporting a Civil 3D drawing to Infraworks, you can choose to export the entire drawing or a specific selection of objects.
  • When linking a Civil 3D drawing to an Infraworks model, you can choose to link the entire drawing or a specific selection of objects.
  • It is important to make sure that the coordinate systems of the Civil 3D drawing and the Infraworks model are the same. If the coordinate systems are not the same, you may experience problems when importing, exporting, or linking data between the two programs.
  • It is also important to make sure that the versions of Civil 3D and Infraworks that you are using are compatible. If the versions are not compatible, you may experience problems when importing, exporting, or linking data between the two programs.

Civil 3D and Infraworks Use Cases

Here are some applications when a Civil 3D user should use Infraworks:

  • Conceptual design: Infraworks is a great tool for conceptual design because it allows you to visualize infrastructure projects in the context of their surroundings. This can help you to identify potential problems and to make better design decisions.
  • Planning: Infraworks can also be used for planning infrastructure projects. It allows you to simulate the impact of different design decisions on the environment and traffic flow. This can help you to choose the best design for the project.
  • Collaboration: Infraworks is a great tool for collaboration because it allows you to share 3D models of infrastructure projects with other team members. This can help to improve communication and to ensure that everyone is on the same page.

Here are some applications when an Infraworks user should use Civil 3D:

  • Detailed design: Civil 3D is the best tool for detailed design because it offers a wider range of features and capabilities than Infraworks. This includes features for traffic modeling, cost estimation, and as-built documentation.
  • Documentation: Civil 3D is also a good tool for documentation because it allows you to create 2D and 3D drawings of infrastructure projects. These drawings can be used to communicate the design to stakeholders and to construct the project.
  • Simulation: Civil 3D can also be used for simulation. It allows you to simulate the behavior of infrastructure projects under different conditions. This can help to identify potential problems and to improve the design of the project.
Autodesk Civil 3D railroad design

Civil 3D Vs Infraworks Conclusion

Civil 3D and Infraworks are two powerful software programs that can be used for a variety of civil engineering design tasks. The best program for a particular project will depend on the specific needs of the project.

If you are looking for a program that offers a wide range of features and capabilities for detailed design and documentation, then Civil 3D is a good choice. If you are looking for a program that is designed for conceptual design and planning, then Infraworks is a good choice.

No matter which program you choose, it is important to make sure that you are familiar with the features and capabilities of the program before you start using it. This will help you to avoid any problems and to get the most out of the program.

Need Software, Training, Setup or Consulting?

If you have any requirements or want to learn more, feel free to contact us on 1800 490 514, email [email protected] or by filling out the form below

Standard Contact Form

Keywords: Civil 3D, infraworks, Civil 3D vs infraworks, Civil engineering design software, Civil engineering, Conceptual design software, Infrastructure design,  civil 3D modeling

VIEW MORE

Autodesk Docs vs Build: Which is a Better Choice?

Autodesk Docs vs Build
Autodesk Construction Cloud

Autodesk Vs Build

Autodesk Docs and Autodesk Build, which includes all the features of Docs, are two cloud-based software solutions part of the Autodesk Construction Cloud that help construction teams manage their projects. Both platforms offer a variety of features for document management, collaboration, and communication. However, there are some key differences between the two platforms that may make one a better fit for your specific needs.

Autodesk Docs

Autodesk Docs is a document management platform that provides a central location for storing, sharing, and collaborating on project documents. It offers a variety of features for organizing and searching documents, as well as for tracking changes and versions. Autodesk Docs also integrates with other Autodesk products, such as BIM 360 and Revit.

Autodesk Build

Autodesk Build is a project management platform that is specifically designed for the construction industry. It offers a variety of features for managing project schedules, costs, and resources. Autodesk Build also integrates with Autodesk Docs, so you can easily access and share project documents.

Compare Autodesk Docs Vs Build

FeatureAutodesk DocsAutodesk Build
Document managementYesYes
CollaborationYesYes
CommunicationYesYes
Project schedulingNoYes
Cost managementNoYes
Resource managementNoYes
Integration with Autodesk productsYesYes
Mobile appYesYes
Autodesk build Autodesk Construction Cloud. Autodesk construction cloud centralised bid management. Autodesk BIM 360 vs Construction Cloud. Autodesk construction cloud design build plan operate Autodesk BIM 360 vs Construction Cloud. bim 360 vs acc, acc vs bim360, acc vs bim 360. Autodesk Construction Cloud vs BIM 360

Autodesk Vs Build – RFI’s

  • Docs: RFIs can be created and tracked in Docs, but they are not as tightly integrated with the rest of the platform as they are in Build.
  • Build: RFIs are a core feature of Build, and they are tightly integrated with the project schedule and budget. This makes it easy to track the status of RFIs and to ensure that they are resolved in a timely manner.

Autodesk Vs Build –

Issue Tracking

  • Docs: Issue tracking is not a core feature of Docs, but it can be enabled through a third-party integration.
  • Build: Issue tracking is a core feature of Build, and it is tightly integrated with the rest of the platform. This makes it easy to track the status of issues and to ensure that they are resolved in a timely manner.

Autodesk Build Features

Quality Management

Autodesk Build offers a variety of features for managing quality. You can create and track quality checklists, which are used to ensure that tasks are completed correctly. You can also create and track quality reports, which are used to identify and track quality issues.

Safety Management

Autodesk Build also offers a variety of features for managing safety. You can create and track safety checklists, which are used to ensure that work areas are safe. You can also create and track safety reports, which are used to identify and track safety issues.

Project Closeout

Autodesk Build offers a variety of features for managing project closeout. You can create and track closeout checklists, which are used to ensure that all project tasks are completed. You can also create and track closeout reports, which are used to document the project’s completion.

Cost Management

Autodesk Build also offers a variety of features for managing cost. You can create and track budgets, track expenses, and generate reports on project costs. You can also create and track change orders, which are used to modify the project scope or budget.

Here are some additional benefits of using Autodesk Build for quality management, safety management, project closeout, and cost management:

  • Increased visibility: Autodesk Build provides a central location for storing all project information, which makes it easy to track progress and identify potential problems.
  • Improved collaboration: Autodesk Build makes it easy for team members to collaborate on projects, even if they are not in the same location.
  • Automated workflows: Autodesk Build automates many of the tasks involved in quality management, safety management, project closeout, and cost management, which frees up team members to focus on other aspects of the project.
  • Real-time data: Autodesk Build provides real-time data on project progress, which allows team members to make informed decisions and take corrective action as needed.

Which platform is right for you?

The best platform for you will depend on your specific needs. If you are looking for a comprehensive document management platform, then Autodesk Docs is a good option. If you are looking for a project management platform with features for scheduling, costs, and resources, then Autodesk Build is a good option.

Autodesk Docs and Autodesk Build are both powerful platforms that can help you manage your construction projects. The best platform for you will depend on your specific needs. If you are not sure which platform is right for you, then I recommend contacting an Autodesk representative for more information.

Download the free eBook: 5 Ways Project Management Technology Helps Construction Owners Stay on Budget and on Time.

5 Ways Project Management Technology Helps Construction Owners Stay on Budget and on Time
ACS Whitepaper

VIEW MORE

Advance Steel Automation: How to Save Time and Improve Accuracy

Advance Steel structural steel fabrication, design and detailing software. Advance Steel Training fundamentals course
advance steel extension for revi Moving at the Speed of Business

Advance Steel Automation: How to Save Time and Improve Accuracy

Advance Steel is a powerful CAD software program that can be used to automate the design and detailing of steel structures. By automating repetitive tasks, Advance Steel can help engineers save time and improve accuracy.

Parametric Connection Library

The parametric connection library in Advance Steel is a powerful tool that can be used to automate the design of steel connections. The library contains a wide variety of connections, which can be customized to meet the specific requirements of a project.

Using the parametric connection library can save engineers a significant amount of time. Instead of manually creating each connection, engineers can simply select the desired connection from the library and modify it as needed.

Autodesk Advance Steel steel. Advance Steel to Revit fabrication workflows, Advance Steel automation

Porta Building

The porta building tool in Advance Steel is a powerful tool that can be used to automate the design of prefabricated steel buildings. The tool includes a variety of features that allow engineers to quickly and easily create porta buildings, including:

  • A library of prefabricated components
  • A wizard that guides engineers through the design process
  • The ability to create custom components
Autodesk Revit and Advance Steel for structural design and fabrication can be synched together

Folded Plate and Stairs

Another way Advance Steel automation is demonstrated is the folded plate and stairs tools which are powerful tools that can be used to automate the design of folded plate structures and stairs. The tools include a variety of features that allow engineers to quickly and easily create folded plate structures and stairs, including:

  • A library of prefabricated components
  • A wizard that guides engineers through the design process
  • The ability to create custom components
Advance Steel sheet metal and folded plate

Ladders and Rail Tools

The ladders and rail tools in Advance Steel are powerful tools that can be used to automate the design of ladders and rails. The tools include a variety of features that allow engineers to quickly and easily create ladders and rails, including:

  • A library of prefabricated components
  • A wizard that guides engineers through the design process
  • The ability to create custom components

Revision Control

Revision control is a system for tracking changes to a design. Advance Steel includes a built-in revision control system that allows engineers to track changes to drawings, parts, and assemblies.

This Advance Steel automation can be helpful for ensuring that the correct version of a design is always used. Additionally, revision control can be used to track the history of a design, which can be helpful for troubleshooting problems.

Generating DXF and NC1 Files

DXF files are a common file format for exchanging CAD data. Advance Steel automation can be used to generate DXF files for a variety of purposes, such as sharing designs with other CAD users or exporting designs to manufacturing software.

Generating DXF files with Advance Steel is a quick and easy process. Simply select the desired objects and click on the “Export to DXF” button.

NC1 files are used to control the operation of CNC machines. Advance Steel can be used to generate NC1 files for a variety of steel fabrication processes, such as punching, cutting, and bending.

This can save a significant amount of time, as it eliminates the need to manually create NC1 files. Additionally, Advance Steel can ensure that the NC1 files are accurate and up-to-date.

Dynamo

Dynamo is a visual programming environment that can be used to automate tasks in Advance Steel. With Dynamo, engineers can create custom scripts that can be used to automate repetitive tasks, such as generating drawings, creating NC1 files, and generating DXF files.

Dynamo can be a powerful tool for automating tasks in Advance Steel. However, it is important to note that Dynamo is a complex tool and requires some programming knowledge to use.

Synchronisation with Revit

Advance Steel can be synchronised with Revit, which allows engineers to automate the import and export of structural BIM and fabrication models. This can save engineers a significant amount of time, as they can avoid having to manually create and update models in both software programs.

The synchronisation between Advance Steel and Revit is bi-directional, which means that changes made in one software program are automatically reflected in the other software program. This ensures that both models are always up-to-date.

Advance Steel to Revit Moving at the Speed of Business

Advance Steel Features

Advance Steel has all the tools of AutoCAD plus: 

  • Document Manager System with revision control to check status, update drawings, track changes and rename drawing numbers.
  • Structural steel beam and column library
  • Folded plate and flatten tools
  • Building Grid
  • Cut Beams and Plates
  • Place bolts, anchors, holes, and shear studs
  • Create welds
  • Connection library – Create, copy and customise
  • Stairs, handrails and cage ladder tools
  • Portable/Gable Frame Tool
  • Mono-pitch Frame tool
  • Bracing tool
  • Purlins, joist and truss tools
  • Cladding tools
  • Clash Check
  • Camera views
  • Automated drawings (requires configuration)
  • 2D Shop Drawings (GA and part)
  • Parts List
  • Export to DXF
  • Export NC1 (CNC Machine)
Advance Steel connections Moving at the Speed of Business

Drawing Webinar Series

Get access to the 4 day drawing webinar series:

  • Understand Drawing style data structure
  • Learn how to create new drawing styles or reuse existing
  • Learn how the modeling impacts drawing output
  • Learn general drawing style concepts for dimensioning
  • Learn basic and advanced filtering for dimensioning objects


Advance Steel Webinar Series

What's new in Advance Steel 2023

Advance Steel features 1 Moving at the Speed of Business
Advance Steel Features 2 Moving at the Speed of Business

Get in Touch

DC is an authorised Autodesk Reseller providing products and services for the Architecture, Engineering, Construction, Infrastructure and Manufacturing Sectors.

Feel free to contact us on 1800 490 514, [email protected], by live chat or fill out the form below.

Contact Form Demo

VIEW MORE

AutoCAD Vs Civil 3D Showdown

AutoCAD and Civil 3D are both powerful CAD software programs, but they have different strengths and weaknesses. This blog post will compare and contrast the two programs, so you can decide which one is right for your needs.

AutoCAD Vs Civil 3D Showdown

AutoCAD and Civil 3D are two of the most popular CAD software programs on the market. AutoCAD is a general-purpose CAD program that can be used for a wide variety of tasks, while Civil 3D is a specialised CAD program designed for civil engineering applications.

In this blog post, we will compare and contrast AutoCAD and Civil 3D. We will discuss their strengths and weaknesses, and we will help you decide which program is right for your needs.

Features

AutoCAD:

  • 2D and 3D drafting
  • Object-based drawing
  • Advanced editing tools
  • Dimensioning and annotation
  • Rendering and visualization
  • Data management
  • Collaboration tools

Civil 3D:

  • Civil engineering-specific tools
  • Alignments
  • Profiles
  • Corridors
  • Pipe networks
  • Land development
  • Surveying
  • Rendering and visualization
  • Data management
  • Collaboration tools

Piping and Drainage

Civil 3D has a number of features that make it well-suited for piping and drainage design. For example, Civil 3D has a tool that can be used to automatically create pipe networks, and it has a tool that can be used to analyze the hydraulics of pipe networks.

Corridor modelling

A powerful tool in Civil 3D that can be used to create 3D models of roads, highways, railways, and other linear features. Corridor models are created by placing 2D sections (assemblies) at incremental locations along a baseline. The assemblies are then joined together to create a continuous 3D model.

Corridor modelling has a number of advantages over traditional 2D drafting methods. First, corridor models are more accurate because they take into account the vertical as well as the horizontal dimensions of the feature being modeled. Second, corridor models are more flexible because they can be easily modified to accommodate changes in the design. Third, corridor models are more efficient because they can be used to generate a variety of output, such as cross-sections, profiles, and surfaces.

Strengths and Weaknesses

Strengths of AutoCAD:

  • More general-purpose
  • Easier to learn
  • More affordable
  • Larger user community

Strengths of Civil 3D:

  • More specialised features
  • More powerful tools
  • Better integration with other Autodesk products
  • More comprehensive documentation

Weaknesses of AutoCAD:

  • Not as specialised as Civil 3D
  • Can be difficult to learn for civil engineers
  • Not as powerful as Civil 3D
  • Lacks some of the civil engineering-specific features of Civil 3D

Weaknesses of Civil 3D:

  • More expensive than AutoCAD
  • More difficult to learn
  • Smaller user community
Autodesk Civil 3D grading optimisation. AutoCAD vs Civil 3D

Survey Surfacing

Civil 3D has a number of features that make it well-suited for survey surfacing. For example, Civil 3D has a tool that can be used to import survey data, and it has a tool that can be used to create 3D surfaces from survey data.

Surfacing and Parcels

Civil 3D has a number of features that make it well-suited for surfacing and parcels. For example, Civil 3D has a tool that can be used to create TIN surfaces, and it has a tool that can be used to create parcels.

Drawing Production

Both AutoCAD and Civil 3D can be used for drawing production. However, Civil 3D has a number of features that make it better suited for this task. For example, Civil 3D has a number of tools that make it easier to create and manage drawing layers, and it has a built-in drawing template that can be used to create consistent drawings.

AutoCAD Vs Civil 3D Conclusion

The best CAD software program for you will depend on your specific needs. If you are a civil engineer, then Civil 3D is the better choice. It has the specialized features and tools you need to create accurate and detailed civil engineering designs.

However, if you are not a civil engineer, or if you need a more general-purpose CAD program, then AutoCAD is a good option. It is easier to learn and more affordable than Civil 3D.

Ultimately, the best way to decide which program is right for you is to try both of them out. You can download free trials of AutoCAD and Civil 3D from the Autodesk website.

AutoCAD and Civil 3D are both powerful CAD software programs. They have different strengths and weaknesses, so it is important to choose the right program for your needs. If you are a civil engineer, then Civil 3D is the better choice. However, if you are not a civil engineer, or if you need a more general-purpose CAD program, then AutoCAD is a good option.

Discover the Right CAD Tool for Your Engineering Needs

Choosing between AutoCAD and AutoCAD Mechanical? Our free eBook offers a detailed comparison to help you make the best choice for your design projects. Gain insights into key features, pricing, and real-world applications.

Download the eBook now to make an informed decision and optimise your workflow.

Download AutoCAD vs Civil 3D Study and Productivity Whitepapers

To download the free whitepapers fill out the form below or feel free to contact us on 1800 490 514, [email protected] to chat about which product is best for you.

Civil 3D CTA

VIEW MORE

Powerful Automated Civil 3D Workflows with These 5 Tips

Get Autodesk Civil 3D Autodesk, Civil 3D Pipe Network Training Essentials Course and other Civil 3D training courses from Design Consulting.

Automate Your Civil 3D Workflows with These 5 Tips

Autodesk Civil 3D grading optimisation. AutoCAD vs Civil 3D

Civil 3D is a powerful software for civil engineering design. It offers a wide range of features for drafting, modeling, and analysis. However, even with all of its features, it can be a time-consuming software to use. This is where automation comes in. Automation can help you save time and improve your productivity.

There are a number of automation tools available. These tools can be used to automate repetitive tasks, such as creating and updating drawings, generating reports, and performing calculations.

In this blog post, we will discuss some of the most popular automation tools and how to use these tools to improve your productivity.

Lisp Routines

Lisp routines are one of the oldest and most popular automation tools. Lisp is a programming language that can be used to create custom commands and functions. Lisp routines can be used to automate almost any task in Civil 3D.

To use Lisp routines, you will need to learn the Lisp programming language. There are many resources available to help you learn Lisp. Once you have learned the basics of Lisp, you can start writing your own Lisp routines.

Visual Basic

Visual Basic is another popular automation tool. Visual Basic is a more powerful programming language than Lisp. This makes it possible to create more complex automation tasks with Visual Basic.

To use Visual Basic, you will need to learn the Visual Basic programming language. There are many resources available to help you learn Visual Basic. Once you have learned the basics of Visual Basic, you can start writing your own Visual Basic macros.

Dynamo for Civil 3D

Dynamo is a new automation tool for Civil 3D. Dynamo is a visual programming language that uses a drag-and-drop interface. This makes it easy to create automation tasks without having to learn a programming language.

To use Dynamo, you will need to install the Dynamo add-in. Once you have installed the add-in, you can start creating your own Dynamo scripts.

Civil 3D API

The API provides a way to automate tasks by writing code that interacts with the software. This code can be written in a variety of programming languages, such as Visual Basic, Python, or C#.

There are many benefits to automating tasks in with the API. These include:

  • Increased productivity: Automation can free up engineers’ time so they can focus on more creative and strategic aspects of their work.
  • Reduced errors: Automation can help to reduce errors by eliminating the need for manual input.
  • Improved consistency: Automation can help to ensure that tasks are performed consistently, regardless of who is doing them.
  • Enhanced collaboration: Automation can make it easier for engineers to collaborate on projects by providing a way to share code and data.

If you are interested in automating tasks with the API, there are a few resources that can help you get started. The Autodesk Developer Network (ADN) provides documentation, tutorials, and sample code for the API. There are also a number of third-party tools that can help you automate tasks as well.

Getting Started

The first step to automating tasks with the API is to create a development environment. This can be done on a personal computer or on a server. Once you have created a development environment, you will need to install the Autodesk ObjectARX SDK. This SDK provides the tools and libraries you need to write code that interacts with Civil 3D.

After you have installed the Autodesk ObjectARX SDK, you can start writing code that automates tasks in Civil 3D. The ADN provides documentation and tutorials that can help you get started. There are also a number of third-party tools that can help you automate tasks in Civil 3D.

Autodesk Civil 3D railroad design

Harnessing the Power of Autodesk Platform Services

Autodesk Platform Services (aka Forge) are a set of cloud-based services that can be used to automate Civil 3D tasks. Autodesk Platform Services include a number of features, such as:

  • The ability to automate tasks using a web browser
  • The ability to store and share data with other users
  • The ability to collaborate on projects with other users

To use Autodesk Platform Services, you will need to create an Autodesk account. Once you have created an account, you can start using the services.

Ready to Automate?

Contact us on 1800 490 514, [email protected] or fill out the contact us form below.

Design Automation

VIEW MORE

Connected Structural Design with the Autodesk Architecture Engineering and Construction Collection

Learn how the Autodesk AEC Collection connects Advance Steel, Revit and other programs for structural design, analysis and fabrication
Design Consulting Architecture Engineering and Construction Collection logo Moving at the Speed of Business

Connected Structural Design with the Autodesk Architecture Engineering and Construction Collection

The construction industry has seen a significant transformation in recent years with the adoption of new technologies and software. Structural engineering is no exception, as it plays a crucial role in the success of any construction project. Autodesk Architecture, Engineering, and Construction (AEC) Industry Collection is a suite of powerful software tools that enable structural engineers and fabricators to streamline their workflows and improve collaboration.

In this blog post, we will explore how Advance Steel, a software tool within the AEC Industry Collection, works with other applications such as Revit, Autodesk Docs, Robot Structural Analysis, Navisworks, and more to create a connected design process. We will also discuss the benefits of this approach for structural engineers and fabricators on construction projects.

How Does Advance Steel Work With Other Applications in the Collection?

With the AEC Industry Collection, structural engineers can create detailed designs, collaborate with architects and other stakeholders, and analyse their designs for efficiency and safety. Fabricators can use the software to create shop drawings and CNC files, and contractors can use it to manage construction projects and ensure that they stay on schedule and on budget.

Advance Steel is a software tool within the AEC Industry Collection that provides 3D modeling and detailing for steel structures. It is designed to streamline the design and fabrication process for steel structures, making it easier for engineers and fabricators to collaborate and ensure accuracy.

Advance Steel can be used to create detailed steel models in 3D, including connections, plates, and bolts. It also provides tools for creating drawings, bills of materials, and NC files for fabrication. With Advance Steel, engineers and fabricators can ensure that their designs are accurate and meet industry standards.

How Advance Steel works with other applications in the AEC Industry Collection

One of the key benefits of the AEC Industry Collection is that it provides a connected design process. This means that engineers and fabricators can use multiple software tools in the collection to streamline their workflows and ensure accuracy.

Here are some of the ways that Advance Steel works with other applications in the AEC Industry Collection:

  1. Revit: Advance Steel can be used with Revit to create detailed steel models that include all of the necessary information for fabrication. Revit can also be used to create detailed architectural and MEP models, which can be linked to the steel model in Advance Steel for coordination.

  2. Autodesk Docs: Autodesk Docs is a cloud-based document management platform that can be used to store and share project information. With Autodesk Docs, engineers and fabricators can collaborate on design files, RFIs, submittals, and more.

  3. Robot Structural Analysis: Robot Structural Analysis is a software tool that can be used to analyse steel structures for safety and efficiency. With Robot Structural Analysis, engineers can perform finite element analysis (FEA) on their steel models to ensure that they meet industry standards.

  4. Navisworks: Navisworks is a software tool that can be used for project coordination and clash detection. With Navisworks, engineers can import steel models from Advance Steel and other software tools to check for clashes and ensure.

  5. Other Applications: The AEC Industry Collection includes a wide range of other software tools that can be used in conjunction with Advance Steel. For example, Fabrication CADmep can be used to create detailed ductwork and piping models that can be linked to the steel model in Advance Steel for coordination.


Benefits of Connected Design for Structural Engineers and Fabricators

The connected design process enabled by the AEC Industry Collection provides several benefits for structural engineers and fabricators. Here are some of the key advantages:

  1. Improved Collaboration: By using multiple software tools in the AEC Industry Collection, engineers and fabricators can collaborate more effectively. They can share design files, coordinate different aspects of the project, and ensure that everyone is working from the same information.

  2. Streamlined Workflows: The connected design process also streamlines workflows by reducing the need for manual data entry and rework. Engineers and fabricators can move seamlessly between different software tools, and the data is automatically synchronised.

  3. Increased Accuracy: By using software tools like Advance Steel, engineers and fabricators can ensure that their designs are accurate and meet industry standards. They can also perform analysis and simulations to ensure that the structure is safe and efficient.

  4. Faster Time-to-Market: The connected design process enables faster time-to-market by reducing the time needed for design and fabrication. This can help construction companies stay on schedule and avoid delays.

  5. Cost Savings: Finally, the connected design process can also lead to cost savings by reducing the need for rework and minimising errors. This can help construction companies stay on budget and avoid costly mistakes.

Ready to Get Connected?

Save up to 20% on Autodesk Software and Services

How Dynamo is Revolutionising Structural Design with Advance Steel and Revit

Dynamo is a visual programming tool that is transforming the way structural engineers and designers work. When combined with software tools like Advance Steel and Revit, it offers several benefits that can help streamline workflows and increase efficiency. In this article, we’ll explore the benefits of using Dynamo with Advance Steel and Revit for structural design.

  1. Automating Repetitive Tasks

One of the main benefits of using Dynamo with Advance Steel and Revit is the ability to automate repetitive tasks. For example, Dynamo can be used to automatically create connections between steel elements in Advance Steel based on predefined rules. This can save time and reduce errors, allowing engineers and designers to focus on more complex tasks.

  1. Enhanced Collaboration

Dynamo also improves collaboration between different teams involved in the structural design process. By using a visual programming language, designers and engineers can easily share scripts and workflows with other team members, regardless of their level of technical expertise. This helps to improve communication and ensures that everyone is working from the same information.

  1. Increased Accuracy and Quality

Using Dynamo with Advance Steel and Revit can help improve the accuracy and quality of structural designs. For example, Dynamo can be used to automatically calculate loads and reactions for a structure, or to optimize the size and shape of steel members. This can lead to more efficient and cost-effective designs, as well as better structural performance.

  1. Streamlined Workflows

Dynamo helps to streamline workflows by eliminating the need for manual data entry and reducing the potential for errors. By automating repetitive tasks and using a visual programming language, engineers and designers can move seamlessly between different software tools, saving time and reducing the potential for delays and mistakes.

  1. Improved Visualization

Finally, using Dynamo with Advance Steel and Revit can improve visualisation of the design. With Dynamo, engineers and designers can create complex geometry and parametric models, allowing for greater flexibility and better visualisation of the structure. This can help identify potential issues and make design decisions more effectively.

FeaturesAutoCADAdvance SteelRevit
2D DraftingComprehensive set of 2D drafting tools, including line, circle, polyline, arc, and text toolsLimited 2D drafting tools, including line, circle, and text toolsLimited 2D drafting tools, including line, circle, and text tools
3D ModelingOffers basic 3D modeling tools, including extrude, revolve, and loft toolsOffers more advanced 3D modeling tools, including parametric modeling tools and the ability to automatically generate steel elementsOffers advanced 3D modeling tools, including parametric modeling tools and the ability to create complex geometry
Steel ModelingLimited steel modeling tools, including the ability to create steel elements manuallyOffers more advanced steel modeling tools, including the ability to automatically generate steel elements and parametric modeling toolsOffers basic steel modeling tools, including the ability to create steel elements manually
Steel DetailingLimited steel detailing tools, including the ability to create drawings of steel elementsOffers more advanced steel detailing tools, including the ability to automatically create part drawings, DXF and NC1 files, and CNC data exportOffers basic steel detailing tools, including the ability to create drawings of steel elements
Connection DesignNo connection design toolsOffers comprehensive connection design tools, including the ability to create and analyze connectionsOffers limited connection design tools, including the ability to create basic connections
Structural AnalysisNo structural analysis toolsOffers more advanced structural analysis tools, including the ability to analyze and optimize steel structuresOffers basic structural analysis tools, including the ability to analyze and check steel structures
FabricationNo fabrication toolsOffers comprehensive fabrication tools, including the ability to create shop drawings, CNC data export, and automatic creation of bills of materialsLimited fabrication tools, including the ability to create shop drawings and bills of materials
CollaborationOffers basic collaboration tools, including the ability to share drawings and collaborate on designOffers more advanced collaboration tools, including the ability to connect to Dynamo and synchronize with Revit modelsOffers advanced collaboration tools, including the ability to connect to Dynamo and synchronize with Advance Steel models

AutoCAD offers a comprehensive set of 2D drafting tools, including line, circle, polyline, arc, and text tools. It also offers basic 3D modeling tools, such as extrude, revolve, and loft tools. However, it has limited steel modeling and detailing tools, connection design, structural analysis, and fabrication tools.

Advance Steel offers more advanced steel modeling and detailing tools than AutoCAD. It can automatically generate steel elements, create part drawings, DXF and NC1 files, and export CNC data. It also has comprehensive connection design and fabrication tools. Advance Steel is specifically designed for steel design and fabrication, making it a powerful tool for structural engineers and steel fabricators.

Revit offers advanced 3D modeling tools and basic steel modeling and detailing tools. It can connect to Dynamo and synchronise with Advance Steel models, which makes it an excellent tool for collaboration with architects and other stakeholders in the building design process.

In summary, the choice between AutoCAD, Advance Steel, and Revit depends on the specific needs of the project and the users. AutoCAD is a general-purpose drafting tool, while Advance Steel is specifically designed for steel design and fabrication, and Revit is an excellent tool for collaboration and building design coordination.


Analysing Structural Designs: Advance Steel Vs Revit Vs Robot Structural Analysis

FeatureAdvance SteelRevitRobot Structural Analysis
Finite Element AnalysisYesYesYes
Static AnalysisYesYesYes
Dynamic AnalysisYesNoYes
Buckling AnalysisYesNoYes
Nonlinear AnalysisYesNoYes
Eigenvalue AnalysisYesNoYes
Response Spectrum AnalysisYesNoYes
Pushover AnalysisYesNoYes
Design OptimizationYesNoYes
Steel Connections AnalysisYesNoYes
Concrete AnalysisNoYesYes
Wood AnalysisNoYesYes
Masonry AnalysisNoYesYes
Design Code CompatibilityMultipleMultipleMultiple
Integration with Other ToolsRevit, DynamoNavisworksRevit, Navisworks

Overall, all three software products offer FEA capabilities for structural analysis, including static analysis and finite element analysis. However, Robot Structural Analysis offers more advanced analysis options such as dynamic analysis, buckling analysis, nonlinear analysis, eigenvalue analysis, response spectrum analysis, and pushover analysis. Advance Steel offers the ability to analyze steel connections, while Revit offers analysis options for concrete, wood, and masonry.

In terms of design code compatibility, all three software products support multiple design codes. Additionally, Revit and Robot Structural Analysis can integrate with Navisworks for clash detection and coordination, while Advance Steel and Revit can connect with Dynamo for automation and optimization of structural designs.


Structural Design Collaboration with the AEC Collection

Structural steel design collaboration is a critical aspect of any construction project. Autodesk AEC Collection offers several collaboration tools, including Navisworks and Autodesk Docs, that can help structural engineers collaborate effectively throughout the design and construction process.

Navisworks is a project review and coordination tool that allows engineers and designers to combine models and data from various sources, including Advance Steel and Revit. Navisworks can help identify and resolve potential design conflicts, allowing for more efficient construction planning and reducing the risk of costly errors during construction.

Autodesk Docs is a cloud-based collaboration tool that allows team members to share and access project information, documents, and models from anywhere and on any device. With Autodesk Docs, structural engineers can collaborate in real-time with other team members, including architects, contractors, and owners. The tool can also help track changes, versioning, and approval workflows, ensuring that all team members are working on the latest version of the project documents.

Connected Structural Design

The Autodesk Architecture Engineering and Construction Collection is a powerful suite of software programs that can help architects create better designs and collaborate more effectively with other professionals in the construction industry. By using programs such as Revit, Navisworks, and Docs, architects can create digital models of buildings and share them with other stakeholders, streamlining the design process and reducing errors. By collaborating with MEP/HVAC, Structural and Civil engineers and designers, architects can ensure that their designs are not only visually appealing but also practical and functional, resulting in better-performing buildings that meet safety and regulatory requirements.

Ready to get your Design Connected?

Discover how Autodesk Architecture Engineering and Construction Collection can streamline your workflow, increase productivity, and optimise your design process. 

Get up to 20% Off Software or Services!

Contact us to find out how much money you can save on software, training or other services. Fill out the form below, by live chat, phone or email.

P: 1800 490 514 |  E: [email protected]

Connected Design

The Autodesk Architecture, Engineering and Construction Collection streamlines design, analysis, and visualization for architecture, engineering, construction, infrastructure, and manufacturing industries. The suite of software programs improves efficiency, reduces errors and rework, and increases cost-effectiveness.

Connected Design with Architecture Engineering and Construction Collection

Click a link below to learn more about Connected Design using the Autodesk Product Design & Manufacturing Collection 

VIEW MORE

Whats New in Autodesk Vault 2024

Check out the latest in mechanical and product design and engineering in What's New in Autodesk Inventor Professional 2024
Check out what's new in the latest Autodesk Vault 2024 release

What's New in Autodesk Vault 2024

Autodesk Vault 2024 is out with a focus on enforcing standards, delivering intuitive tools and administrative enhancements

Autodesk Vault 2024 is out with a focus on enforcing standards, delivering intuitive tools and administrative enhancements. Focus on the Work Export more design formats for downstream collaboration. Create new projects from a template structure. Enforcing Standards Manage and distribute Inventor template and design data. Enforce peer review during the design process. Intuitive Tools for Collaboration User-interface enhancements for more intuitive workflows and workflow enhancements.

Authors: More features for CAD users in Vault 2024 to Focus on the Work

Job Processor: DXF and STEP

Users can export DXF and STEP files for manufacturing, suppliers, and subcontractors as part of the release process.

  • On-demand DXF/STEP publish
  • DXF/STEP publish on state transition
  • Sync LC state and revision on DXF/STEP files
  • DXF/STEP file getting created in vault to use Design Rep classification and PDF like workflow
  • DXF/STEP file publish options like PDF publish options

Copy Design Enhancements

Design re-use efficiency by reducing number of clicks to complete the workflow and pre-checks to prevent errors prior to creating a new design variation.

  • More usability by enabling Copy/Paste in the copy design numbering panel
  • Use the Copy/Paste functionality to edit multiple row values in and excel spreadsheet and then copy them to the Copy Design with one operation
  • More guidance through highlight restriction before copy operations start (property: –)
  • Export File list within the warning dialog

Copy Design BOM Enhancements

Newly copied parts can be assigned to an Item immediately after Copy Design is executed.

Copy Design updates the BOM information in part files without having to open them in Inventor first

Copy Folder Structure

You can setup a new project quickly and start with a known folder structure.

  • Users can create a project folder from a template or previous folder structure
  • Copy Folder Structure permissions and Properties

Save up to 20% on Autodesk Vault Deployments

Insert Punch Tool from Vault

Users can select sheet metal punches from Vault when they are not in the local workspace.

Browse for 3D iFeature shapes from Vault to be inserted into the sheet metal face.

Administrators: Enforcing Vault Standards for Gratere Project Compliance

Inventor Design Data & Template Management

CAD Administrator can create and deploy template updates to users easily through Vault. Users remain up-to-date with templates and design data without manual updates.

The focus in 2024 is to create an Inventor\Vault integrated experience for the Template and Design Data Files with automatic updates of Templates and Design Data within specific workflows.

Peer Review

Control the lifecycle process by requiring a different user to transition to the next state. 

With this new user requirement, you can configure the Vault State transition to require Four Eyes Check and configure multiple rules for which files require Peer Review based on property values.

Job Processor

Apply retry strategy to visualization and custom jobs to reduce administration and user disruption to re-submit such jobs manually.

  • Automatic Retry capability for failed Job
  • Specify retry strategy between 1 and 10 attempts
  • The Job Processor will retry the failed jobs automatically without manual intervention

Thin Client Admin Settings

Administrators can set default columns for all Thin Client users in Autodesk Vault 2024.

Backup/Restore Enhancements

In Vault 2024, there is more flexibility in the Vault Server backup command to assist with backing up specified data components. This enhancement helps customers with large Vault environments that cannot use the existing backup command in the Vault Server.

Participants: Intuitive Vault Tools in 2024 for Project Collaboration

Thin Client – Enhancements

Select the Vault you need at the time of signing into the Thin Client and the Vault drop-down list shows the available Vault on the Server.

  • Improve interactions and control within the Thin Client interface with control for Expanding or Collapsing All for Objects with Structure.

Advanced Search capabilities paired with a modern UI for better experience:

  • Save searches as bookmarks in the browser
  • Search individual workspaces or multiple workspaces
  • Search workspaces of choice with search parameters
  • Search current folders and sub-folders
  • Find latest version only

Inventor Read-Only Vault Add-in

The Vault Add-in in Autodesk Vault Professional 2024 is available in Inventor Read-only, so users can open files and get access to Vault data directly from Inventor Read-only allowing users to review models efficiently without going between applications.

Learn More about Autodesk Vault 2024

Check out the Autodesk Vault 2024 Help

section for more information regarding the 2024 release.

Ready to get Autodesk Vault 2024?

Discover how Autodesk Vault 2024 can streamline your workflow, increase productivity, and optimise your design process. 

Vault is available from Design Consulting on-premise or cloud, so contact us to discuss which instance suits you best.

Get up to 20% Off Software or Services!

Contact us to find out how much money you can save on software, training or other services. Fill out the form below, by live chat, phone or email.

P: 1800 490 514 |  E: [email protected]

Connected Design

Check out what's new in the latest Autodesk Vault 2024 release

VIEW MORE

What’s New in Autodesk Inventor Professional 2024

Check out the latest in mechanical and product design and engineering in What's New in Autodesk Inventor Professional 2024

What's New in Autodesk Inventor Professional 2024

Autodesk Inventor Professional  2024 is out with a focus on new features and over 100 customer driven enhancements for MBD, Part Modeling, Assembly, Drawings, Graphics, Performance, iLogic, Content Center and the API.

Here’s the top features and enhancements in Autodesk Inventor Professional 2024.

General Enhancements

General

It is now possible to set Perspective With Ortho Faces as the default view setting in both Document Settings and Application options.

  • Set ‘Perspective With Ortho Faces’ as the default view setting

Application Options:

  • Display tab > Appearance > Settings >
  • Display Appearance dialog > Initial Display Appearance > Projection

Modeling document:

  • Document Settings > Standard tab > Display Appearance >
  • Settings > Initial Display Appearance > Projection

Graphics

Render Size Limit Removed

Inventor Studio has had, until now, an imposed 4096 x 4096 pixel rendering output. The limitation has been removed and Inventor Studio will render images up to 16K x 16K resolution, depending on what your graphics card supports.

Custom Environment Image Support

The workflow for using custom hdr and exr images with IBL lighting styles is much improved and is supported for both CPU and GPU ray tracing.

Support for IBL backgrounds

GPU ray tracing now supports rendering with IBL backgrounds.

The following enhancements in Graphics have been added:

  • Section view tools expanded
    • Flip
    • Move
    • Rotate
    • End cap
  • Section options added to mini-toolbar
  • Edit and suppress section views in “View Representations”
  • Control Section View end cap preview during section view plane dragging
  • <= 500 parts – end cap shown by default
  • > 500 parts – end cap not shown
  • Override the setting by selecting or deselecting the option in the mini-toolbar
  • Use custom IBL environment
  • GPU ray tracing now supports:
    • IBL environments
    • Threads
  • Ray Tracing UI update

Part Modeling Enhancements

Sheet Metal

Enhanced profile detection on overlapping sketches

Parameter Window

Text and Boolean values can now be exported

  • Boolean has the options of:
    • Text (True or False)
    • Number (0 or 1)
    • Yes or No
  • Hardness

Mark Feature

  • New behaviour section:
    • Project
    • Wrap (new)
  • Choose direction for mark
  • Mark across multiple coplanar surfaces

Assembly Modeling Enhancements

Oriented Minimum Bounding Box

  • Rotate Bounding Boxes to match angle of parts
  • Represents footprint of components more accurately
  • Available in:
    • Simplify
    • Derive
  • Simplify – bounding box edges measured and appear in parameter window

Patterns

Rectangular Pattern

You can now select a revolved face, cylindrical or conical, to define the direction for a component pattern. The Pattern Component command uses the face axis to define the pattern direction. Use the standard controls to flip the direction.

It is not necessary to activate the selector when using an origin axis, clicking the flyout activates the selector and chooses the selected axis. The direction selection does not change with the activation of the selector, you must also select a new direction.

Circular Pattern

Circular pattern for components is enhanced to provide incremental and fitted positioning methods.

Ready to Get Connected?

Save up to 20% on Autodesk Software and Services

New: Finish Feature

The new Finish feature enables you to not only specify the appearance of your parts, components and assemblies, but also the manufacturing process such as material coating or surface finish.

All applied finishes are listed in a new Finishes folder in the browser. You can re-order the finishes in the browser node, suppress, rename or delete them.

In Drawings, a new “Parameters – Finish” type category is added to the Leader Text and the Format Text dialogs to enable Finish information to be used in drawing notes. These parameters will automatically be updated if changed in the modelling environment. This enhances your drawing by adding additional manufacturing process information to the documentation.

Each Finish feature setting has a parameter with corresponding unique name in the “Finish Parameters” category in the Parameters dialog. All Finish parameters can be exported. Exported parameters are displayed in iProperties. Note that change in iProperties doesn’t affect the model finish feature parameters.

The Finish feature can be captured in Model States, iPart an iAssembly.

3D Annotations (MBD) Enhancements

3D Weld Symbols

3D weld symbols are now available as one of the 3D annotation types. Create and edit weld and subweld symbols in a part or assembly model. Then, retrieve the associative symbols in drawings. 3D weld symbols are included in exports to 3D PDF, DWF, and Shared Views.

3DA Envelope Requirement Modifier

The Envelope Requirement modifier is now available for hole notes and dimensions. In the annotation preview, click on a dimension and in the toolbar select the envelope modifier.

Annotation Scale

In this release, 1:5 scale is added to the annotation scale drop down per DIN EN ISO 55455

All Over Modifier

The All Over modifier is now available for feature control annotations.

Drawing Enhancements

Sheet Property

Sheet Name is added as a Sheet Property and can be used in text.

It is now easier to recognize if a filter is applied to the parts list. An icon in the browser and the Parts List dialog displays a filter symbol when one is applied.

Break Line

A change was made to the “Break Out Line” object type for ISO standards. Until now, the “Visible” layer on “Thickness” was set to 0.5 mm. Now, as per the updated standard, the “Break Out Line” object type uses the “Break Line” layer by default with a thickness of 0.25 mm. This also applies to DIN/GB/JIS standards.

Many 2D weld symbols in drawings were updated as per ISO/BSI/DIN/GB standards. The newly introduced 3D weld symbols use ISO, DIN and ANSI standards. The changes include updating the names of fields and adding new fields depending on the selected weld type. The changes were made to Square Butt Welds, Fillet Welds, or Plug Welds for example.

Drawing Line Colour Controls

With this release, color scheme settings can be set for drawing sketch elements. Until now, it was difficult to work with elements if their color conflicted with the sheet color setting. The new Sketch options under the Drafting heading allow the color of sketch elements to be set for the drawing environment.

Revision Clouds

Revision clouds are full-fledged Inventor objects and no longer in the SDK. Add them to drawing sheets or views, move them around, add or delete vertices, and like other annotation styles the formatting is managed using the Styles Editor. Being sketch-based they can be edited either in their cloud state or from the sketch.

Edge Symbol

Starting from this release of Inventor, you can define an Edge Symbol based on ISO 13715:2019 standard. The new Edge Symbol command is added to the Symbols panel of the Annotate tab. The Edge symbol style is added to the drawing Style and Standard Editor.

Tube and Pipe Enhancements

Custom Elbows

In previous versions of Inventor, it was only possible to add a 45 or 90 degree elbow to a rigid pipe run. Starting from this release , it is now possible to apply custom angled elbows.

When a style with Custom Elbows is activated, select the Custom Elbows option in the Route dialog and either use the curved arrow manipulators, or type a value to angle the elbow relative to the current position.

  • When dragged by 45 or 90 degrees, the route is populated with a rigid elbow. Rigid elbow is placed as a Standardpart.
  • When dragged to other than 45 or 90 degrees, the route is populated with a custom elbow. Custom elbow is placed as a Custompart

Minimum and maximum angles are defined in the Custom Angle (CA) column within the Content Center part.

New Custom Elbow Styles

New styles which support the use of custom elbows (Custom Elbow 45, Custom Angle 90) are available in the Tube and Pipe Styles dialog.

iLogic Enhancements

Vault Workflow Enhancements

With Inventor 2024, working with Vault has never been easier. New functions added to iLogic allow Inventor to check out, get files, search Vault, and much more as part of your automations. Vault code snippets added to the editor make it easy to quickly get started.

Add a Custom Content Center Part

You now have the ability to place and define a custom part in iLogic. Create a custom part in Content Center, or insert a standard Content Center part as a custom part, and create a rule to capture the current state. The “AddCustomConterCenterPart” function is created. When you edit the part and repeat the capture operation, iLogic rule updates accordingly. Also, when you edit the rule, the part updates as well.

Close an Open Form

A new function to close an open form is added in this release of Inventor. Note that this is only available for non-modal forms.

Interoperability Enhancements

UCS Support

Both JT and STEP support the option to include UCS on import.

OBJ Import

Performance when opening OBJ files has been improved.

Solid Edge

Support for reading SolidEdge 2023 is added.

Parasolid

Support for importing and exporting Parasolid version 35 is added.

Access to Manual Inspection added to Fusion 360 tools

From within Inventor you can send a part (.ipt) file to Fusion 360 and create manual inspection tasks.

Fusion Exports Workflow

If a change has occurred in the Inventor model state or design view used for a Fusion 360 export, and you click Open in Fusion 360 in the export context menu, you are notified that the Inventor model and Fusion 360 model are out of sync and are given the option to update the Fusion 360 model before opening it.

Learn More about Autodesk Inventor 2024

Ready to get Inventor Professional 2024?

Discover how Autodesk Inventor 2024 can streamline your workflow, increase productivity, and optimise your design process. 

Get up to 20% Off Software or Services!

Contact us to find out how much money you can save on software, training or other services. Fill out the form below, by live chat, phone or email.

P: 1800 490 514 |  E: [email protected]

Connected Design

Check out the latest in mechanical and product design and engineering in What's New in Autodesk Inventor Professional 2024

VIEW MORE

What’s New in Autodesk AutoCAD 2024

check out the latest ion AutoCAD 2024 with specialized toolsets. The essential software for industries such as manufacturing, engineering, construction, and infrastructure. Its industry-specific workflows, such as BIM and collaboration tools, help professionals to create accurate and efficient designs. Features like PDF import, DWG compare, data extraction, dynamic blocks, and layer management make AutoCAD a versatile and powerful tool for 2D drafting and 3D modeling.

What's New in Autodesk AutoCAD 2024

Autodesk AutoCAD 2024 is out with a focus on Accelerating Creativity, Tailored Functionality and a Connected Design Experience.

AutoCAD 2024 Categories Moving at the Speed of Business

Autodesk AutoCAD 2024 Overview

Accelerating Creativity

Focus on quickly creating and collaborating on innovative solutions using assistive machine learning technology to improve design workflows.

The performance enhancements in AutoCAD 2024 really stand out—both with how fast it opens and the speed of switching between models and view ports. It’s much faster than any previous versions.
Michael Shurgalla
Senior Design Technology Specialist, Merrick

Activity Insights

Bridge information gaps in collaborative AutoCAD workflows and stay connected to essential data throughout project lifecycles

My Insights Macro Advisor & Dashboard

Provides valuable information to you at the right time and in the right context to assist with steps that you can automate.

Count & Blocks Palette

Counting blocks is now up to 70% faster and reusing design content with blocks is up to 47% faster.

Autodesk AutoCAD 2024 Macro Advisor. Provides valuable information to you at the right time and in the right context to assist with steps that you can automate.
What's New in Autodesk AutoCAD 2024 - Automatically place blocks in your drawing based on where you’ve inserted the same ones thus far, reducing the number of clicks and saving you valuable time in the process.

Smart Blocks: Placement and Replacement

Automatically place blocks in your drawing based on where you’ve inserted the same ones thus far, reducing the number of clicks and saving you valuable time in the process.

Quickly find the blocks you need with machine learning powered functionality, delivering powerful time-saving automations.

Tailored Functionality

Organisations can customise AutoCAD for their industries, empowering teams to build and run discipline-specific routines and workflows.

Autodesk AutoCAD 2024 Specialised Toolset Moving at the Speed of Business

Ready to Get Connected?

Save up to 20% on Autodesk Software and Services

ACAD for Mac – M series chip

Added support for Apple Silicon increased AutoCAD for Mac’s overall performance by 2x*

Connected Design Experience

Autodesk creates an ecosystem of industry-leading design software and technology partners.

Web AutoLISP APIs

AutoLISP, a staple feature of AutoCAD desktop, now enables customisations to automate a sequence of commands in AutoCAD on the web 

AutoLISP, a staple feature of AutoCAD desktop, now enables customizations to automate a sequence of commands in AutoCAD on the web 

AutoLISP

AutoCAD LT now includes AutoLISP

Leverage thousands of previously written programs created for use in AutoCAD-based programs. AutoCAD LT supports AutoLISP Source (LSP) files, compiled LSP files, Fast-load AutoLISP (FAS), and Visual LISP Applications (VLX) files.

Markup Import & Markup Assist

Faster cross-platform markup workflows through expanded machine learning capabilities & essential experience improvements 

Markup Import & Markup Assist

Faster cross-platform markup workflows through expanded machine learning capabilities & essential experience improvements 

Markup Import Markup Assist​ Moving at the Speed of Business

Migrating Custom Settings

The CUI, tool palettes, and templates have undergone enhancements to facilitate the transfer of customised files and locations.

To utilise personalized configurations:

  1. Access the Autodesk AutoCAD <product and release> folder drop-down list from the Windows Start menu. Choose Migrate From a Previous Release.
  2. In the resulting Migrate Custom Settings dialog box, specify the release you wish to migrate from.
  3. Select the customized settings you want to transfer to the latest release.

Tab Improvements

The Start, File and Layout Tabs have been improved.

Trace Updates

Enhancements to the Trace environment continue, with the introduction of the COPYFROMTRACE command and additional settings controls on the toolbar.

Autodesk Docs Improvements

The following improvements have been made to Autodesk Docs:

  • Improved support and performance when viewing large files on Autodesk Docs.
  • Improved Desktop Connector resulting in improved performance displaying a drawing in the Start tab and opening a drawing from Autodesk Docs.
  • Improved navigation on the Start tab for drawings stored on Autodesk Docs

AutoCAD 2024 Vs AutoCAD LT 2024

AutoCAD 2024 offers more advanced features for 3D modeling, customisation with add-on apps and APIs, rendering, and CAD standards, among other features, while AutoCAD LT 2024 is a more affordable version that still offers many of the essential features for 2D drafting, annotation, and automation. 

FeaturesAutoCAD 2024AutoCAD LT 2024
Find and replace blocks based on other blocks in your drawingYesNo
Stay informed of relevant file changes with details of multi-user activities in a DWG fileYesNo
Utilise AutoLISP programs to automate repetitive tasks and enhance workflowsYesYes
Extend AutoLISP programs with third-party automation libraries, and utilize specialised editors to write and debug programsYesNo
Create and edit 2D geometryYesYes
Annotate drawings with traces, text, dimensions, leaders & tablesYesYes
Customize the ribbon and tool palettesYesYes
Attach and import data from PDF filesYesYes
Share and use data from DGN files, Navisworks, & Bing MapsYesYes
Create and edit 3D models with solids, surfaces, & mesh objectsYesNo
Customize with add-on apps and APIsYesNo
Extract object data to tablesYesNo
Create renderings with lighting, materials, & visual stylesYesNo
Apply and monitor CAD standardsYesNo
Automate counting objects and blocksYesYes
Share drawings with colleagues directly from AutoCAD or AutoCAD LTYesYes
Import feedback and incorporate changes with a click of a buttonYesNo
Learn new features and workflows to work faster with My InsightsYesNo

What's New in Specialised Toolsets

AutoCAD Architecture and MEP 2024

AEC3DPRINT

With AEC3DPRINT command, you can natively export the AEC objects to an STL file format that’s compatible with 3D printing without converting to 3D solids.

Enhanced Design Center Content

New MVBlocks and block references are available in Design Center.

More than 200 new MVBlocks and block references are added to the AutoCAD Architecture (US Imperial) and AutoCAD Architecture (US Metric) content packs for Design Center. The added content is available in metric profile for non-English languages. The content includes external lighting, bathroom accessories, furniture, site, kitchen fittings, and more.

Enhanced Design Center Content Moving at the Speed of Business

Refer to the 2024 Help file for further information 

AutoCAD Mechanical 2024

ANSI/ASME Standard Revision Update

The section line symbol within AutoCAD Mechanical is updated to support the AWS Y14.3 – 2012 standard revision. To support AWS Y14.3 – 2012, all aspects of the section line symbol are revised to correspond with AWS Y14.3 – 2012.

AutoCAD Mechanical continues to support the AWS Y14.3 – 2003 standard revision to allow documents created in previous releases to be opened, edited, and saved without updating the section line symbol standard. By supporting AWS Y14.3 – 2012 and AWS Y14.3 – 2003, you can annotate new and as-built designs using the required standard revision.

ISO Standard Revision Update for Taper and Slope Symbols

The taper and slope symbol within AutoCAD Mechanical is updated to support the ISO 3040:2016(E) standard revision. To support the ISO 3040:2016(E), all aspects of the taper and slope symbol is revised to correspond with ISO 3040:2016(E).

AutoCAD Mechanical continues to support the ISO 3040:2009(E) standard revision to allow documents created in previous releases to be opened, edited, and saved without updating the taper and slot symbol standard. By supporting ISO 3040:2016(E) and ISO 3040:2009(E), you can annotate new and as-built designs using the required standard revision.

Refer to the 2024 Help file for further information 

AutoCAD Plant 3D 2024

Ortho Bill of Materials (BOM)

The Ortho Table Setup dialog box includes simplified options and more table capabilities for orthographic drawings. You can now add the Bill of Materials (BOM) for piping, equipment, steel, as well as nozzle and spool lists into ortho drawings.

Spec and Catalog Editor Enhancements

The Edit Parts and Edit Properties functions are enhanced in both Spec and Catalog Editors.

Edit parts within a selected parts family for inclusion in a spec sheet or catalog.

The Edit Parts and Edit Properties functions are enhanced in both Spec and Catalog Editors. Edit parts within a selected parts family for inclusion in a spec sheet or catalog.

Refer to the 2024 Help file for further information 

Pipe Spec Viewer Enhancements

View all parts available for a specific size in the selected spec. Use the search box to look for specific components in the Pipe Spec Viewer.

Any changes to the size and spec lists are both updated in Pipe Spec Viewer and the Part Insertion panel on the ribbon.

Ortho Single-Line Piping Enhancements

In this release, ortho single-line piping offers more enhancements including a new interface for some piping criteria providing better control when you display piping in a single-line representation in orthographic drawings.

AutoCAD Map 3D 2024

Coordinate System Update

AutoCAD Map 3D 2024 supports the new coordinate systems in the following categories:

  • SnakeGrid EWR2
  • NAD83(CSRS) / Alberta 3TM

Refer to the 2024 Help file for further information 

AutoCAD Electrical 3D 2024

Pipe Spec Viewer Enhancements

Create a schematic symbol table from schematic reports.

The schematic report lists the symbols used in the project along with its description in a table. You can also surf through a particular symbol that is used in various locations of the project.

Wire Type Synchronisation

Wire type can now be synchronized for all wires in the network with the same signal code across the drawings.

In previous releases, when you update the type of the wire connected to the source arrows, the destination wire type was not updated. In AutoCAD Electrical 2024 toolset, when the wire type is updated at the source arrow, all wires in the network are updated to the same wire type of the source. New wire layers are created along with its properties if the destination drawing doesn’t contain the new wire type.

Refer to the 2024 Help file for further information 

Discover the Right CAD Tool for Your Engineering Needs

Choosing between AutoCAD and AutoCAD Mechanical? Our free eBook offers a detailed comparison to help you make the best choice for your design projects. Gain insights into key features, pricing, and real-world applications.

Download the eBook now to make an informed decision and optimise your workflow.

Ready to get AutoCAD 2024?

Discover how Autodesk AutoCAD 2024 can streamline your workflow, increase productivity, and optimise your design process. 

Get up to 20% Off Software or Services!

Contact us to find out how much money you can save on software, training or other services. Fill out the form below, by live chat, phone or email.

P: 1800 490 514 |  E: [email protected]

Connected Design

Buy Autodesk AutoCAD 2024

AutoCAD 2024 Brochures

PDF Icon
AutoCAD 2024 Brochure
PDF Icon
AutoCAD LT 2024 Brochure
PDF Icon
AutoCAD vs AutoCAD LT 2024

VIEW MORE

Connected Infrastructure Design with the Autodesk Architecture Engineering and Construction Collection

Connected infrastructure design with the Autodesk Architecture Engineering and Construction Collection
Design Consulting Architecture Engineering and Construction Collection logo Moving at the Speed of Business

Connected Infrastructure Design with the Autodesk Architecture Engineering and Construction Collection

Civil engineering projects involve complex designs and planning. For a successful project, the various components of the design and planning process must work together seamlessly. Autodesk’s Architecture Engineering and Construction Industry Collection offers a suite of software tools that allow for connected design in infrastructure projects. The collection integrates different applications, including Civil3D, Revit, Autodesk Docs, and InfraWorks, to enable civil engineers to work collaboratively and efficiently. This blog post will explore how Civil3D works with other applications in the collection, the benefits of connected design for civil engineers, and infrastructure projects.

How Does Civil3D Work With Other Applications in the Collection?

Civil3D is a software tool for civil engineers that helps in the design and analysis of infrastructure projects such as roads, highways, and land development. Civil3D works seamlessly with other applications in the collection to allow for connected design in infrastructure projects.

Revit is a software tool for architects and engineers that allows for the creation of detailed building models. Revit can import Civil3D data, allowing architects to see how buildings interact with the surrounding infrastructure.

Autodesk Docs is a cloud-based document management system that enables teams to collaborate on project documentation in real-time. Civil engineers can use Autodesk Docs to manage project documentation, including design plans, construction schedules, and specifications.

InfraWorks is a software tool that allows for the creation of 3D models of infrastructure projects. Civil engineers can use InfraWorks to visualize the impact of infrastructure projects on the surrounding environment. InfraWorks can also import data from Civil3D, enabling the creation of detailed 3D models of infrastructure projects.

The Benefits of Connected Design for Civil Engineers and Infrastructure Projects

Connected design offers several benefits for civil engineers and infrastructure projects. Let’s explore some of these benefits in more detail.

Improved Collaboration

One of the main benefits of connected design is improved collaboration between engineers and other members of the project team. By using software tools like Civil3D, Revit, Autodesk Docs, and InfraWorks, engineers can work together in real-time to make changes and updates to the model. This collaborative approach can lead to more efficient and effective decision-making, which can ultimately save time and reduce errors in the design process. Connected design also allows for better communication between team members, as everyone has access to the same data and can easily share their ideas and feedback.

Streamlined Design Process Connected design also streamlines the design process for civil engineers. With software tools like Civil3D, engineers can create accurate and detailed 3D models of their designs, which can be easily imported into other applications like Revit and InfraWorks. This integration between different software tools eliminates the need for manual data transfer, which can be time-consuming and error-prone. The streamlined design process also allows for faster iteration and decision-making, as engineers can quickly make changes and updates to the model based on feedback from other team members.

More Accurate and Detailed Modeling

Connected design enables civil engineers to create more accurate and detailed models of their designs. With software tools like Civil3D, engineers can create 3D models that accurately represent the real-world conditions of the project site. This level of detail allows engineers to analyze and test their designs more thoroughly, which can help identify potential issues and prevent costly mistakes during construction. More accurate and detailed modeling also enables engineers to optimize their designs for efficiency, reducing the overall cost and environmental impact of the project.

Better Data Management Connected design also provides better data management for civil engineers. With software tools like Autodesk Docs, engineers can store and manage all project data in one central location. This eliminates the need for manual data transfer and ensures that all team members have access to the most up-to-date information. Better data management also enables engineers to track changes and updates to the design over time, which can be helpful for future maintenance and repairs.

Enhanced Visualisation

Finally, connected design enables enhanced visualization for civil engineers. With software tools like InfraWorks, engineers can create 3D models of entire cities and infrastructure projects, which can be used to visualize the impact of the project on the surrounding environment. Enhanced visualization can also be helpful for presenting designs to stakeholders and the public, as it provides a clear and detailed representation of the project.

Unlocking the Potential of Connected Civil Engineering Design with Autodesk's AEC Industry Collection

Civil 3D, InfraWorks, and Revit are all part of the Autodesk Architecture, Engineering, and Construction (AEC) industry collection, and are designed to work together for connected design workflows.

InfraWorks is used for creating and visualizing large-scale infrastructure projects, such as roads, highways, and airports. It provides tools for creating 3D models of proposed designs, analyzing the impacts of these designs on the surrounding environment, and sharing and collaborating with other stakeholders.

Civil 3D, on the other hand, is focused on detailed civil engineering design, such as grading, drainage, and road design. It allows for the creation of detailed design models, analysis of earthwork quantities, and the creation of construction documentation.

Revit is a BIM software that provides tools for creating and managing detailed 3D models of buildings and structures. It can be used to create and analyze structural designs, as well as to manage building information throughout the design and construction process.

When used together, these tools enable a connected design workflow that allows for the creation and analysis of both the infrastructure and the buildings and structures that will be integrated into it. InfraWorks can be used to create a preliminary design of the infrastructure project, which can then be imported into Civil 3D for detailed design and analysis. Revit models can also be integrated into the design process, allowing for the creation of detailed building information models that can be analyzed in the context of the surrounding infrastructure.

Overall, the connected design workflow enabled by these tools allows for greater collaboration and efficiency throughout the design and construction process, leading to better outcomes for infrastructure projects.


Ready to Get Connected?

Save up to 20% on Autodesk Software and Services

AutoCAD vs. AutoCAD Civil 3D vs. Revit

AutoCAD is a general-purpose CAD software used for 2D drafting and 3D modeling, whereas Civil 3D is specifically designed for civil engineering tasks such as road design and land development. Revit is a BIM software used for building design and construction documentation. While AutoCAD and Civil 3D are more focused on geometric design, Revit allows for the creation of detailed 3D models with parametric design features. Civil 3D and Revit also offer collaboration features such as cloud-based sharing and real-time updates, which are not available in AutoCAD. The choice between these software depends on the specific needs and tasks of the project.

FeaturesAutoCADCivil 3DRevit
2D DraftingYesNoYes
3D ModelingYesYesYes
Geometric DesignYesYesLimited
Civil Engineering DesignNoYesYes
Road DesignNoYesLimited
Land DevelopmentNoYesLimited
BIM FeaturesNoNoYes
Parametric DesignNoNoYes
Cloud-Based SharingNoYesYes
Real-Time UpdatesNoYesYes
Bridge DesignNoYesYes
TopographyNoYesYes
Civil Structural EngineeringNoYesYes


Civil 3D vs. Infraworks

Civil 3D and InfraWorks are both part of the Autodesk AEC industry collection and are commonly used for civil engineering and infrastructure design projects. While they share some similarities, they have distinct differences in terms of their focus and capabilities.

Civil 3D is primarily focused on detailed design for civil engineering projects, such as grading, drainage, and road design. It is a powerful tool for creating accurate 3D models of proposed designs and analysing earthwork quantities, as well as for creating construction documentation. Civil 3D is ideal for engineers who need precise control over the design process and require a high level of detail and accuracy.

InfraWorks, on the other hand, is focused on conceptual design and visualization for large-scale infrastructure projects, such as highways, airports, and rail networks. It provides tools for creating 3D models of proposed designs, analyzing the impacts of these designs on the surrounding environment, and sharing and collaborating with other stakeholders. InfraWorks is ideal for early-stage design, where the focus is on understanding the potential impacts of a project and communicating that information to stakeholders.

When used together, Civil 3D and InfraWorks enable a connected design workflow that allows for the creation and analysis of both the detailed civil engineering design and the larger-scale infrastructure design. Civil 3D can be used to create detailed design models, which can then be imported into InfraWorks for visualisation and analysis in the context of the surrounding environment. InfraWorks models can also be used to create preliminary designs that can be refined and detailed in Civil 3D.

A feature comparison matrix for Civil 3D and InfraWorks might include the following:

FeatureCivil 3DInfraWorks
Detailed designYesNo (focused on conceptual design)
Earthwork quantitiesYesNo
Terrain modelingYesYes
Analysis toolsYesYes
VisualisationLimited (focused on detailed design)Extensive (focused on conceptual design)
CollaborationLimited (focused on detailed design)Extensive (focused on conceptual design)

Overall, the connected design workflow enabled by Civil 3D and InfraWorks allows for greater collaboration and efficiency throughout the design and construction process, leading to better outcomes for infrastructure projects. Civil 3D is ideal for detailed design, while InfraWorks is ideal for early-stage design and visualisation.

Empowering Civil Engineering Design with Dynamo for Civil 3D: Streamline Workflows and Boost Efficiency

Dynamo for Civil 3D is a powerful tool that allows users to automate complex design tasks and create custom workflows for Civil 3D. Dynamo is a visual programming language that can be used to create custom scripts that automate repetitive design tasks, such as creating road alignments, profiles, and surfaces.

With Dynamo, Civil 3D users can create custom tools and workflows that are tailored to their specific project needs. For example, users can create scripts that automatically generate designs based on predefined parameters, or scripts that analyze and optimize designs for cost and efficiency.

The use of Dynamo for Civil 3D can significantly streamline the design process, reduce errors, and improve project outcomes. By automating repetitive tasks, engineers and designers can focus on higher-level design decisions and creative problem-solving.

Connected Infrastructure Design

The Autodesk Architecture Engineering and Construction Collection is a powerful suite of software programs that can help architects create better designs and collaborate more effectively with other professionals in the construction industry. By using programs such as Revit, Navisworks, and Docs, architects can create digital models of buildings and share them with other stakeholders, streamlining the design process and reducing errors. By collaborating with MEP/HVAC, Structural and Civil engineers and designers, architects can ensure that their designs are not only visually appealing but also practical and functional, resulting in better-performing buildings that meet safety and regulatory requirements.

Ready to get your Design Connected?

Discover how Autodesk Architecture Engineering and Construction Collection can streamline your workflow, increase productivity, and optimise your design process. 

Get up to 20% Off Software or Services!

Contact us to find out how much money you can save on software, training or other services. Fill out the form below, by live chat, phone or email.

P: 1800 490 514 |  E: [email protected]
Connected Design

The Autodesk Architecture, Engineering and Construction Collection streamlines design, analysis, and visualization for architecture, engineering, construction, infrastructure, and manufacturing industries. The suite of software programs improves efficiency, reduces errors and rework, and increases cost-effectiveness.

Connected Design with Architecture Engineering and Construction Collection

Click a link below to learn more about Connected Design using the Autodesk Product Design & Manufacturing Collection 

VIEW MORE

Connected Architecture Design with the Autodesk Architecture Engineering and Construction Collection

Connected Architecture Design with the Architecture Engineering and Construction Collection
Design Consulting Architecture Engineering and Construction Collection logo Moving at the Speed of Business

Connected Architecture Design with the Autodesk Architecture Engineering and Construction Collection

The field of architecture has come a long way from hand-drawn sketches and blueprints. With the rise of technology, architects now have access to a wide range of software tools that can help them design and construct buildings more efficiently. One such tool is the Autodesk Architecture Engineering and Construction (AEC) Collection, a suite of software programs designed to facilitate connected design and collaboration among architects, engineers, and other construction professionals.

Understanding Autodesk AEC Collection

The Autodesk AEC Collection is a comprehensive suite of software programs that includes tools for building information modeling (BIM), 2D and 3D design, visualization, and analysis. It includes software programs such as Revit, AutoCAD, Navisworks, and Docs, among others. By using the AEC Collection, architects can create, manage, and share their design data more effectively, resulting in a more streamlined and efficient design process.

The Benefits of Connected Architecture Design

Connected design refers to the process of collaborating with other professionals involved in the construction process. By working together and sharing information, architects, engineers, and builders can reduce errors, speed up the design process, and ultimately create better buildings. Connected design also enables architects to incorporate feedback from other stakeholders, resulting in a more comprehensive and effective design.

Collaborating with Revit in AEC Collection

One of the key tools in the AEC Collection is Revit, a BIM software program that allows architects to design and collaborate on building projects in real-time. Revit enables architects to create a digital model of a building, complete with all the necessary information, such as dimensions, materials, and structural details. This model can then be shared with other professionals in the construction process, such as engineers and builders, to facilitate collaboration and ensure a more efficient design process.

Ready to Get Connected?

Save up to 20% on Autodesk Software and Services

Connecting with Navisworks and Docs

Navisworks and Docs are two other software programs included in the AEC Collection that can help streamline the design process. Navisworks is a project review software that allows architects and engineers to visualise and analyse their designs in 3D. This can help identify any potential clashes or issues before construction begins, reducing the likelihood of errors and delays. Docs, on the other hand, is a cloud-based collaboration tool that enables architects to share and manage design data with other professionals in real-time, from any location.

AutoCAD vs. AutoCAD Architecture vs. Revit

While all three software programs are used in the architecture industry, they serve different purposes. AutoCAD is a 2D drafting and design software program, while AutoCAD Architecture is a 3D design tool specifically for architects. Revit, on the other hand, is a BIM software program that enables architects to create digital models of buildings with all the necessary information. While each program has its own strengths and weaknesses, architects can use them together in the AEC Collection to create a more comprehensive and effective design.

Tool/CommandAutoCADAutoCAD ArchitectureRevit
2D drafting✔️  
3D design ✔️✔️
Walls ✔️✔️
Doors ✔️✔️
Windows ✔️✔️
Stairs ✔️✔️
Roofs ✔️✔️
Slabs/Floors ✔️✔️
Structural elements  ✔️
MEP/HVAC  ✔️
Building Information Modelling (BIM)  ✔️

Collaboration with Other Disciplines in AEC Collection:

The AEC Collection also includes software programs designed for MEP/HVAC, Structural and Civil engineering and design. By working together with these professionals, architects can ensure that their designs are not only visually appealing but also practical and functional. MEP/HVAC software programs such as AutoCAD MEP and Revit MEP enable architects to create accurate and detailed mechanical, electrical, and plumbing (MEP) systems. This ensures that these systems are integrated seamlessly into the building design, resulting in better performance and energy efficiency.

Structural engineering software programs such as Revit Structure and Robot Structural Analysis can help architects design structurally sound buildings that can withstand various forces and loads. By incorporating these programs into the design process, architects can create more efficient and cost-effective designs that meet safety requirements.

Civil engineering software programs such as AutoCAD Civil 3D and InfraWorks enable architects to design roadways, bridges, and other infrastructure projects with accuracy and precision. By working together with civil engineers, architects can ensure that their designs are integrated into the surrounding environment and meet the necessary safety and regulatory requirements.

Connected Architecture Design

The Autodesk Architecture Engineering and Construction Collection is a powerful suite of software programs that can help architects create better designs and collaborate more effectively with other professionals in the construction industry. By using programs such as Revit, Navisworks, and Docs, architects can create digital models of buildings and share them with other stakeholders, streamlining the design process and reducing errors. By collaborating with MEP/HVAC, Structural and Civil engineers and designers, architects can ensure that their designs are not only visually appealing but also practical and functional, resulting in better-performing buildings that meet safety and regulatory requirements.

Ready to get your Design Connected?

Discover how Autodesk Architecture Engineering and Construction Collection can streamline your workflow, increase productivity, and optimise your design process. 

Get up to 20% Off Software or Services!

Contact us to find out how much money you can save on software, training or other services. Fill out the form below, by live chat, phone or email.

P: 1800 490 514 |  E: [email protected]
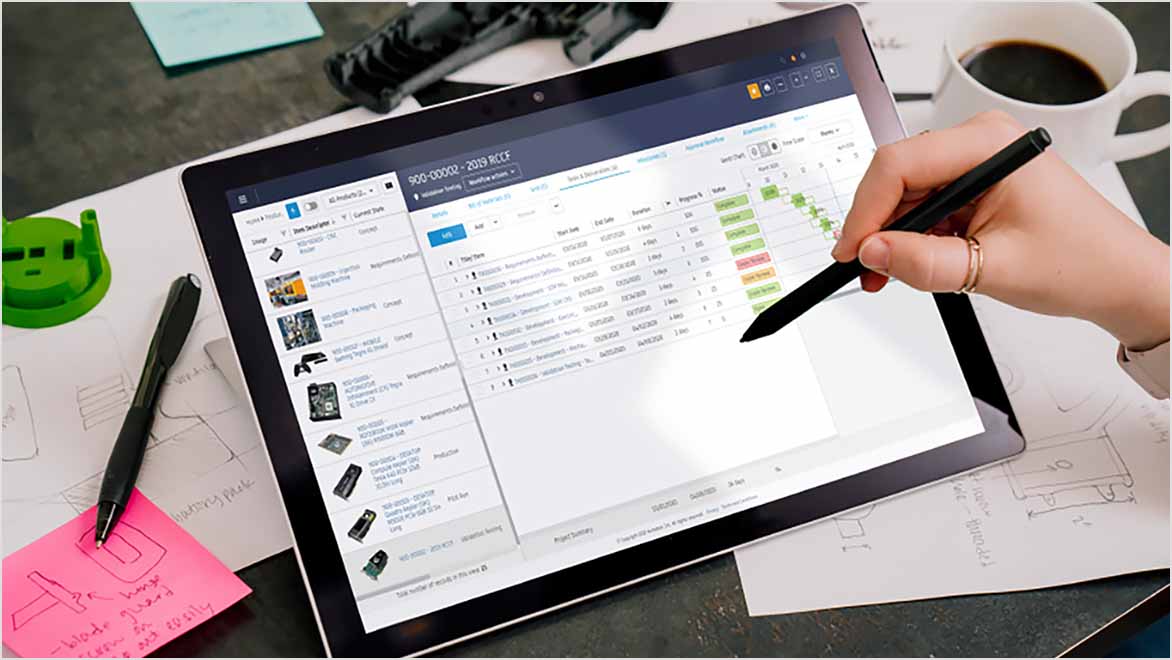
Connected Design

The Autodesk Architecture, Engineering and Construction Collection streamlines design, analysis, and visualization for architecture, engineering, construction, infrastructure, and manufacturing industries. The suite of software programs improves efficiency, reduces errors and rework, and increases cost-effectiveness.

Connected Design with Architecture Engineering and Construction Collection

Click a link below to learn more about Connected Design using the Autodesk Product Design & Manufacturing Collection 

VIEW MORE

Connected Design with the Autodesk Architecture Engineering and Construction Collection

The Autodesk Architecture, Engineering and Construction Collection streamlines design, analysis, and visualization for architecture, engineering, construction, infrastructure, and manufacturing industries. The suite of software programs improves efficiency, reduces errors and rework, and increases cost-effectiveness.
Design Consulting Architecture Engineering and Construction Collection logo Moving at the Speed of Business

Connected Design with the Autodesk Architecture Engineering and Construction Collection

In today’s fast-paced world, the construction industry is continuously evolving with new technology advancements. As technology advances, it becomes essential to have an efficient and connected design process that incorporates design, analysis, and visualization. The Autodesk Architecture, Engineering and Construction Collection is a comprehensive suite of software programs that facilitate this process. This blog post will discuss how the Autodesk Architecture, Engineering and Construction Collection can benefit various industries by connecting design, analysis, and visualization.

Connected Design Workflow: How Software Programs Work Together

The Autodesk Architecture, Engineering and Construction Collection consists of multiple software programs that allow for a connected design workflow. The software programs in the collection work together seamlessly, allowing for efficient design, analysis, and visualization. The collection includes software programs such as AutoCAD, Revit, Navisworks, and more. Each software program is designed to perform a specific task, and when used together, they create a comprehensive design workflow.

Designing with Precision: AutoCAD and Revit in the AEC Collection

The first step in any construction project is design. The Autodesk Architecture, Engineering and Construction Collection includes various software programs that aid in the design process. AutoCAD is a widely used software program that allows for 2D and 3D drafting. AutoCAD is used to create detailed drawings, and it is compatible with other software programs in the collection. Revit is another software program that is used in the design process. Revit allows for BIM (Building Information Modelling), which helps in creating a detailed 3D model of the building. By using Revit, the design process becomes more efficient, as the software program allows for collaboration between various stakeholders.

Revit and Civil 3D: Enhancing Infrastructure and Construction Projects with 3D Modeling and Efficient Design Collaboration

Revit and Civil 3D are commonly used in the AEC industry for infrastructure and construction projects. Revit creates 3D models of buildings, while Civil 3D designs infrastructure projects. Used together, they complement each other and improve the design process by identifying potential design issues in 3D models. Changes made in one software program are automatically updated in the other. This streamlines the design process and helps identify issues early in the design phase.

Ready to Get Connected?

Save up to 20% on Autodesk Software and Services

How Revit and Advance Steel Work Together to Streamline Steel Design and Fabrication

Revit and Advance Steel are two software programs that can be used together in the architecture, engineering, and construction (AEC) industry. Revit is a building information modeling (BIM) software that is used to create 3D models of buildings, while Advance Steel is a 3D modeling software that is used to design steel structures.

When used together, Revit and Advance Steel can improve the efficiency and accuracy of the design process. For example, an engineer can create a 3D model of a building in Revit and then export it to Advance Steel to design the steel structure. The engineer can then import the steel structure design back into Revit to ensure that it is compatible with the rest of the building design.

In addition, when changes are made in one software program, they are automatically updated in the other software program. This means that any changes made to the steel structure design in Advance Steel will be automatically reflected in the building design in Revit, and vice versa.

Using Revit and Advance Steel together can also help identify potential design issues early in the design phase. The 3D models created in Revit and Advance Steel can be used to identify clashes or conflicts that may have been missed in 2D design drawings. This can help save time and reduce the risk of errors and rework later in the project.

In conclusion, Revit and Advance Steel are powerful software programs that can be used together to improve the efficiency and accuracy of the design process in the AEC industry. The ability to export and import design elements between the two software programs and ensure that changes are automatically updated can streamline the design process and help identify potential issues early in the design phase.

Efficient Analysis with Navisworks and Autodesk Robot Structural Analysis Professional

The Autodesk Architecture, Engineering and Construction Collection includes software programs that aid in the analysis process. Navisworks is a software program that allows for coordination and simulation of construction projects. Navisworks helps in identifying clashes, reducing errors and rework, and creating more efficient designs. Additionally, Autodesk Robot Structural Analysis Professional is used to perform structural analysis of buildings. The software program helps in identifying structural deficiencies and optimizes the design process.

Bringing GIS Mapping and Connected Design Together: A Comprehensive Approach with Autodesk's AEC Collection

In today’s world, design and construction projects require a more comprehensive approach than ever before. With the Architecture Engineering and Construction (AEC) Collection from Autodesk, architects, engineers, and construction professionals have access to a suite of powerful tools that can help them collaborate and work more efficiently. One of the most valuable features of the AEC Collection is its ability to integrate with Geographic Information Systems (GIS) mapping, providing a more accurate and detailed view of project sites and landscapes.

AutoCAD Map 3D is a powerful software tool for GIS mapping, which allows users to access, manage and analyse spatial data. With AutoCAD Map 3D, users can easily import and export data from various sources, such as aerial imagery, satellite imagery, and other GIS data. This software also provides a wide range of tools for data analysis, visualization and editing, making it an essential tool for GIS professionals. Some of the key features of AutoCAD Map 3D include 3D modelling and visualisation, data query and analysis, and advanced geospatial analysis tools. By leveraging these features, users can create accurate and comprehensive maps and spatial data sets for a wide range of applications.

GIS mapping is a critical component of many construction projects, particularly those that involve large-scale developments or infrastructure. By overlaying geographic data such as topography, hydrology, and geology onto a digital map, project teams can better understand the context of their projects and make more informed decisions. The AEC Collection’s integration with GIS mapping tools allows architects, engineers, and construction professionals to access this data within their design software, creating a more seamless and connected workflow.

With the AEC Collection, design professionals can also collaborate with each other in real-time using tools such as Navisworks and Docs. Navisworks allows teams to integrate and coordinate models from multiple disciplines, while Docs enables document management and sharing across teams. By using these tools in conjunction with GIS mapping, project teams can ensure that all stakeholders have access to the most up-to-date information, reducing errors and improving overall project efficiency.

Enhancing Oil and Gas Plant Design with the AEC Collection and Plant 3D

The Architecture Engineering and Construction (AEC) Collection is a powerful suite of software programs designed to facilitate connected design for the architecture industry. One of the key software programs in this collection is Plant 3D, which is specifically designed for oil and gas plant design.

Plant 3D is a comprehensive software program that enables users to design, model, and analyze piping and instrumentation diagrams (P&ID) for oil and gas plants. With its intuitive interface and advanced tools, Plant 3D allows users to create accurate and detailed 3D models of plant layouts, equipment, and piping systems.

One of the key advantages of using the AEC Collection and Plant 3D for oil and gas plant design is the ability to collaborate with other disciplines in the industry, such as civil engineering and structural design. By working together in a connected design environment, designers and engineers can ensure that all aspects of the plant design are integrated seamlessly, from the initial concept through to construction and operation.

In addition, the AEC Collection and Plant 3D offer a range of powerful tools for data management and analysis, enabling users to track and monitor plant performance, optimize plant layouts, and identify potential safety hazards or operational issues.

Some of the key features of Plant 3D include:

  • Intelligent P&ID design and management tools
  • Comprehensive 3D modeling capabilities
  • Advanced piping and instrumentation analysis tools
  • Integration with other AEC Collection software programs, such as Navisworks and Docs

By leveraging these features, designers and engineers in the oil and gas industry can streamline their design processes, improve collaboration, and ensure that their plant designs are optimized for safety, efficiency, and performance.

Enhancing Visualisation with 3DS Max and InfraWorks

Visualisation is an essential part of any construction project. The Autodesk Architecture, Engineering and Construction Collection includes software programs that aid in the visualization process. 3DS Max is a software program that allows for rendering and animation of 3D models. 3DS Max helps in creating realistic visuals, which help in selling designs to clients. Autodesk InfraWorks is another software program that helps in creating visualizations of infrastructure projects. InfraWorks allows for collaboration between various stakeholders, and it helps in creating a more efficient design process.

Streamlining AEC Projects with Autodesk Docs

Autodesk Docs is a powerful document management tool that can help streamline AEC projects when used in conjunction with the Architecture Engineering and Construction Collection (AEC Collection) software. The AEC Collection includes several software programs that are essential for building design and construction, including Revit, Civil 3D, and Advance Steel.

By using Autodesk Docs to manage project documents, stakeholders can easily access and collaborate on project files from anywhere, at any time. This can improve project efficiency and communication, as all team members can stay up-to-date on project progress and changes.

Moreover, the AEC Collection software can be seamlessly integrated with Autodesk Docs, allowing users to store and manage their project files directly within Autodesk Docs. This integration makes it easier for teams to collaborate on project files and ensures that all project documentation is stored in one place, reducing the risk of lost or missing files.

For example, Revit models can be directly linked to Autodesk Docs, allowing team members to access and collaborate on the most up-to-date model at all times. Civil 3D designs can also be stored in Autodesk Docs, making it easy to share and collaborate on complex civil engineering projects.

Overall, by using Autodesk Docs in conjunction with the AEC Collection software, AEC professionals can streamline their project workflows, improve collaboration and communication, and ensure that project documentation is secure and easily accessible.

AEC Collection in Various Industries: Architecture, Engineering, Construction, Infrastructure, and Manufacturing

The Autodesk Architecture, Engineering and Construction Collection is beneficial to various industries. Here are a few examples:

Architecture: The Autodesk Architecture, Engineering and Construction Collection is used by architects to design and visualise buildings. The software programmes in the collection allow for efficient design, analysis, and visualisation.

Engineering: Engineers use the Autodesk Architecture, Engineering and Construction Collection to perform structural analysis and design. The software programmes in the collection help in identifying structural deficiencies, optimising designs, and creating efficient designs.

Construction: The Autodesk Architecture, Engineering and Construction Collection is used in the construction industry to coordinate and simulate construction projects. The software programmes in the collection help in identifying clashes, reducing errors and rework, and creating more efficient designs.

Infrastructure: The Autodesk Architecture, Engineering and Construction Collection is used in the infrastructure industry to design and visualise infrastructure projects. The software programmes in the collection, such as InfraWorks, help in creating visualisations of infrastructure projects. InfraWorks allows for collaboration between various stakeholders, including engineers, designers, and contractors. By using the Autodesk Architecture, Engineering and Construction Collection, infrastructure projects can be completed more efficiently and cost-effectively.

Manufacturing: The Autodesk Architecture, Engineering and Construction Collection is also used in the manufacturing industry. The collection includes software programmes that aid in the design of manufacturing equipment and machinery. Autodesk Inventor, for example, is used to design and test products before they are manufactured, reducing errors and costs.

Architecture Engineering and Construction Collection Connected Design Matrix

SoftwareDescriptionFile TypeCommandImport/ExportLink
AutoCAD2D and 3D computer-aided design software used for creating blueprints, schematics, and modelsDWG, DXF, DWFDRAWING, MODEL, VIEW, PLOTImport: DWG, DXF, DWF, PDF, STEP, SAT, IGES, STLExport: DWG, DXF, DWF, PDF, STL, OBJ, FBX
RevitBuilding information modeling (BIM) software used for creating detailed 3D models of buildings and structuresRVT, RFA, RTEOPEN, VIEW, EXPORT, PRINTImport: DWG, DXF, IFC, SAT, SKP, 3DM, STL, OBJ, FBXExport: DWG, DXF, DWF, PDF, IFC, SAT, SKP, 3DM, STL, OBJ, FBX
Civil 3DCivil engineering design and documentation software used for designing, analyzing, and documenting civil engineering projectsDWGCIVIL3D, C3DImport: DWG, LandXML, RevitExport: DWG, LandXML, Revit
InfraWorksInfrastructure design and engineering software used for creating 3D models of infrastructure projectsIAMOPEN, MODEL, VIEW, EXPORT, PUBLISHImport: DWG, DGN, GIS, SHP, KML, FBXExport: DWG, DGN, FBX, COLLADA, OBJ, IFC, KMZ
3ds Max3D modeling, animation, and rendering software used for creating visualizations of buildings and environmentsMAXOPEN, MODEL, RENDERImport: DWG, FBX, DAE, OBJ, 3DS, STLExport: DWG, FBX, DAE, OBJ, 3DS, STL
NavisworksProject review software used for 3D coordination, model analysis, and clash detectionNWD, NWFOPEN, APPEND, EXPORT, PUBLISHImport: DWG, DWF, DGN, IFC, SKP, FBX, 3DS, OBJExport: DWF, DWFx, NWC, NWF, FBX, 3DS, OBJ
Advance SteelSteel detailing software used for creating structural steel models and fabrication drawingsDWG, DSTVOPEN, MODEL, EXPORTImport: DWG, CIS/2, SDNF, IFC, STEP, SAT, SKPExport: DWG, DSTV, CIS/2, SDNF, IFC, STEP, SAT, SKP
Robot Structural Analysis ProfessionalStructural analysis software used for simulating and analyzing building structuresRST, RSA  

AEC Collection: A Valuable Tool for Cost-Effective Design Processes.

In conclusion, the Autodesk Architecture, Engineering and Construction Collection is a comprehensive suite of software programs that facilitates a connected design workflow. The software programs in the collection work together seamlessly, allowing for efficient design, analysis, and visualization. By using the Autodesk Architecture, Engineering and Construction Collection, various industries can benefit from a more efficient and cost-effective design process. The collection is beneficial to architects, engineers, construction professionals, infrastructure designers, and manufacturers. The collection is continuously evolving to meet the needs of these industries, and it remains a valuable tool in the construction industry.

Ready to get your Design Connected?

Discover how Autodesk Architecture Engineering and Construction Collection can streamline your workflow, increase productivity, and optimise your design process. 

Get up to 20% Off Software or Services!

Contact us to find out how much money you can save on software, training or other services. Fill out the form below, by live chat, phone or email.

P: 1800 490 514 |  E: [email protected]
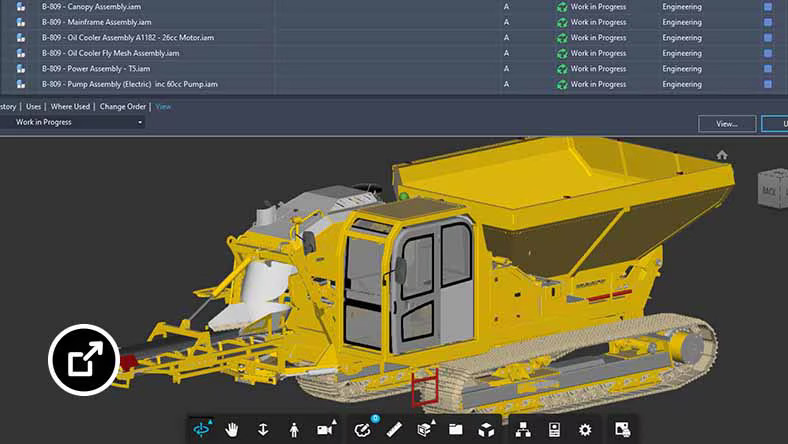
Connected Design

The Autodesk Architecture, Engineering and Construction Collection streamlines design, analysis, and visualization for architecture, engineering, construction, infrastructure, and manufacturing industries. The suite of software programs improves efficiency, reduces errors and rework, and increases cost-effectiveness.

Connected Design with Architecture Engineering and Construction Collection

Click a link below to learn more about Connected Design using the Autodesk Product Design & Manufacturing Collection 

VIEW MORE

Autodesk Acquires Unifi: Enhancing the BIM Content Management Experience

Autodesk, a leading provider of 3D design, engineering, and construction software, has acquired Unifi, a cloud-based platform for Building Information Modeling (BIM) content management. Learn about the benefits of this acquisition for Autodesk customers.
Autodesk, a global leader in 3D design, engineering, and construction software, has recently announced its acquisition of Unifi, a cloud-based platform for Building Information Modeling (BIM) content management. With this acquisition, Autodesk aims to enhance the BIM content management experience for its customers and provide a more streamlined workflow.

Autodesk, a global leader in 3D design, engineering, and construction software, has recently announced its acquisition of Unifi, a cloud-based platform for Building Information Modeling (BIM) content management. With this acquisition, Autodesk aims to enhance the BIM content management experience for its customers and provide a more streamlined workflow.

What is Unifi and What Does it Offer?

Unifi is a cloud-based platform that provides a centralized location for BIM content management. It allows users to store, organize, and share BIM content such as 3D models, materials, and specifications. Unifi also offers advanced search and filtering capabilities, making it easier for users to find the content they need.

How Will Unifi Benefit Autodesk Customers?

By acquiring Unifi, Autodesk aims to enhance its BIM content management capabilities and provide a more seamless workflow for its customers. With Unifi’s advanced content management features, Autodesk customers can more easily manage their BIM content and collaborate with other stakeholders on projects. This will help to improve productivity and reduce errors in the design and construction process.

In addition, Unifi’s cloud-based platform provides greater flexibility and scalability for users, allowing them to access their BIM content from anywhere and on any device. This will enable more efficient collaboration between teams, whether they are working in the office or remotely.

What Does This Acquisition Mean for the Future of BIM?

The acquisition of Unifi by Autodesk is a significant development in the BIM industry, as it highlights the importance of effective content management in the design and construction process. By providing a more streamlined and efficient workflow for BIM content management, Autodesk is helping to drive innovation and improve collaboration in the industry.

Overall, the acquisition of Unifi by Autodesk is a positive development for BIM users, as it will enhance the content management experience and provide greater efficiency and flexibility for design and construction teams. With this acquisition, Autodesk is demonstrating its commitment to providing innovative solutions to its customers and driving the industry forward.

In conclusion, the acquisition of Unifi by Autodesk is a major step forward in BIM content management, and it is set to bring numerous benefits to Autodesk customers. With this move, Autodesk is well positioned to continue providing innovative solutions that enhance the BIM workflow and drive industry progress.

Learn more about Autodesk and Unifi:

  1. Autodesk Newsroom: https://adsknews.autodesk.com/en/news/connecting-aec-customer-data/ 
  2. Unifi’s website: https://unifilabs.com/
  3. Autodesk AEC Industry Solutions: https://www.autodesk.com/solutions/architecture-engineering-construction
  4. Autodesk BIM 360: https://www.autodesk.com/products/bim-360/overview
  5. Autodesk Revit: https://www.autodesk.com/products/revit/overview


Are you an Autodesk customer and want to get Unified?

If you an Autodesk customer interested in leveraging the benefits of Unifi’s cloud-based data platform for your AEC projects, and want be the first to know when Autodesk is ready to start supplying Unifi, contact us now to stay in the loop and take your AEC projects to the next level.

Contact Form Demo (#5) (#7)

VIEW MORE

Connected Visual Design with Autodesk Product Design & Manufacturing Collection

Sportscar driving on a futuristic road Moving at the Speed of Business
Design Consulting Product Design Manufacturing Collection Moving at the Speed of Business

Connected Visual Design With Autodesk Product Design & Manufacturing Collection

Introduction to Visualisation With Autodesk Product Design & Manufacturing Collection

Autodesk Product Design & Manufacturing Collection is a comprehensive suite of software tools designed for manufacturers, product designers, and engineers. The collection includes a range of software applications, including Autodesk Inventor, Fusion 360, Nastran, 3ds Max, Navisworks, and Recap. These tools are designed to work together seamlessly, enabling users to create and visualise designs with ease.

One of the key benefits of the Autodesk Product Design & Manufacturing Collection is its ability to facilitate connected visual design. This means that the software tools in the collection work together to provide users with a holistic view of their designs, from initial concept to final product.

In this blog, we will explore some of the key features of the Autodesk Product Design & Manufacturing Collection that enable connected visual design, including photo rendering, shared views, simulation, project management collaboration, and 3D laser scan visualisation.

connected visual design with 3ds max in the Product Design & Manufacturing Collection for manufacturers visualising products

Photo Rendering in Autodesk Inventor

Photo rendering is an important aspect of visual design, as it enables designers to create realistic and detailed images of their designs. Autodesk Inventor, one of the software tools included in the Autodesk Product Design & Manufacturing Collection, includes powerful photo rendering capabilities.

Autodesk Inventor’s photo rendering tools enable users to create high-quality, photorealistic images of their designs. The software includes a range of lighting and material options, enabling users to customise the look and feel of their designs.

In addition, Autodesk Inventor’s photo rendering tools are integrated with its modelling tools, enabling users to create and edit their designs in real-time as they render them. This enables designers to quickly make changes to their designs and see how they will look in real-time.

Autodesk Inventor connected visual design photo rendering Product Design Manufacturing Collection Moving at the Speed of Business

Shared Views and Presentation Environment in Autodesk Inventor

In addition to its photo rendering capabilities, Autodesk Inventor also includes features that enable users to share their designs with others. The software’s Shared Views feature enables users to share their designs with others, regardless of whether they have Autodesk Inventor installed on their computer.

Using Shared Views, users can share their designs with others via a web link. This enables designers to collaborate with others and receive feedback on their designs from a wider range of stakeholders.

In addition, Autodesk Inventor includes a Presentation Environment feature, which enables users to create interactive presentations of their designs. This feature enables designers to showcase their designs in a more engaging and interactive way, helping to communicate the value of their designs to others.

Autodesk Inventor connected visual design using shared views in the Product Design & Manufacturing Collection

Photo Rendering in Fusion 360

Fusion 360 is another software tool included in the Autodesk Product Design & Manufacturing Collection that includes powerful photo rendering capabilities. The software includes a range of lighting and material options, enabling users to create realistic and detailed images of their designs.

In addition, Fusion 360 includes a cloud rendering feature, which enables users to render their designs in the cloud.

This means that users can send their rendering jobs to the cloud, where they will be processed using powerful cloud-based hardware. This enables users to quickly and easily create high-quality, photorealistic images of their designs without having to invest in expensive hardware.

Autodesk Fusion 360 photo rendering connected visual design Product Design & Manufacturing Collection

Photo Rendering in Navisworks

Navisworks is a project management software tool included in the Autodesk Product Design & Manufacturing Collection. The software is designed to facilitate collaboration and project management across the entire product design process.

In addition to its project management capabilities, Navisworks also includes powerful photo rendering tools. This enables users to create high-quality, photorealistic images of their designs, helping to communicate the value of their designs to stakeholders.

Navisworks rendering connected visual design wioth the Product Design & Manufacturing Collection

Simulation in Autodesk Inventor and Fusion 360

Simulation is an important aspect of the product design process, as it enables designers to test and validate their designs before they are manufactured. The Autodesk Product Design & Manufacturing Collection includes a range of simulation tools, including simulation capabilities in both Autodesk Inventor and Fusion 360.

Autodesk Inventor’s simulation tools enable users to simulate a range of scenarios, including stress analysis, deformation analysis, and motion analysis. This enables users to identify potential design flaws and make improvements before the product is manufactured.

Similarly, Fusion 360’s simulation tools enable users to simulate a range of scenarios, including structural, thermal, and fluid simulations. This enables users to gain a deeper understanding of how their designs will perform in the real world, helping to identify potential issues and make improvements.

Autodesk Fusion 360 connected visual design with simulation using the Product Design & Manufacturing Collection

Ready to Get Connected?

Save up to 20% on Autodesk Software and Services

Visualising Simulation Studies with Nastran and 3ds Max

In addition to simulation capabilities, the Autodesk Product Design & Manufacturing Collection includes tools that enable users to visualise and communicate their simulation studies. Nastran, a finite element analysis software tool, is included in the collection and enables users to perform advanced simulations.

Using Nastran, users can simulate a range of scenarios, including linear and nonlinear stress analysis, dynamic analysis, and heat transfer analysis. Once a simulation study is complete, users can use 3ds Max, a cinematic photo rendering and animation software tool included in the collection, to visualise the results.

This means that users can create high-quality, photorealistic animations of their simulation studies, helping to communicate their findings to others. This is particularly useful for designers who need to communicate their findings to non-technical stakeholders, such as executives or investors.

Nastran simulation connected visual design with Product Design & Manufacturing Collection

Simulation with 3ds Max

While 3ds Max is primarily known for its capabilities in creating 3D models and animations, it also includes powerful simulation tools that can be used to test and validate designs. These tools can be particularly useful for designers who are creating complex assemblies, such as mechanical or architectural systems.

One of the key simulation tools included in 3ds Max is the MassFX physics engine. This engine enables users to simulate realistic physical interactions between objects, such as collisions, gravity, and friction. Users can create simulations of objects falling, bouncing, and rolling across surfaces, and adjust the properties of the objects and the environment to create realistic effects.

Another simulation tool included in 3ds Max is the Particle Flow system. This system enables users to simulate the behavior of particles, such as dust, smoke, or debris. Users can create complex simulations of particle systems, adjusting the speed, direction, and density of the particles to create realistic effects.

In addition to these tools, 3ds Max also includes a range of plugins and add-ons that can be used to enhance its simulation capabilities. For example, the ThinkingParticles plugin enables users to create complex particle simulations, while the FumeFX plugin can be used to simulate smoke and fire.

Overall, the simulation tools included in 3ds Max can be a valuable resource for designers who need to test and validate their designs before they are manufactured. By creating simulations of complex systems, designers can identify potential problems and make adjustments before the design is finalized, helping to ensure that the final product meets the needs of its users.

It is important to note that while 3ds Max includes powerful simulation tools, it is not a dedicated simulation software like Nastran or Inventor. Therefore, it may not be suitable for all types of simulations and may require additional plugins or tools to create more complex simulations.

3ds max simulation connected visual design with Product Design Manufacturing Collection Moving at the Speed of Business

Cinematic Photo Rendering and Animations in 3ds Max

3ds Max is a cinematic photo rendering and animation software tool included in the Autodesk Product Design & Manufacturing Collection. The software includes powerful rendering capabilities, enabling users to create high-quality, photorealistic images of their designs.

In addition, 3ds Max includes a range of animation tools, enabling users to create complex animations of their designs. This is particularly useful for designers who need to create animations of their designs for marketing or instructional purposes.

Visualising 3D Laser Scans with Recap

Recap is a 3D scanning software tool that is included in the Autodesk Product Design & Manufacturing Collection. It enables users to create detailed 3D scans of physical objects, which can then be imported into other software tools for further processing.

One of the primary ways that Recap is used in the collection is to import 3D scans into other design software tools, such as Autodesk Inventor or Fusion 360. Once the scan data has been imported into these tools, designers can use it to create precise 3D models of the scanned objects.

For example, a designer might use Recap to create a 3D scan of an existing object, such as a machine part. The scan data can then be imported into Inventor, where the designer can create a 3D model of the part. This can be useful for designers who need to create replacement parts or make modifications to existing designs.

In addition to Inventor and Fusion 360, Recap data can also be imported into other software tools included in the Product Design & Manufacturing Collection. For example, the scan data can be imported into 3ds Max, where it can be used to create detailed visualisations and animations of the scanned objects.

Recap data can also be imported into Navisworks, which is a powerful project management and collaboration tool. By importing scan data into Navisworks, designers can create detailed 3D models of existing structures or environments, which can be used to plan construction projects or renovations.

Overall, Recap is a powerful tool that can be used to create detailed 3D scans of physical objects, which can then be imported into other software tools in the Product Design & Manufacturing Collection. This can be useful for designers who need to create precise 3D models of existing objects, or for those who need to plan construction projects or renovations using detailed 3D models of existing structures or environments.


Recap scans can be imported into several other software tools included in the Autodesk Product Design & Manufacturing Collection, including AutoCAD with specialized toolsets.

AutoCAD with specialized toolsets is a version of AutoCAD that includes additional features and tools designed for specific industries, such as architecture, engineering, and construction. It includes toolsets such as Architecture, Electrical, Mechanical, and MEP, among others.

By importing Recap scans into AutoCAD with specialized toolsets, designers can use the scan data to create precise 2D and 3D models of existing structures or environments. For example, the Architecture toolset includes features such as walls, doors, windows, and stairs, which can be used to create detailed architectural plans based on the scan data. Similarly, the Mechanical toolset includes tools for creating 3D models of mechanical components based on the scan data.

In addition to AutoCAD with specialized toolsets, Recap scans can also be imported into other software tools included in the Product Design & Manufacturing Collection, such as Nastran and Simulation Mechanical. These tools are used for advanced simulation and analysis of complex mechanical systems, and by importing scan data into these tools, designers can create precise 3D models of existing systems and components.

Recap scans can also be imported into Navisworks, which is a powerful project management and collaboration tool. By importing scan data into Navisworks, designers can create detailed 3D models of existing structures or environments, which can be used to plan construction projects or renovations.

Overall, Recap scans can be imported into a variety of software tools included in the Autodesk Product Design & Manufacturing Collection, including AutoCAD with specialized toolsets, Nastran, Simulation Mechanical, and Navisworks. This enables designers to create precise 2D and 3D models based on scan data, as well as perform advanced simulation and analysis of complex systems and components.

Bringing in 3D Models into 3ds Max and Navisworks

Connected visual design refers to the process of using various software tools to create and visualise 3D models of products or structures in a connected, integrated way. The Autodesk Product Design & Manufacturing Collection includes several software tools that can be used for connected visual design, including 3ds Max and Navisworks.

3ds Max is a powerful tool for creating highly detailed 3D models, as well as visualisations and animations of those models. By importing designs from other software tools, such as Inventor or Fusion 360, into 3ds Max, designers can create highly detailed visualisations of their products or structures. This can be useful for creating marketing materials or for visualising how products will look in real-world environments.

One of the key benefits of using 3ds Max for connected visual design is its ability to create highly realistic photo-renderings and animations. The software includes a range of tools and features for creating realistic lighting, textures, and materials, which can help designers create highly realistic visualisations of their designs. This can be particularly useful for designers who need to create realistic images or animations for marketing materials or presentations.

Navisworks, on the other hand, is a powerful project management and collaboration tool that is designed for use in the construction industry. It allows designers and project managers to create detailed 3D models of buildings or other structures, which can be used to plan and manage construction projects.

By importing 3D designs from other software tools, such as Inventor or Fusion 360, into Navisworks, designers can create highly detailed 3D models of their structures or environments. These models can then be used to plan construction projects or to identify potential issues or clashes in the design.

In addition to its project management and collaboration features, Navisworks also includes tools for creating realistic visualisations of designs. The software includes a range of photo-rendering and animation tools, which can be used to create highly realistic visualisations of buildings or other structures. This can be useful for creating marketing materials or for visualising how buildings or structures will look in real-world environments.

Overall, the Autodesk Product Design & Manufacturing Collection includes several software tools that can be used for connected visual design, including 3ds Max and Navisworks. By importing designs from other software tools into these applications, designers can create highly detailed and realistic visualisations of their products or structures, as well as manage construction projects and collaborate with other team members.

Exporting Navisworks to 3ds Max

To export Navisworks models to 3ds Max for further visualization such as photo rendering and animation, you can use the FBX file format. First, open your Navisworks model and select the objects you wish to export. Then, go to the “Add-Ins” tab and click on “Export FBX”. In the Export FBX dialog box, select the appropriate options such as the file location and units, and click “Export”. Once exported, open 3ds Max and import the FBX file. You can then apply textures, materials, and lighting to the model and use the software’s rendering and animation tools to create high-quality visuals and animations.

Compare Visualisation in Product Design & Manufacturing Collection

Software Title

Visualisation Tool

Key Features

Autodesk Inventor

Photo Rendering

• Realistic rendering of 3D designs

• Supports a variety of materials, textures, and lighting options

• Ability to create exploded views and animation

Autodesk Inventor

Shared Views and Presentation Environment

• Share designs with others and receive feedback

• Collaboration and commenting tools

• Ability to create presentations with interactive features

Autodesk Fusion 360

Photo Rendering

• Cloud rendering for faster rendering times

• Realistic rendering of 3D designs

• Supports a variety of materials, textures, and lighting options

Autodesk Simulation

Inventor

• Ability to simulate mechanical, thermal, and fluid flow properties

• In-product simulation analysis

• Interactive result visualisation

Autodesk Simulation

Fusion 360

• Cloud-based simulation analysis

• Ability to simulate mechanical, thermal, and fluid flow properties

• Interactive result visualisation

Autodesk Nastran

Visualise Simulation Studies

• Advanced simulation analysis capabilities

• Ability to simulate a wide range of materials and physical properties

• Interactive result visualisation

Autodesk Navisworks

Photo Rendering

• Realistic rendering of 3D models

• Ability to create animations and walkthroughs

• Collaboration and commenting tools

Autodesk Navisworks

Project Management and Collaboration

• Ability to create highly detailed 3D models of buildings or structures

• Identify potential issues or clashes in the design

• Collaboration and commenting tools

Autodesk Navisworks

5D Scheduling

• Create and manage construction schedules

• Ability to simulate construction sequences and identify potential issues

• Collaboration and commenting tools

Autodesk 3ds Max

Cinematic Photo Rendering and Animations

• Highly realistic photo-rendering and animation capabilities

• Supports a variety of materials, textures, and lighting options

• Advanced animation capabilities

Autodesk Recap

Visualise 3D Laser Scans with 3D Models

• Ability to create detailed 3D scans of physical objects

• Import scans into other software tools for further processing

• Integration with AutoCAD with specialised toolsets for modelling and visualisation

Ready to get your Visualisations Connected?

Discover how Autodesk Product Design & Manufacturing Collection can streamline your workflow, increase productivity, and optimise your design process. 

Get up to 20% Off Software or Services!

Contact us to find out how much money you can save on software, training or other services. Fill out the form below, by live chat, phone or email.

P: 1800 490 514 |  E: [email protected]
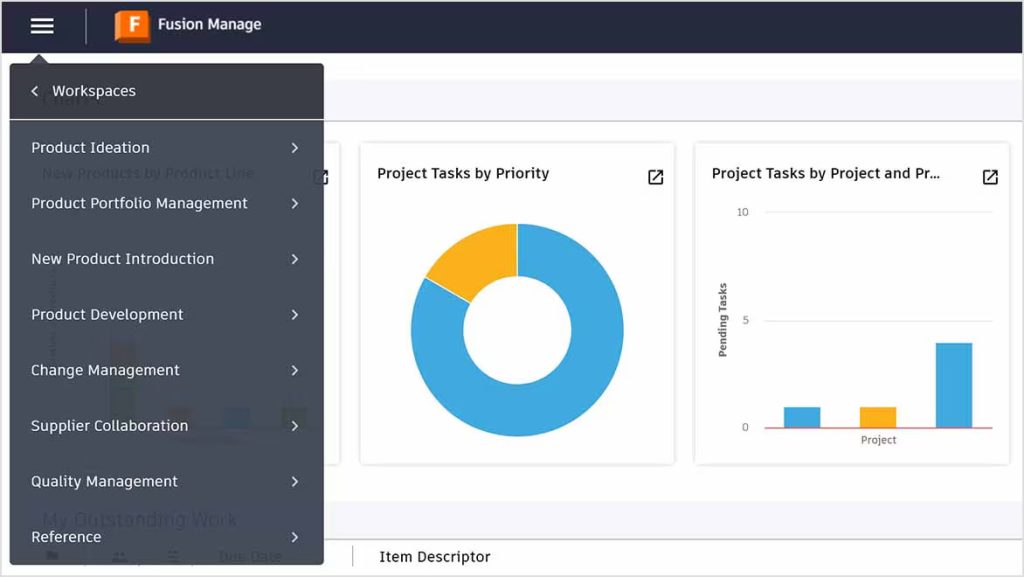
Connected Design

Sportscar driving- on a futuristic road

Connected Design with Product Design & Manufacturing Collection

Click a link below to learn more about Connected Design using the Autodesk Product Design & Manufacturing Collection 

VIEW MORE

Connected Factory Design with Autodesk Product Design & Manufacturing Collection

Connected Factory Design Moving at the Speed of Business
Design Consulting Product Design Manufacturing Collection Moving at the Speed of Business

Connected Factory Design with Autodesk Product Design & Manufacturing Collection

The Benefits of Connected Factory Design with Autodesk Product Design & Manufacturing Collection

In today’s competitive manufacturing landscape, it’s crucial for companies to design and build factories that are efficient, cost-effective, and adaptable to changing market demands. With the help of advanced technology, such as Autodesk’s Product Design & Manufacturing Collection, Autodesk Inventor, AutoCAD Architecture, and Navisworks, manufacturers can streamline their factory design process, reduce errors, and improve productivity.

In this blog post, we’ll explore the benefits of using Autodesk’s Product Design & Manufacturing Collection, Inventor, AutoCAD Architecture, and Navisworks using the Factory Design Utilities and how these tools are connected. We’ll also discuss real-world applications of connected factory design and how it can empower manufacturers to stay ahead of the competition.

Introduction to Connected Factory Design with Autodesk

Connected factory design refers to the use of advanced software tools to create a cohesive, streamlined design process for factories. This approach involves integrating various design and simulation tools to create a single, unified workflow. Autodesk’s Product Design & Manufacturing Collection is a powerful suite of software tools that allows manufacturers to create a connected factory design process.

Benefits of Using Product Design & Manufacturing Collection for Factory Design

The Product Design & Manufacturing Collection includes several powerful tools that can help manufacturers design and simulate their factories with greater efficiency and accuracy. Here are some of the key benefits of using these tools for factory design:

  1. Streamlined Design Process: Autodesk’s tools allow manufacturers to create a connected factory design process that integrates various design and simulation tools. This approach can help reduce errors and streamline the design process, resulting in faster time-to-market.

  2. 3D Modeling: With Autodesk Inventor, manufacturers can create 3D models of their factories, allowing them to visualize and optimize their designs before construction begins. This can help reduce costs and ensure that the factory meets all functional requirements.

  3. Building Design Optimization: AutoCAD Architecture provides a suite of powerful tools for building design optimization. This includes features such as automated documentation, advanced rendering, and collaboration tools, which can help manufacturers create optimized building designs.

  4. Factory Design and Simulation: Navisworks allows manufacturers to create detailed simulations of their factories, including machinery, equipment, and workflows. This can help identify potential issues before construction begins and ensure that the factory operates efficiently once it’s up and running.

factory design suite 2 Moving at the Speed of Business

Enhancing Factory Design with Navisworks and Factory Design Utilities

Navisworks and Factory Design Utilities are two key tools within the Product Design & Manufacturing Collection that can help manufacturers enhance their factory design process. Navisworks allows for detailed factory simulation, while Factory Design Utilities provides a suite of tools specifically designed for factory design.

Some of the key features of these tools include:

  1. Factory Design Utilities: This tool provides a suite of powerful tools specifically designed for factory design, including conveyor design, layout optimization, and factory equipment libraries.

  2. Navisworks: Navisworks allows manufacturers to create detailed simulations of their factories, including machinery, equipment, and workflows. This can help identify potential issues before construction begins and ensure that the factory operates efficiently once it’s up and running.

Factory Design Utilities AutoCAD Moving at the Speed of Business

Ready to Get Connected?

Save up to 20% on Autodesk Software and Services

Connecting the Tools for Seamless Factory Design

One of the key advantages of Autodesk’s Product Design & Manufacturing Collection is that it allows manufacturers to connect various tools within the suite to create a seamless factory design process. For example, manufacturers can use Navisworks to simulate their factory design, then use Factory Design Utilities to optimize the layout and equipment design, before using Inventor to create detailed 3D models of the factory.

Factory Design Utilities 1 Moving at the Speed of Business

Real-world Applications of Connected Factory Design

Connected factory design has numerous real-world applications across a wide range of industries. For example, automotive manufacturers can use these tools to design and build factories that are optimized for the production of electric vehicles. Pharmaceutical companies can use these

Top 5 Reasons to use Connected Factory Design with Product Design & Manufacturing Collection instead of only AutoCAD or Inventor

  1. Layout Optimization: One of the biggest advantages of using Factory Design Utilities is its ability to optimize the layout of a factory. This software enables users to create 3D factory models and simulate their operations, allowing them to test different layout configurations and optimize them for better productivity and efficiency.

  2. Equipment Design: Factory Design Utilities provides specialized tools for designing and placing factory equipment, including conveyors, robots, and other machinery. This software enables users to create accurate 3D models of equipment, test its functionality, and optimize its placement for maximum efficiency.

  3. Collaboration Tools: Factory Design Utilities also provides collaboration tools that allow multiple stakeholders to work on the same project simultaneously. This feature enables designers, engineers, and other team members to collaborate on designs, exchange feedback, and make changes in real-time, improving the overall quality of the design.

  4. Real-world Applications: Factory Design Utilities has been specifically designed for factory design and is widely used in real-world applications. This software has been used by manufacturers in various industries, including automotive, pharmaceutical, and consumer goods, to create efficient and effective factory designs.

  5. Time-to-Market: The use of Factory Design Utilities can help reduce the time-to-market of a product by enabling manufacturers to design and optimize their factories quickly and efficiently. This software allows manufacturers to test and optimize their designs before they are built, reducing the need for costly and time-consuming modifications during the construction phase.

Factory Design Utilities Commands

Command/ToolFactory Design UtilitiesAutoCADInventorNavisworks
LayoutFactory tab > Create Layout
Edit LayoutFactory tab > Edit Layout
Auto-RouteFactory tab > Auto-Route
Auto-PlaceFactory tab > Auto-Place
Factory ComponentsFactory tab > Factory Components
Insert DWG/DXFFactory tab > Insert DWG/DXF
Align and DistributeFactory tab > Align and DistributeModify tab > AlignAssemble tab > AlignModify tab > Align
Grounding and SurfaceFactory tab > Grounding and Surface
Place EquipmentFactory tab > Place Equipment
Factory AssetsFactory tab > Factory AssetsNavisworks Manage tab > Manage Assets
Assets from InventorFactory tab > Assets from InventorNavisworks Manage tab > Import Inventor
Asset PropertiesFactory tab > Asset PropertiesNavisworks Manage tab > Asset Properties
VisualizeFactory tab > VisualizeVisualize tab > RenderStudio tab > Create Studio RenderNavisworks Manage tab > Visualize
AnalyzeFactory tab > AnalyzeNavisworks Manage tab > Analyze
OptimizeFactory tab > OptimizeNavisworks Manage tab > Optimize
Sync to FactoryFactory tab > Sync to FactoryNavisworks Manage tab > Synchronize
Add to Factory AssetsFactory tab > Add to Factory AssetsNavisworks Manage tab > Add to Assets
Update from Factory AssetsFactory tab > Update from Factory AssetsNavisworks Manage tab > Update from Assets
Factory ReportsFactory tab > Factory ReportsNavisworks Manage tab > Report

Case Studies

Here are some case studies for Autodesk Factory Design Utilities and Factory Design Suite:

  1. FLSmidth: FLSmidth, a global supplier of cement and minerals processing equipment, used Autodesk Factory Design Suite to design and optimize a new manufacturing facility in China. The software allowed them to create a 3D model of the plant layout and simulate different scenarios to identify the most efficient design.

  2. Pratt & Whitney: Pratt & Whitney, a manufacturer of aircraft engines, used Autodesk Factory Design Suite to design a new production facility in Singapore. The software allowed them to visualize the facility in 3D and optimize the layout to reduce material handling and increase efficiency.

  3. Hekuma: Hekuma, a manufacturer of injection molding systems, used Autodesk Factory Design Suite to design a new factory in Germany. The software allowed them to create a 3D model of the facility and simulate different scenarios to optimize the layout for efficiency and safety.

  4. Sandvik Mining: Sandvik Mining, a global supplier of mining equipment and services, used Autodesk Factory Design Suite to design a new manufacturing facility in South Africa. The software allowed them to visualize the layout in 3D and optimize the design to reduce material handling and increase productivity.

  5. The Heinz Endowments: The Heinz Endowments, a nonprofit organization focused on environmental sustainability, used Autodesk Factory Design Utilities to design a new sustainable manufacturing facility in Pittsburgh. The software allowed them to create a 3D model of the facility and simulate different scenarios to optimize the design for energy efficiency and sustainability.

These case studies demonstrate the diverse range of industries and applications for Autodesk Factory Design Utilities and Factory Design Suite, and the software’s ability to improve efficiency, productivity, and sustainability in manufacturing and production facilities.

Ready to get your Factory Design Connected?

Discover how Autodesk Product Design & Manufacturing Collection can streamline your workflow, increase productivity, and optimise your design process. 

Get up to 20% Off Software or Services!

Contact us to find out how much money you can save on software, training or other services. Fill out the form below, by live chat, phone or email.

P: 1800 490 514 |  E: [email protected]
Connected Design

Connected Factory Design Moving at the Speed of Business

Connected Design with Product Design & Manufacturing Collection

Click a link below to learn more about Connected Design using the Autodesk Product Design & Manufacturing Collection 

VIEW MORE

Connected PCB Design with Autodesk Product Design & Manufacturing Collection

Smartphone exploded view showing the pcb Moving at the Speed of Business
Design Consulting Product Design Manufacturing Collection Moving at the Speed of Business

Connected PCB Design with Autodesk Product Design & Manufacturing Collection

Revolutionising Electronics Design: How Autodesk Inventor's PCB Interoperability Tools are Changing the Game

Autodesk Inventor is a powerful CAD software that offers a range of advanced features for mechanical and electrical design. One of the most valuable features for electronic designers is the ability to work with printed circuit boards (PCBs) directly in the software. With Autodesk Inventor’s PCB interoperability tools, users can streamline their design process and create more accurate designs

How to Achieve Connected Design with Autodesk Inventor and Eagle (Fusion 360)

Are you looking to streamline your printed circuit board (PCB) design workflow? Look no further than Autodesk’s connected design solution between Inventor and Eagle. This powerful combination allows for seamless collaboration between mechanical and electrical design teams. Autodesk Eagle, now a part of Fusion 360, is a popular PCB design tool that offers a range of powerful features to create schematics, layout designs, and manufacturing outputs. By integrating Eagle with Inventor, designers can easily incorporate PCBs into their mechanical assemblies and optimize the fit and function of their designs. 

One key advantage of using Inventor and Eagle together is the ability to maintain a “single source of truth” for your design data. With the integration, design changes in one tool can be automatically propagated to the other, reducing the risk of errors and ensuring consistency across the design process. 

Another benefit of this connected design approach is the ability to visualize the PCB and its components in a 3D mechanical assembly context. This allows designers to check for potential interferences, optimize the placement of the PCB and its components, and ultimately achieve a more efficient and cost-effective design.

To get started with connected design between Inventor and Eagle, simply import your Eagle board file into Inventor. From there, you can place the PCB into your assembly and start working on the integration with your mechanical components. Changes made to the PCB in Eagle will be reflected in Inventor, and vice versa.

Picture2 Moving at the Speed of Business

Inventor's PCB Interoperability Tools

Inventor offers a suite of tools for working with PCBs, including:

ECAD-MCAD Collaboration

This tool allows electrical and mechanical designers to work together seamlessly by importing 3D models of the PCB into Inventor. This tool eliminates the need for physical prototypes and enables designers to test the fit of the PCB in the mechanical assembly.

PCB layout import

Inventor can import and view PCB layouts from other software tools such as Eagle, Altium, and OrCAD. This feature allows designers to view their designs in a 3D environment and make any necessary changes before finalizing the design.

Design rule checking

Inventor offers a comprehensive design rule checking tool that allows designers to check their PCB designs against a set of predefined rules. This feature ensures that the design meets industry standards and helps identify any potential errors before the manufacturing process.

Export to Manufacturing

Once the design is complete, Inventor can export the PCB design to the manufacturing process. This feature ensures that the design is accurate and ready for production.

Picture1 Moving at the Speed of Business

Ready to Get Connected?

Save up to 20% on Autodesk Software and Services

Streamlining Design Workflows: Importing and Exporting Data Between Autodesk Inventor and Eagle (Fusion 360)

Importing and exporting data between Autodesk Inventor and Eagle is a critical function for any engineer working on a connected design project. Fortunately, the process is straightforward, thanks to the seamless integration between the two applications.

To import an Eagle board into Inventor, the first step is to create a new board assembly in Inventor. Next, click on the Eagle PCB Import command and select the .brd file. Inventor will then import all the PCB data, including the component placement and board outline.

Exporting data from Inventor to Eagle is equally easy. Simply open the board assembly in Inventor and select the Eagle PCB Export command. This will generate a .brd file that can be imported into Eagle, complete with all the board data and component placement.

One critical aspect of importing and exporting data between these two applications is ensuring that the design rules and constraints are consistent. Any discrepancies in the design rules can cause significant issues, including board failures or electrical shorts.

Fortunately, Autodesk has developed a comprehensive set of tools to ensure that data is accurately exchanged between Inventor and Eagle. For example, the Eagle board data is automatically translated into the Inventor format, ensuring that all dimensions and placement data are consistent.

Seamless Integration: How Autodesk Inventor and Fusion 360 Work Together for Streamlined PCB Design

Autodesk Inventor and Fusion 360 are both powerful design tools that can be used for a wide range of applications. While Inventor is known for its advanced 3D design capabilities, Fusion 360 is a comprehensive product development platform that allows designers and engineers to work together in a collaborative environment.

One of the ways that Inventor and Fusion 360 work together is through their interoperability with PCB design software. In particular, Fusion 360 includes an integrated PCB design tool called Eagle that can be used to create schematics and layouts for printed circuit boards. By leveraging the power of Eagle and the design capabilities of Inventor and Fusion 360, designers can create complex PCB designs with ease.

One of the key benefits of using Inventor and Fusion 360 for PCB design is the ability to work in a connected design environment. This means that designers can collaborate in real-time with other members of their team, including electrical engineers, mechanical engineers, and other stakeholders. This collaborative approach can help to streamline the design process and reduce errors, ensuring that the final product is of the highest quality.

Another advantage of using Inventor and Fusion 360 for PCB design is the ability to import and export data between the two platforms. This means that designers can easily move between the two tools, leveraging the strengths of each platform as needed. For example, designers can create a 3D model of a PCB in Inventor, then import the data into Fusion 360 to add electrical components and wiring.

To get started with using Inventor and Fusion 360 for PCB design, users should first become familiar with the basic workflows and tools of each platform. They should also explore the various integration points between the two tools, including the ability to import and export data, collaborate in a connected design environment, and use the integrated Eagle PCB design tool within Fusion 360.

Why Use Autodesk Inventor for PCB Design?

Autodesk Inventor’s PCB interoperability tools make it an ideal choice for electronic designers. The ability to work with both mechanical and electrical designs in the same software environment streamlines the design process and eliminates the need for multiple software tools. This feature also enables designers to test the fit of the PCB in the mechanical assembly, reducing the risk of errors and rework.

Additionally, Inventor’s ability to import and view PCB layouts from other software tools enables designers to work with existing designs and make any necessary changes in a 3D environment. This feature saves time and improves accuracy.

Finally, Inventor’s comprehensive design rule checking tool ensures that the design meets industry standards and identifies any potential errors before the manufacturing process. This feature reduces the risk of costly errors and ensures that the design is accurate and ready for production.

Conclusion

In conclusion, the interoperability between Autodesk Inventor and Fusion 360, along with the integrated Eagle PCB design tool, makes these tools an excellent choice for designers and engineers looking to create complex PCB designs. By working together in a connected design environment and leveraging the strengths of each platform, designers can create high-quality PCB designs in a fraction of the time it would take with other tools.

Ready to get your PCB Design Connected?

Discover how Autodesk Product Design & Manufacturing Collection can streamline your workflow, increase productivity, and optimise your design process. 

Get up to 20% Off Software or Services!

Contact us to find out how much money you can save on software, training or other services. Fill out the form below, by live chat, phone or email.

P: 1800 490 514 |  E: [email protected]
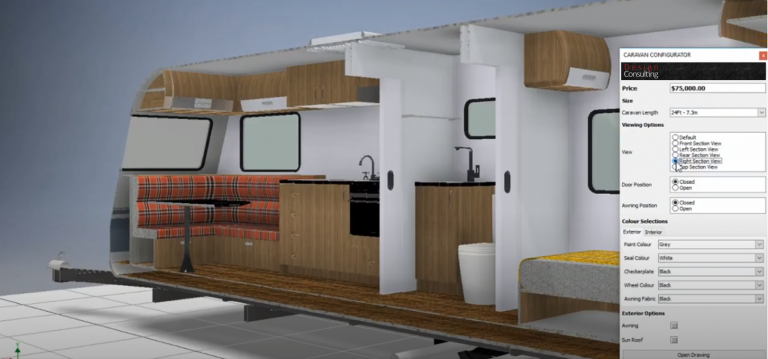
Connected Design

Smartphone exploded view showing the pcb Moving at the Speed of Business

Connected Design with Product Design & Manufacturing Collection

Click a link below to learn more about Connected Design using the Autodesk Product Design & Manufacturing Collection 

VIEW MORE

Connected MEP Design with Autodesk Product Design & Manufacturing Collection

Connected MEP Design Moving at the Speed of Business
Design Consulting Product Design Manufacturing Collection Moving at the Speed of Business

Connected MEP Design with Autodesk Product Design & Manufacturing Collection

Streamlining MEP Design with Autodesk: An In-Depth Look at AutoCAD MEP and Inventor's Tools and Benefits

MEP (mechanical, electrical, and piping) design is an essential part of building construction, and Autodesk’s Product Design and Manufacturing Industry Collection provides software tools to simplify and streamline the MEP design process. In this blog post, we’ll explore how Autodesk’s AutoCAD MEP and Inventor can be used for efficient and accurate MEP design

Using AutoCAD MEP for MEP Design

AutoCAD MEP is a powerful software tool specifically designed for MEP industry professionals. It comes equipped with a range of tools that make MEP design more efficient, including mechanical, electrical, and plumbing content, tool palettes, space coordination, electrical circuiting, and data extraction. These tools make it easy to create, edit, and share MEP designs with precision and accuracy

Use AutoCAD MEP to design HVAC systems and extend capabilities with Revit MEP (BIM) and cadMEP, ESTmep and CAMduct (Fabrication)

Using Autodesk Inventor for MEP Design

Autodesk Inventor is a 3D mechanical design software tool that can be used for MEP design. Its tube and pipe routing features, assembly environment, XREF, and AnyCAD features make it ideal for designing and analysing piping systems. The software allows for the creation of intelligent 3D models that can be used for interference checking, stress analysis, and simulation, providing MEP professionals with the necessary tools to streamline their design process.

Benefits of Using Autodesk's Product Design and Manufacturing Industry Collection

Using Autodesk’s Product Design and Manufacturing Industry Collection provides many benefits for MEP design. It saves time, improves accuracy, and ensures compliance with industry standards. With this software collection, MEP professionals have access to a suite of tools that can be used for 2D and 3D design, simulation, and analysis. Additionally, the software integrates with other Autodesk products, allowing for seamless collaboration between teams.

Importing DWG Files into AutoCAD MEP and Inventor

Both AutoCAD MEP and Inventor allow for the import of 2D and 3D DWG files. In AutoCAD MEP, you can import 2D DWG files using the “Insert” command. You can also import 3D DWG files and use them as a reference to create a new MEP model. In Inventor, you can import 2D DWG files using the AnyCAD feature. This feature allows you to link the 2D DWG file to your Inventor model, allowing you to update your design in real-time.

XREFing an Inventor Model into AutoCAD MEP

In addition to importing DWG files, you can also XREF an Inventor model into AutoCAD MEP. This feature allows you to bring in a 3D model created in Inventor and use it as a reference for your AutoCAD MEP model. By doing so, you can ensure that your MEP design is accurate and coordinated with other building systems.

Conclusion

In conclusion, Autodesk’s Product Design and Manufacturing Industry Collection provides MEP professionals with a suite of tools that can be used to streamline their design process. AutoCAD MEP and Inventor are two software tools that provide MEP professionals with a range of features, including mechanical, electrical, and plumbing content, tube and pipe routing, assembly environment, XREF, AnyCAD, and more.

You can also check out our Fabrication page to learn more about Fabrication workflows for MEP.

Ready to get your MEP Design Connected?

Discover how Autodesk Product Design & Manufacturing Collection can streamline your workflow, increase productivity, and optimise your design process. 

Get up to 20% Off Software or Services!

Contact us to find out how much money you can save on software, training or other services. Fill out the form below, by live chat, phone or email.

P: 1800 490 514 |  E: [email protected]
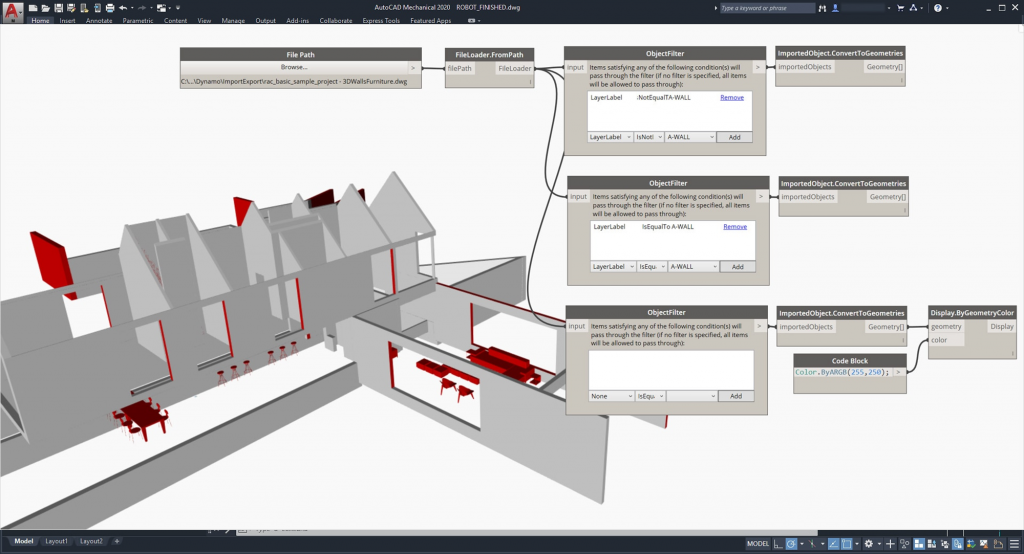
Connected Design

Connected MEP Design Moving at the Speed of Business

Connected Design with Product Design & Manufacturing Collection

Click a link below to learn more about Connected Design using the Autodesk Product Design & Manufacturing Collection 

VIEW MORE

Connected Structural Design with Autodesk Product Design & Manufacturing Collection

Connected Structural Design Moving at the Speed of Business
Design Consulting Product Design Manufacturing Collection Moving at the Speed of Business

Connected Structural Design with Autodesk Product Design & Manufacturing Collection

Transforming Structural Design with Autodesk Product Design & Manufacturing Collection

The Autodesk Product Design and Manufacturing Industry Collection is a comprehensive set of software tools for designing and manufacturing products across various industries. This collection includes software for 3D design, engineering, and production, and it’s ideal for product designers and manufacturers. In this blog post, we will explore the connected structural design tools in Autodesk Inventor and how they can be used to design and analyse structures. We will also discuss how the structural designs from Inventor can be used in Plant 3D to design production plants, oil and gas projects, and how to export dwg or adsk file formats to AutoCAD.

Structural Design and Analysis Tools in Autodesk Inventor

Autodesk Inventor offers a range of structural design and analysis tools that enable users to create complex structures with ease. The software comes equipped with frame generator, sheet metal, and assembly modeling environment to facilitate the design of structural elements. These tools are ideal for designers and engineers who need to create robust and reliable structures.

Exporting dwg or adsk File Formats to AutoCAD

Autodesk Inventor offers the ability to export designs in dwg or adsk file formats to AutoCAD. This feature enables users to work with the designs in AutoCAD, which is useful for designers who need to create 2D drawings or for those who prefer working in AutoCAD. The process of exporting designs is straightforward and requires only a few clicks.

Structural Design in Plant 3D

Plant 3D is a specialized toolset of AutoCAD that allows users to design and analyse production plants, oil and gas projects, and other industrial structures. Users can utilise structural designs created in Inventor in Plant 3D to design various elements such as pipe supports, equipment, and structural steel. This feature enables designers to create a comprehensive 3D model that includes all the structural and mechanical elements of a plant.

Frame Generator

Frame Generator is a powerful tool in Autodesk Inventor that enables users to design and create structural frames with ease. This tool allows users to create complex frame structures using pre-defined structural shapes or custom shapes. The tool also provides the ability to create structural members with different cross-sections and apply various constraints to optimize the frame’s strength and stability.

Frame Analysis

Frame Analysis is a feature in Autodesk Inventor that allows users to analyse and optimize frame structures. This feature provides a comprehensive set of tools for analysing frames, including calculating the frame’s natural frequencies, calculating the stresses and displacements, and evaluating the frame’s stability. The tool also provides the ability to modify the frame’s design and re-run the analysis to optimise the frame’s performance.

Simulation

Autodesk Inventor offers simulation tools that enable users to simulate various types of mechanical and structural behavior, including structural analysis, motion analysis, and dynamic simulation. These tools allow users to evaluate the structural and mechanical performance of their designs, identify potential issues, and optimize their designs for better performance.

Ready to Get Connected?

Save up to 20% on Autodesk Software and Services

Nastran Structural Simulation Analysis

Nastran Structural Simulation Analysis is a comprehensive simulation tool in Autodesk Inventor that allows users to simulate and analyse complex mechanical and structural behaviour. This tool provides advanced simulation capabilities for analysing stress, deformation, vibration, and other mechanical behaviours. The tool also provides the ability to perform finite element analysis (FEA) to optimize designs for better performance.

Structural Design Workflow

The workflow from designing a structural design in Inventor to performing a frame analysis and Nastran structural analysis study involves several steps, which are as follows:

Step 1: Designing the Structural Design in Inventor

The first step is to create the structural design in Autodesk Inventor using tools such as Frame Generator, Sheet Metal, or Assembly Modelling Environment. The design can include various elements, such as beams, columns, braces, and trusses.

Step 2: Preparing the Model for Analysis

Once the structural design is created, the next step is to prepare the model for analysis. This involves assigning material properties, loads, and boundary conditions to the model. Material properties include properties such as modulus of elasticity, Poisson’s ratio, and density, while loads and boundary conditions can include forces, moments, supports, and constraints.

Step 3: Performing a Frame Analysis

The next step is to perform a frame analysis to evaluate the structural behaviour of the design. In Autodesk Inventor, Frame Analysis can be performed using the Frame Analysis Environment. This environment allows users to perform various types of analysis, including static, modal, and buckling analysis. Frame Analysis can be used to calculate natural frequencies, stresses, and deformations of the structure.

Step 4: Performing a Nastran Structural Analysis Study

If more advanced analysis is required, a Nastran Structural Analysis Study can be performed. Nastran is a finite element analysis software that is integrated into Autodesk Inventor. This tool provides advanced simulation capabilities for analysing stress, deformation, and other mechanical behaviours. It can also be used to perform more complex analyses, such as dynamic and thermal analysis.

Step 5: Optimizing the Design

Once the analysis is complete, the next step is to optimize the design based on the results of the analysis. This can involve modifying the structural design or adjusting the loads and boundary conditions to improve the performance of the design.

Step 6: Iterating the Process

Finally, the design process is iterated, with the model being adjusted and re-analysed until an optimal design is achieved. This can involve going back to Step 2 and re-defining the loads and boundary conditions, or adjusting the design in Inventor and re-analysing in the Frame Analysis or Nastran Structural Analysis Study environment.

In summary, the workflow from designing a structural design in Inventor to performing a Frame Analysis and Nastran Structural Analysis Study involves several steps, including preparing the model for analysis, performing the analysis, optimizing the design, and iterating the process until an optimal design is achieved. These tools in Inventor allow for the creation of complex structures and ensure their mechanical behaviour is analysed and optimized for performance.

Ready to get your Structural Design Connected?

Discover how Autodesk Product Design & Manufacturing Collection can streamline your workflow, increase productivity, and optimise your design process. 

Get up to 20% Off Software or Services!

Contact us to find out how much money you can save on software, training or other services. Fill out the form below, by live chat, phone or email.

P: 1800 490 514 |  E: [email protected]
Connected Design

Connected Structural Design Moving at the Speed of Business

Connected Design with Product Design & Manufacturing Collection

Click a link below to learn more about Connected Design using the Autodesk Product Design & Manufacturing Collection 

VIEW MORE

Connected Mechanical Design with Autodesk Product Design & Manufacturing Collection

Connected Mechanical Design 2 Moving at the Speed of Business
Design Consulting Product Design Manufacturing Collection Moving at the Speed of Business

Connected Mechanical Design with Autodesk Product Design & Manufacturing Collection

Streamlining Mechanical Design with Product Design & Manufacturing Collection: A Guide to Connecting Autodesk Inventor, Fusion 360, AutoCAD, and AutoCAD Mechanical

Mechanical design is an intricate process that requires the use of multiple software tools. Each software tool has its unique features, which are essential for creating a functional design. The Product Design & Manufacturing Collection from Autodesk brings together all the necessary tools for mechanical design. This collection includes Autodesk Inventor, Fusion 360, AutoCAD, and AutoCAD Mechanical. By using these tools together, mechanical design becomes more streamlined and efficient. In this guide, we will explore the benefits of using these tools in conjunction with each other and provide a step-by-step process on how to connect them for maximum efficiency.

Overview of Product Design & Manufacturing Collection

The Product Design & Manufacturing Collection from Autodesk is a comprehensive collection of software tools that are designed to streamline the product design process. The collection includes Autodesk Inventor, Fusion 360, AutoCAD, and AutoCAD Mechanical. These tools work together seamlessly, allowing engineers and designers to collaborate on projects and share data across platforms. By using these tools together, teams can reduce errors, improve accuracy, and speed up the design process.

The Benefits of Using Autodesk Inventor, Fusion 360, AutoCAD, and AutoCAD Mechanical Together

The benefits of using Autodesk Inventor, Fusion 360, AutoCAD, and AutoCAD Mechanical together are numerous. First, the tools provide a comprehensive set of features that cover all aspects of mechanical design, from 3D modeling to simulation to manufacturing. Second, the tools are designed to work together seamlessly, allowing teams to collaborate on projects and share data across platforms. Third, the tools are constantly updated and improved, ensuring that users always have access to the latest features and functionality.

Connecting Autodesk Inventor, Fusion 360, AutoCAD, and AutoCAD Mechanical

To connect Autodesk Inventor, Fusion 360, AutoCAD, and AutoCAD Mechanical, follow these steps:

Install all the software tools from the Product Design & Manufacturing Collection on your computer.

Open Autodesk Inventor and create a new part or assembly.

From the menu bar, select “Manage” and then select “Import/Export.”

From the dropdown menu, select the file format you wish to use (e.g., DWG, DXF, IGES).

Select the file you wish to import and click “Open.”

The file will be imported into Autodesk Inventor, and you can start working on it.

Using Autodesk Inventor, Fusion 360, AutoCAD, and AutoCAD Mechanical for Mechanical Design

Autodesk Inventor is a powerful 3D CAD software that is used for mechanical design. It allows designers to create 3D models of parts and assemblies, perform simulations, and generate documentation. Fusion 360 is a cloud-based CAD/CAM software that allows designers and engineers to collaborate on projects in real-time. AutoCAD is a 2D CAD software that is used for creating detailed drawings, and AutoCAD Mechanical is a 3D CAD software that is used for mechanical design.

Ready to Get Connected?

Save up to 20% on Autodesk Software and Services

Unlocking the Power of AnyCAD: Combining Autodesk Inventor, Fusion 360, and AutoCAD Mechanical for Seamless Mechanical Design

AnyCAD in Autodesk Product Design & Manufacturing Collection lets you transfer 3D models between different software platforms effortlessly, making collaboration on complex projects easier. AnyCAD enables you to link Autodesk Inventor, Fusion 360, and AutoCAD Mechanical to create an integrated mechanical and electrical design with automatic updates. The 2D detailing in AutoCAD Mechanical benefits from AnyCAD’s ability to import the Inventor model, maintaining a single source of truth for design data and reducing the risk of errors.

Front page Moving at the Speed of Business

AnyCAD and DWG Files

Autodesk Inventor and AutoCAD are powerful design tools for 3D and 2D design, respectively. With AnyCAD, users can import AutoCAD DWG files into Inventor and work with both 2D and 3D geometry. AnyCAD eliminates the need for manual conversions and allows for faster and more accurate design changes. It also enables users to work with annotations and other design details in both environments, improving collaboration and communication between stakeholders. Overall, AnyCAD streamlines the design process, making it more efficient and accurate.

inventor 2021 revit to inventor anycad 11 1024x1024 1 Moving at the Speed of Business

Combining all Designs from Fusion 360 and AutoCAD Mechanical into Autodesk Inventor

The Product Design & Manufacturing Collection from Autodesk offers a suite of powerful tools for designing and manufacturing products. One of the major benefits of this collection is the ability to seamlessly integrate designs from different software platforms, such as Autodesk Inventor, Fusion 360, and AutoCAD Mechanical. In this post, we’ll explore how to combine all designs from Fusion 360 and AutoCAD Mechanical into Autodesk Inventor.

Importing Fusion 360 designs

To import a Fusion 360 design into Inventor using Anycad, you first need to export the design as a STEP file from Fusion 360. In Fusion 360, select the design you want to export, go to the File menu, and select Export. Choose the STEP file format and save the file.

Next, open an Inventor assembly and go to the Anycad tab. Click on the Import command and select the exported STEP file. The Fusion 360 design will now be imported into the Inventor assembly, where you can combine it with other designs.

Importing AutoCAD Mechanical designs

To import an AutoCAD Mechanical design into Inventor using Anycad, you need to export the design as a DWG file from AutoCAD Mechanical. In AutoCAD Mechanical, select the design you want to export, go to the File menu, and select Save As. Choose the DWG file format and save the file.

Next, open an Inventor assembly and go to the Anycad tab. Click on the Import command and select the exported DWG file. The AutoCAD Mechanical design will now be imported into the Inventor assembly, where you can combine it with other designs.

Combining all designs in Inventor

Once you’ve imported the designs from Fusion 360 and AutoCAD Mechanical into Inventor, you can start combining them. You can use the assembly tools in Inventor to mate and constrain the different components, creating a complete 3D model. You can also use the drawing tools in Inventor to create 2D drawings and detailing.

Combining all Designs into AutoCAD Mechanical

When using the Product Design & Manufacturing Collection, it’s possible to combine the strengths of different software programs to create a more comprehensive mechanical design workflow. One example of this is using Autodesk Inventor to create a 3D mechanical model, which could have a Fusion 360 model linked into it.

Once the 3D model is complete, it can be imported into AutoCAD Mechanical to further refine the design and create detailed 2D drawings. AutoCAD Mechanical offers a range of powerful tools for creating mechanical drawings, including the ability to create and edit mechanical symbols, automate common tasks, and easily generate bills of materials.

To import the Inventor model into AutoCAD Mechanical, simply use the “Insert” command to bring the 3D model into the 2D workspace. Once the model is in place, you can use AutoCAD Mechanical’s powerful annotation tools to add dimensions, notes, and other details to your drawings.

It’s worth noting that AutoCAD Mechanical also has a range of built-in tools for working with Inventor files directly, including the ability to import Inventor assemblies and parts directly into the software. This can be a great way to leverage existing Inventor designs and incorporate them into your AutoCAD Mechanical workflows.

Overall, the combination of Inventor, Fusion 360, and AutoCAD Mechanical offers a powerful suite of tools for mechanical design and detailing. By leveraging the strengths of each software program, designers can create comprehensive mechanical designs and detailed 2D drawings with greater efficiency and accuracy.

Ready to get your Mechanical Design Connected?

Discover how Autodesk Product Design & Manufacturing Collection can streamline your workflow, increase productivity, and optimise your design process. 

Get up to 20% Off Software or Services!

Contact us to find out how much money you can save on software, training or other services. Fill out the form below, by live chat, phone or email.

P: 1800 490 514 |  E: [email protected]
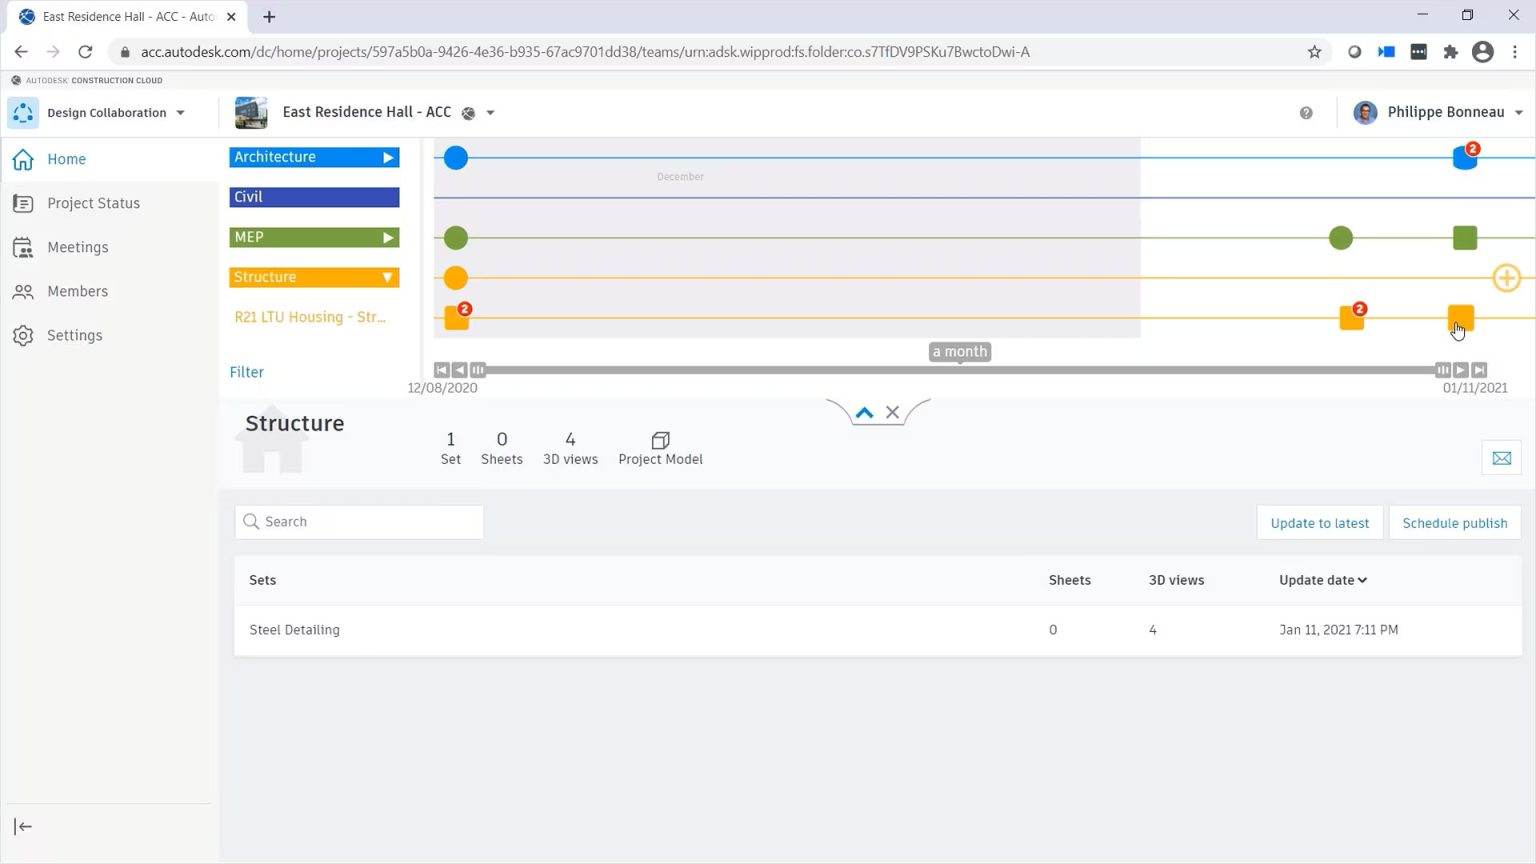
Connected Design

Connected Mechanical Design 2 Moving at the Speed of Business

Connected Design with Product Design & Manufacturing Collection

Click a link below to learn more about Connected Design using the Autodesk Product Design & Manufacturing Collection 

VIEW MORE

Connected Design with Autodesk Product Design & Manufacturing Collection

Product Design & Manufacturing Collection IC Commercial New Single-user ELD Annual Subscription
Design Consulting Product Design Manufacturing Collection Moving at the Speed of Business

Connected Design with Autodesk Product Design & Manufacturing Collection

Connecting Autodesk Inventor with Other Software Tools for Efficient Design

Are you looking for ways to streamline your product design and manufacturing process? Autodesk Product Design & Manufacturing Collection which includes Autodesk Inventor, a powerful 3D modelling software, can be a game-changer for your business. Not only can Inventor help you create complex designs with ease, but it can also connect with other Autodesk software tools for a more efficient and integrated design process.

Here’s how Product Design & Manufacturing Collection and Inventor can connect with other Autodesk software tools to improve your design workflow:

Connected Design with Product Design & Manufacturing Collection

Inventor can be used in conjunction with other Autodesk software tools such as Revit, 3ds Max, and AutoCAD. This “connected design” approach allows for seamless data exchange between software applications, improving collaboration and reducing the risk of errors and delays.

Using Inventor and AutoCAD to improve Design and Collaboration

Inventor and AutoCAD can be used together to create 2D drawings of 3D models. This integration streamlines the design process and allows for quick changes to be made to drawings as the design evolves.

Collaboration in Navisworks

Models can be imported into Navisworks for simulation and analysis. This integration allows designers to evaluate the performance of their designs and identify potential issues before production begins.

Navisworks Factory Moving at the Speed of Business
Editing Properties in Vault

Connected Design with 3ds Max

Export 3D models to 3ds Max for high-quality rendering and visualization. This integration allows designers to create photorealistic images and animations of their designs, making it easier to communicate their vision to stakeholders and customers.

Autodesk Revit

Connecting Product Design & Manufacturing Collection to Revit

Inventor can import Revit models to create detailed designs for mechanical and electrical components. Revit models can also be exported to Inventor for further refinement.

Revit interoperability Moving at the Speed of Business

Autodesk Shared Views: Collaborate Easily with Stakeholders

Autodesk Shared Views is a cloud-based tool that enables users to share their designs and models with stakeholders in real-time. It simplifies the review process by allowing users to share a link to the Shared View, where reviewers can access the design directly in their browser. Shared Views supports multiple reviewers and provides markup tools for collaboration. The tool also includes version control features for tracking changes and viewing previous versions. Being cloud-based, Shared Views requires no software or hardware installation, making it accessible from any device with an internet connection.

How Autodesk Inventor Helps You Achieve BIM Interoperability

Autodesk Inventor simplifies BIM workflows and enhances collaboration with other stakeholders by providing BIM interoperability tools. These tools allow you to create, import and export BIM data in various formats, enabling you to work more efficiently with software like Revit and Navisworks. Inventor’s BIM Content Creation, BIM Content Import, BIM Project Review and BIM-to-Fabrication tools provide accurate and consistent designs. These tools can be used in conjunction with the Product Design and Manufacturing Industry Collection, which includes additional software tools. Start using Inventor’s BIM interoperability tools today to streamline your workflow and deliver better projects.

Ready to Get Connected?

Save up to 20% on Autodesk Software and Services

Revolutionizing Electronics Design: How Autodesk Inventor's PCB Interoperability Tools are Changing the Game

Autodesk Inventor is a powerful CAD software that offers a range of advanced features for mechanical and electrical design. One of the most valuable features for electronic designers is the ability to work with printed circuit boards (PCBs) directly in the software. With Autodesk Inventor’s PCB interoperability tools, users can streamline their design process and create more accurate designs.

Inventor’s PCB Interoperability Tools

Inventor offers a suite of tools for working with PCBs, including:

  • ECAD-MCAD Collaboration
  • PCB layout import
  • Design rule checking
  • Export to Manufacturing

Additionally, Inventor’s ability to import and view PCB layouts from other software tools enables designers to work with existing designs and make any necessary changes in a 3D environment. This feature saves time and improves accuracy.

Finally, Inventor’s comprehensive design rule checking tool ensures that the design meets industry standards and identifies any potential errors before the manufacturing process. This feature reduces the risk of costly errors and ensures that the design is accurate and ready for production.

Product Design & Manufacturing Collection Connected Matrix

SoftwareDescriptionFile TypeCommandImport/ExportLink
Inventor3D mechanical design software used for creating detailed product designs and engineering documentationIPT, IAMOPEN, MODEL, DRAWING, PUBLISHImport: DWG, DXF, STEP, IGES, SAT, CATIA, SolidWorks, Pro/E, NXExport: DWG, DXF, STEP, IGES, SAT, CATIA, SolidWorks, Pro/E, NX
AutoCAD2D and 3D computer-aided design software used for creating blueprints, schematics, and modelsDWG, DXF, DWFDRAWING, MODEL, VIEW, PLOTImport: DWG, DXF, DWF, PDF, STEP, SAT, IGES, STLExport: DWG, DXF, DWF, PDF, STL, OBJ, FBX
Fusion 360Integrated CAD, CAM, and CAE software used for product development and manufacturingF3D, IPT, IAMOPEN, MODEL, DRAWING, CAMImport: DWG, DXF, STEP, IGES, SAT, SolidWorks, Pro/E, NXExport: DWG, DXF, STEP, IGES, SAT, SolidWorks, Pro/E, NX
Alias AutoStudioIndustrial design software used for creating and visualizing product designsOBJ, STLOPEN, MODEL, RENDERImport: IGES, STEP, STL, OBJ, SolidWorks, CATIA, Pro/EExport: IGES, STEP, STL, OBJ, SolidWorks, CATIA, Pro/E
NavisworksProject review software used for 3D coordination, model analysis, and clash detectionNWD, NWFOPEN, APPEND, EXPORT, PUBLISHImport: DWG, DWF, DGN, IFC, SKP, FBX, 3DS, OBJExport: DWF, DWFx, NWC, NWF, FBX, 3DS, OBJ
      
HSMWorksIntegrated CAM software used for programming CNC machinesIPT, IAMSETUP, TOOLPATH, POSTImport: DWG, DXF, STEP, IGES, SAT, SolidWorks, Pro/E, NXExport: DWG, DXF, STEP, IGES, SAT, SolidWorks, Pro/E, NX
Nastran In-CADFinite element analysis (FEA) software used for simulating and analyzing product designsNAS, OP2OPEN, ANALYSIS, RESULTSImport: IPT,

Interoperability between design and analysis software

Import/Export: Inventor supports a variety of file formats for import and export, including STEP, IGES, and SAT. This flexibility allows for easy data exchange between Inventor and other software tools, improving collaboration and reducing errors.

Collaboration

By connecting Inventor with other Autodesk software tools, designers can create complex designs with ease, reduce errors and delays, and streamline the design process. With improved collaboration and data exchange, the product design and manufacturing process can be more efficient and cost-effective.

In conclusion, Autodesk Inventor is a powerful tool that can be used in conjunction with other Autodesk software tools to improve the design workflow. By following the tips outlined in this article, you can optimize your design process, reduce errors and delays, and create high-quality designs that meet your business needs.

Ready to get your Design Connected?

Discover how Autodesk Product Design & Manufacturing Collection can streamline your workflow, increase productivity, and optimise your design process. 

Get up to 20% Off Software or Services!

Contact us to find out how much money you can save on software, training or other services. Fill out the form below, by live chat, phone or email.

P: 1800 490 514 |  E: [email protected]

Connected Design

Design Consulting Product Design Manufacturing Collection Moving at the Speed of Business

Connected Design with Product Design & Manufacturing Collection

Click a link below to learn more about Connected Design using the Autodesk Product Design & Manufacturing Collection 

VIEW MORE

Connected Electrical Design with Autodesk Product Design & Manufacturing Collection

Connected Electrical Design Moving at the Speed of Business
Design Consulting Product Design Manufacturing Collection Moving at the Speed of Business

Connected Electrical Design with Autodesk Product Design & Manufacturing Collection

Autodesk Inventor and AutoCAD Electrical are two of the most popular software applications used in engineering design, particularly in electrical and electronic design automation. While each has its own strengths, combining these two powerful tools can lead to even greater design efficiency and productivity. In this article, we will explore how Autodesk Inventor and AutoCAD Electrical work together, focusing on the EMX project, syncing files, and how they can be combined with Fusion 360 for advanced PCB design.

Autodesk Inventor and AutoCAD Electrical: Combining Forces for Better Schematic Design

Introduction to Autodesk Inventor and AutoCAD Electrical

Autodesk Inventor is a 3D modeling software used primarily for mechanical engineering design. It allows users to create precise 3D models of mechanical parts, assemblies, and even entire machines. On the other hand, AutoCAD Electrical is a specialized software used for electrical engineering design. It provides a comprehensive set of tools for creating and modifying electrical control systems, wiring diagrams, and other related documentation.

The EMX Project: Enhancing Design Efficiency and Productivity

The EMX Project is an add-on for AutoCAD Electrical that enables users to create 3D representations of their electrical schematics in Autodesk Inventor. This makes it possible to visualize the electrical components in 3D space, making it easier to detect potential design issues before fabrication. The EMX project also allows users to import Inventor models into AutoCAD Electrical, giving them a more realistic representation of the actual components used in their designs.

Syncing Files Between Inventor and AutoCAD Electrical

Another advantage of using Autodesk Inventor and AutoCAD Electrical together is the ability to sync files between the two applications. This allows users to transfer 3D electrical harness models from Inventor to Electrical or vice versa, as well as easily update changes made in one application to the other. This seamless integration not only saves time but also ensures accuracy and consistency in design documentation.

Combining with Fusion 360: Taking PCB Design to the Next Level

Fusion 360 is a cloud-based CAD/CAM platform that allows users to collaborate on projects in real-time. It integrates with both Autodesk Inventor and AutoCAD Electrical, enabling users to bring their schematic designs into the 3D modeling environment of Fusion 360 for more advanced PCB design. This integration streamlines the design process and helps eliminate errors by providing a seamless workflow from schematic design to PCB layout and manufacturing.

How to Get Started with Autodesk Inventor and AutoCAD Electrical

To get started with Autodesk Inventor and AutoCAD Electrical, users need to have a basic understanding of electrical engineering principles and practices. They also need to have access to both software applications, as well as the EMX Project add-on for AutoCAD Electrical. Additionally, users can benefit from online training resources, tutorials, and forums provided by Autodesk to help them master the software.

Connected Electrical Design AutoCAD Electrical Schematics - Connected Electrical Design

Revolutionizing Electronics Design: How Autodesk Inventor's PCB Interoperability Tools are Changing the Game

Autodesk Inventor is a powerful CAD software that offers a range of advanced features for mechanical and electrical design. One of the most valuable features for electronic designers is the ability to work with printed circuit boards (PCBs) directly in the software. With Autodesk Inventor’s PCB interoperability tools, users can streamline their design process and create more accurate designs.

Picture2 Moving at the Speed of Business

Ready to Get Connected?

Save up to 20% on Autodesk Software and Services

How to Achieve Connected Design with Autodesk Inventor and Eagle (Fusion 360)

Look no further than Autodesk’s connected design solution between Inventor and Eagle. This powerful combination allows for seamless collaboration between mechanical and electrical design teams. Autodesk Eagle, now a part of Fusion 360, is a popular PCB design tool that offers a range of powerful features to create schematics, layout designs, and manufacturing outputs. By integrating Eagle with Inventor, designers can easily incorporate PCBs into their mechanical assemblies and optimize the fit and function of their designs. 

One key advantage of using Inventor and Eagle together is the ability to maintain a “single source of truth” for your design data. With the integration, design changes in one tool can be automatically propagated to the other, reducing the risk of errors and ensuring consistency across the design process. Another benefit of this connected design approach is the ability to visualize the PCB and its components in a 3D mechanical assembly context.

This allows designers to check for potential interferences, optimize the placement of the PCB and its components, and ultimately achieve a more efficient and cost-effective design. To get started with connected design between Inventor and Eagle, simply import your Eagle board file into Inventor.

From there, you can place the PCB into your assembly and start working on the integration with your mechanical components. Changes made to the PCB in Eagle will be reflected in Inventor, and vice versa.

Inventor’s PCB Interoperability Tools

Inventor offers a suite of tools for working with PCBs, including:

ECAD-MCAD Collaboration

This tool allows electrical and mechanical designers to work together seamlessly by importing 3D models of the PCB into Inventor. This tool eliminates the need for physical prototypes and enables designers to test the fit of the PCB in the mechanical assembly.

PCB layout import

Inventor can import and view PCB layouts from other software tools such as Eagle, Altium, and OrCAD. This feature allows designers to view their designs in a 3D environment and make any necessary changes before finalizing the design.

 Design rule checking

Inventor offers a comprehensive design rule checking tool that allows designers to check their PCB designs against a set of predefined rules. This feature ensures that the design meets industry standards and helps identify any potential errors before the manufacturing process.

Export to Manufacturing

Once the design is complete, Inventor can export the PCB design to the manufacturing process. This feature ensures that the design is accurate and ready for production.

Seamless Integration: How Autodesk Inventor and Fusion 360 Work Together for Streamlined PCB Design

https://www.autodesk.com/redshift/pcb-design-with-fusion-360/Autodesk Inventor and Fusion 360 are both powerful design tools that can be used for a wide range of applications. While Inventor is known for its advanced 3D design capabilities, Fusion 360 is a comprehensive product development platform that allows designers and engineers to work together in a collaborative environment.

One of the ways that Inventor and Fusion 360 work together is through their interoperability with PCB design software. In particular, Fusion 360 includes an integrated PCB design tool called Eagle that can be used to create schematics and layouts for printed circuit boards. By leveraging the power of Eagle and the design capabilities of Inventor and Fusion 360, designers can create complex PCB designs with ease.

One of the key benefits of using Inventor and Fusion 360 for PCB design is the ability to work in a connected design environment. This means that designers can collaborate in real-time with other members of their team, including electrical engineers, mechanical engineers, and other stakeholders. This collaborative approach can help to streamline the design process and reduce errors, ensuring that the final product is of the highest quality.

Another advantage of using Inventor and Fusion 360 for PCB design is the ability to import and export data between the two platforms. This means that designers can easily move between the two tools, leveraging the strengths of each platform as needed. For example, designers can create a 3D model of a PCB in Inventor, then import the data into Fusion 360 to add electrical components and wiring.

To get started with using Inventor and Fusion 360 for PCB design, users should first become familiar with the basic workflows and tools of each platform. They should also explore the various integration points between the two tools, including the ability to import and export data, collaborate in a connected design environment, and use the integrated Eagle PCB design tool within Fusion 360.

Why Use Autodesk Inventor for PCB Design?

Autodesk Inventor’s PCB interoperability tools make it an ideal choice for electronic designers. The ability to work with both mechanical and electrical designs in the same software environment streamlines the design process and eliminates the need for multiple software tools. This feature also enables designers to test the fit of the PCB in the mechanical assembly, reducing the risk of errors and rework.

Additionally, Inventor’s ability to import and view PCB layouts from other software tools enables designers to work with existing designs and make any necessary changes in a 3D environment. This feature saves time and improves accuracy.

Finally, Inventor’s comprehensive design rule checking tool ensures that the design meets industry standards and identifies any potential errors before the manufacturing process. This feature reduces the risk of costly errors and ensures that the design is accurate and ready for production.

In conclusion, the interoperability between Autodesk Inventor and Fusion 360, along with the integrated Eagle PCB design tool, makes these tools an excellent choice for designers and engineers looking to create complex PCB designs. By working together in a connected design environment and leveraging the strengths of each platform, designers can create high-quality PCB designs in a fraction of the time it would take with other tools.

Connected Design with Product Design & Manufacturing Collection

Click a link below to learn more about Connected Design using the Autodesk Product Design & Manufacturing Collection 

Ready to get your Electrical Design Connected?

Discover how Autodesk Product Design & Manufacturing Collection can streamline your workflow, increase productivity, and optimise your design process. 

Get up to 20% Off Software or Services!

Contact us to find out how much money you can save on software, training or other services. Fill out the form below, by live chat, phone or email.

P: 1800 490 514 |  E: [email protected]

Connected Design

Connected Electrical Design Moving at the Speed of Business

VIEW MORE

ProModel: Your Autodesk® Process Analysis 360 Substitute

ProModel

After March 31, 2023, the Product Design and Manufacturing Collection will no longer include Process Analysis 360 as a part of the offering. See the FAQs below for more information on this change. We recommend ProModel by BIGBEAR.AI as an alternative option with similar capability.

With ProModel, you can create the perfect factory layout before you start any building works. Design, simulate, and optimize your factory layout before you build it, using one of the world’s leading computer-aided design tools.

ProModel

With ProModel AutoCAD Edition you can easily build spatially accurate layout and process simulation models of your factory simultaneously—all from within AutoCAD.

Simulate scaled models with just one click, view results, and easily make, test, and validate layout process changes in AutoCAD. You can then finalize your model and view it in 3D.

Promodel animation
Promodel

Create, test and optimise a bottleneck free factory layout, long before any work evert takes place in your factory.  Be ready to hit the ground running with efficient factory layout and processes.

Autodesk® Process Analysis 360 End of Life.
Frequently Asked Questions

What is changing with Autodesk® Process Analysis 360?
After March 31, 2023, the Product Design and Manufacturing Collection will no longer include Process Analysis 360 as a part of the offering.

Why is this change happening?
Autodesk Process Analysis 360 does not have the integration or scalability required for modern factory planning workflows.

What are the recommended solutions with similar capabilities to Process Analysis 360?
Autodesk is working with ProModel to provide Autodesk customers with a trial version of the ProModel AutoCAD Edition. ProModel has capabilities similar to Process Analysis 360. ProModel also offers other standalone software solutions that may better fulfill your requirements.

Where can I learn more about the ProModel AutoCAD Edition evaluation?
Visit the ProModel website where you can find more information and download a free trial of the ProModel AutoCAD Edition.

What will happen to Process Analysis 360 after March 31, 2023?
Autodesk Product Design & Manufacturing Collection subscribers will no longer have access to Process Analysis 360 after March 31, 2023. Customers will still be able to access existing files, but you will not be able to use the software to modify those files.

More Information

Contact us on 1800 490 514, [email protected], by live chat or fill out the form below to get more information on how to best manage your design and engineering software.  Our team of experts have saved our clients thousands of dollars by helping them make smart decisions around how to best structure their investment in technology for maximum return on investment.   We’d be happy to audit your existing technology and recommend any changes that you could benefit from.


Contact Form Demo

VIEW MORE

Autodesk Access Replacing Autodesk Desktop Application (ADA)

Autodesk
Autodesk Banner

On March 15, 2023, Autodesk Desktop Application (ADA) will be replaced by Autodesk Access. This will provide a firm foundation  for future capabilities, making it simple to manage new Autodesk product updates.

The new Autodesk Access has been built with trust, security and choice in mind, providing many benefits, including:

  • Easy access to updates, new features, and defect fixes, keeping you productive without interfering with your workflows
  • Improved control over your user update experience
  • Enhanced security features while improving performance
  •  

How To Update To Autodesk Access

You will automatically receive Autodesk Access if you currently have the Autodesk Desktop App or if you install a new Autodek product on or after March 15, 2023.

Starting March 15, you can download Autodesk Access here

Important Notice: User Permissions

Please note that when Autodesk Access is installed, by default, users will have access to install updates if they have administrator rights. To prevent users from manually installing updates via the new Autodesk Access, use the following Registry Key. We recommend completing this step before March 15th. For more guidance on how to set this key for your users, please see this support article. See key details below:

  • Create a new key in the HKCU/Software/Autodesk/ODIS folder.
    • Key name: DisableManualUpdateInstall
    • DWORD value: 1

This is Autodesk’s first step in an exciting roadmap to give customers a simple, transparent update experience with full control and easy access to new product features.  Stay tuned for further updates from Design Consulting as Autodesk continue to release new features and improvements.

More Information

Contact us on 1800 490 514, [email protected], by live chat or fill out the form below to get more information on how to best manage your Autodesk software.  Our team of experts have saved our clients thousands of dollars by helping them make smart decisions around how to best structure their investment in technology for maximum return on investment.   We’d be happy to audit your existing technology and recommend any changes that you could benefit from.


Contact Form Demo

VIEW MORE

Autodesk Vault Vs Windows Explorer – Renaming Files

Compare Autodesk Vault to using windows explorer

Autodesk Vault Vs Windows Explorer - Renaming Files

This Autodesk Vault Vs Windows Explorer post looks at the common workflows in both systems when it comes to renaming a file. Typically when a a file is renamed it is either named differently because their is a variation, or perhaps the design intent has changed and there may be a need to modify the filename or it is copied and the requirement to have a unique filename exists.

File Management

Renaming Files in Windows Explorer

When renaming within a Windows Explorer environment, as long as the file is not opened, you can simply left click or right-click > rename and change the filename as long as the same filename does not exist in the same file path.

There are 3rd party tools to batch rename as well of you need to change a filename in bulk.

Windows Explorer File Renaming Challenges

Using Windows, users experience the following challenges:

  • Reference management may fail as the filename in the reference file path has changed
  • Changing multiple files can be time consuming
  • Updating the part number or other metadata, properties or attributes within the file. While we can rename the file, if we need to also rename the metadata within that file, we need to go into each file that needs to be modified, make the changes, save, exit and repeat for each file that needs a similar metadata change.

Renaming in Vault

With Vault, you can rename files and metadata within the file a couple ways:

  • Rename Wizard
  • Edit Properties
  • Copy Design
 

Rename Wizard

By selecting a file or files, then right-clicking the mouse button, you can select the rename command to launch the rename wizard.

Autodesk Vault’s Rename Wizard gives you the following options:

  • Add more files to rename
  • Add a Prefix and/or Suffix or Increment
  • Modify the filename
  • Update the Part Number
  • Numbering Scheme (for Vault Professional environments)
 
Autodesk Vault
Using the Rename Wizard in Vault

Edit Properties

Like the Rename Wizard in Autodesk Vault, you can bulk update properties through the Vault Explorer without needing to open files individually.

Autodesk Vault Autodesk Vault Basic Training Course
Editing Properties in Vault

Opening Files That Have Been Renamed

Windows Explorer

The issue with opening referenced files that have been renamed is matching the file reference. No big deal when it’s one, but if there are hundreds or more, the process can be mind numbing and time consuming.

Autodesk Vault

When files are renamed in Vault and opened in CAD, Vault tracks the change and ensures the reference to any other files are maintained, giving users more time to focus on design rather than file administration. 

Autodesk Vault Vs Windows - File Renaming Video

Watch the video below to compare file remaming in Autodesk Vault Vs Windows Explorer.

Learn More about Autodesk Vault

Check out the rest of the Autodesk Vault Vs Windows Explorer Blog Series or click on a button below to learn more about having Vault to manage your data on-prem or in the cloud.

Free 90 Day Vault Trial

If you are interested in trialling Vault or just want to discuss your data management requirements further, feel free to fill out the form below or contact us on 1800 490 514, [email protected], by live chat or fill out the form below.

Contact Form Demo (#5)

Design Consulting

VIEW MORE

February 2023 Autodesk Update: What’s New

Autodesk
Autodesk Banner

Discover the latest news and new features from Autodesk, Click the links below for more information.

 AutoCAD and AutoCAD LT

 Architecture, Engineering & Civil Engineering

 Design & Manufacturing

 Media & Entertainment

 Admin resources and more

 More Information

Contact us on 1800 490 514, [email protected], by live chat or fill out the form below to get more information on how to best manage your Autodesk software.  Our team of experts have saved our clients thousands of dollars by helping them make smart decisions around how to best structure their investment in technology for maximum return on investment.   We’d be happy to audit your existing technology and recommend any changes that you could benefit from.


Contact Form Demo

VIEW MORE

Autodesk Portal Gets New Usage Reporting Features

Autodesk Portal New Usage Reports Side Bar Moving at the Speed of Business

NEW Autodesk Usage Report

Autodesk have announced that there are new usage reporting features within the Autodesk Account Management Portal for Autodesk accounts.

Coming soon, this new reporting tool will be found under Usage Report. Whether your users are on Autodesk subscriptions or Autodesk Flex licenses, you can now view the product usage details for all of your users on one single page with Usage Report. All admins on all Autodesk plans will have access to the new Usage Report.

Have a look in the reporting section of your account. When the new feature is activated, you will see a snapshot of important details for both subscriptions and Flex. The information available in the new reporting tool ncludes:

  • Total number of Autodesk subscriptions for your team(s)
  • The number of active or inactive users
  • The number of Flex tokens used and Flex tokens remaining
  • The monthly average Flex token usage

You now have easy access to all of this data at your fingertips with a single report showing usage across both Autodesk Flex and Autodesk Subscriptions.

Autodesk Portal New Usage Reports Moving at the Speed of Business

As you scroll down the report you will see a list of users with simple summaries showing:

  • Which Autodesk products they’re using
  • The average number of days they use each product per month
  • How many Flex tokens they’ve used.

You can use the report to differentiate between frequent and infrequent users to adjust and optimize licenses for your team.  For example, you can identify light users and assign them Flex licenses.

Clicking on a user, you can drill down for more detailed information on that particular user as shown below:

Autodesk Portal New Usage Reports User Moving at the Speed of Business

Additionally, you can use filters to arrange your data and identify specific information of interest. For example, you can filter by products, teams or access type. Any filters you apply will also be carried over to the export functionality if you choose to export your data for additional analysis and insights outside of Usage Report, in Microsoft Excel or a Google Sheet for example.

Autodesk Portal New Usage Reports Filter Moving at the Speed of Business

The new Usage Report provides a single view of how all of your Autodesk users are using their licenses. The new Usage Report will help you identify patterns and make better decisions.  For example, the new Usage Report can help you decide:

  • Which users might benefit from using Flex or subscription
  • When to buy more subscriptions or tokens,
  • Which inactive subscriptions you can reassign

Coming Soon

This new reporting feature is not available yet.  When it is launched, you will find it in the Reporting menu as shown below:

Autodesk Portal New Usage Reports Side Bar Moving at the Speed of Business

More Information

Contact us  on 1800 490 514, [email protected], by live chat or fill out the form below to get more information on how to best manage your Autodesk licenses and tokens.  Our team of experts have saved our clients thousands of dollars by helping them make smart decisions around how to best structure their investment in technology for maximum return on investment.   We’d be happy to audit your existing license structure and recommend any changes that you could benefit from.


Contact Form Demo

VIEW MORE

Autodesk Vault Vs Windows Explorer – File Management

Compare Autodesk Vault to using windows explorer

Autodesk Vault Vs Windows Explorer - File Management

In the first post of the Autodesk Vault vs Windows Explorer Blog Series, we take a look at the differences between Autodesk Vault and Windows Explorer when it comes to file management and how users store, find files, create files and folders.

File Management

Windows Explorer File Management Processes and Techniques

When managing CAD or BIM data using AutoCAD, Inventor or Revit in a Windows Explorer, Network Server or even Cloud Storage environment, users typically:

  • Store data in folders
  • Sort data or projects by folder
  • Descriptive filenames that are complex and long are used to understand what the file is and what it contains
  • Find files by clicking through folders and sub-folders or searching by file name
  • Have a centralised library of content center files, xrefs, blocks, templates, etc.
  • Create multiple ipj files (for Inventor) to manage projects or isolate project specific files
  • Updating files and the file metadata on a batch scale using 3rd party tools, such as Inventor task scheduler

Windows Explorer File Management Challenges

Using Windows, users experience the following challenges:

  • Complex folder and sub-folder structures based on agreed upon rules or company standards
  • Understanding what a filename means to know what the file contains
  • Having to open the file or multiple files to find the right file/s.
  • Managing folder and filenames characters when the 255 character folder/filename limitation becomes an issue
  • Wasting time looking through folder structures to find the ‘correct’ file
  • Understanding which files reference the file you want to modify.
  • If there are duplicates, which file is the right file.
  • Using files across projects. In an Inventor environment, doing this while managing ipj files and reference errors can also become challenging.
  • Renaming or updating files on a batch scale can be laborious 
  • The time it takes windows to search and find the files is time consuming
  • Windows finds other files that may not be related
  • You can’t see the metadata or file properties that are stored within the CAD file
  • Unless the filename includes the version or revision, it’s difficult to understand if it’s the latest file
Autodesk Vault vs Windows Explorer - searching for a file side by side comparison
Autodesk Vault vs Windows Explorer - Side by side comparison when searching

Vault File Management

Using a SQL database, Vault managing folder and file entries, queries and file attributes, changing the way files are managed from relying on manual standards, file naming and folder structure procedures to leveraging file metadata and visualisation.

Using Vault, users can still use traditional folder and file naming methods to find files or by using advanced searching criteria, metadata and visualisation, users can the right file.

In the scenario below, we know the file name contains 558, it’s an ipt file and who created it, so by using this criteria, we can filter through the folder structure very quickly to isolate which file/s we are looking for. Search results can also be saved for future use too.

Autodesk Vault explorer user interafce
Autodesk Vault Explorer User Interface

Folder Management

Like Windows, using the Project Explorer interface, users can create folders, sub-folders and (also new files) also use numbering schemes, Vault properties, datasheet, categories, version controls and lifecycles to manage the folder and its contents.

Tools to find the right file in Vault

Now that we have found what files have met the search criteria, amongst other tools in Vault, we can use these tabs to give us more insight into the file:

  • Search Results – view the results, file category, stage, compliance and any other associated metadata you want to view
  • Properties – displays all the properties associated with the file
  • History – provides an thumbnail, it’s version, revision, historical state and other meta data
  • Where Used – Lets you know which files are referencing the selected file before you start editing it and making changes to the file.
  • View –  without needing to open the file, a user can view a 3D model (pan, rotate & zoom) or 2D drawing, measure, see markups, create cross sections and utilise all the other tools available in the Autodesk Viewer that is used in other Autodesk management tools such as Fusion Teams and Autodesk Construction Cloud.
Autodesk Vault saved search Moving at the Speed of Business
Autodesk Vault - View tab lets you preview a 3D model in Vault
Autodesk Vault visualisation viewer lets you preview the model in 3D before opening it
Autodesk Vault - View tab lets you preview a 3D model in Vault
Autodesk Vault - where used allows users to understand where the file is being used as a reference
Autodesk Vault - Where Used Tab lets you see which other files are referencing the selected file

Autodesk Vault File Management Video

Watch the video below to see how easy it is to find files in Autodesk Vault.

Learn More about Autodesk Vault

Autodesk Vault can be deployed on-premise or cloud. To learn more about Autodesk Vault click one of the buttons below.

Free 90 Day Vault Trial

If you are interested in trialling Vault or just want to discuss your data management requirements further, feel free to fill out the form below or contact us on 1800 490 514, [email protected], by live chat or fill out the form below.

Contact Form Demo (#5)

Design Consulting Logo

VIEW MORE

Autodesk Vault Vs Windows Explorer

Compare Autodesk Vault to using windows explorer

Autodesk Vault Vs Windows Explorer

When using CAD software such as Autodesk AutoCAD and Autodesk Inventor, the natural choice is to use the Windows Explorer environment and store files and manage projects and data in Windows folders.

User who use Windows folders can experience limitations and need to do more manual operations compared to using Autodesk Vault to manage their data, however, what are the differences between these two ways of working and is the time and money spent on implementing a new system less than the time spent working in Windows folders?

The answer an overwhelming yes from Vault users, and this blog series will demonstrate the differences, so if you are unsure of why you should stop how you are managing your CAD data in Windows, this blog should answer those questions. 

What's the Difference?

Here’s the main differences when working in Autodesk Vault and Windows:

  • File Management – How do you store and find files and metadata
  • Reference management – How the systems manage file references such as when files like dwg xrefs are linked into a dwg in an AutoCAD project or with Inventor Assemblies, how sub-assemblies, parts and drawings are managed.
  • Renaming Files – How do you rename a file or a batch of files and how it affects other files that reference the renamed file.
  • Copying Files – Copying existing files from existing projects and re-using designs.
  • IPJ file management (Autodesk Inventor) – Inventor uses IPJ project files and the way they are used in both systems differ.
  • Attributes/Properties – How users modify the attributes/properties of files
  • Version Control – How versions are managed
  • Concurrent Design – How do you work on the same project and files
  • Collaboration – How do you collaborate with other team members

File Management

Windows Explorer File Management Processes and Techniques

When managing CAD or BIM data using AutoCAD, Inventor or Revit in a Windows Explorer, Network Server or even Cloud Storage environment, users typically:

  • Store data in folders
  • Sort data or projects by folder
  • Descriptive filenames that are complex and long are used to understand what the file is and what it contains
  • Find files by clicking through folders and sub-folders or searching by file name
  • Have a centralised library of content center files, xrefs, blocks, templates, etc.
  • Create multiple ipj files (for Inventor) to manage projects or isolate project specific files
  • Updating files and the file metadata on a batch scale using 3rd party tools, such as Inventor task scheduler

Vault File Management

Using a SQL database, Vault managing folder and file entries, queries and file attributes, changing the way files are managed from relying on manual standards, file naming and folder structure procedures to leveraging file metadata and visualisation.

Using Vault, users can still use traditional folder and file naming methods to find files or by using advanced searching criteria, metadata and visualisation, users can the right file.

In the scenario below, we know the file name contains 558, it’s an ipt file and who created it, so by using this criteria, we can filter through the folder structure very quickly to isolate which file/s we are looking for. Search results can also be saved for future use too.

Autodesk Vault explorer user interafce
Autodesk Vault Explorer User Interface

Autodesk Vault vs Windows Explorer - File Management Blog Post

Click the button below to learn more about how Autodesk Vault manages files compared to using Windows Explorer

Reference Management

Windows Reference Management

When files are referenced within a file such as an xref in AutoCAD and Revit or iam, ipt and idw in an Inventor iam

Windows Vs Vault

Here’s the main differences when working in Autodesk Vault and Windows:

  • Reference management – How the systems manage file references such as when files like dwg xrefs are linked into a dwg in an AutoCAD project or with Inventor Assemblies, how sub-assemblies, parts and drawings are managed.
  • Renaming Files – How do you rename a file or a batch of files and how it affects other files that reference the renamed file.
  • Copying Files – Copying existing files from existing projects and re-using designs.
  • IPJ file management (Autodesk Inventor) – Inventor uses IPJ project files and the way they are used in both systems differ.
  • Attributes/Properties – How users modify the attributes/properties of files
  • Version Control – How versions are managed

Renaming Files

Here’s the main differences when working in Autodesk Vault and Windows:

  • Reference management – How the systems manage file references such as when files like dwg xrefs are linked into a dwg in an AutoCAD project or with Inventor Assemblies, how sub-assemblies, parts and drawings are managed.
  • Renaming Files – How do you rename a file or a batch of files and how it affects other files that reference the renamed file.
  • Copying Files – Copying existing files from existing projects and re-using designs.
  • IPJ file management (Autodesk Inventor) – Inventor uses IPJ project files and the way they are used in both systems differ.
  • Attributes/Properties – How users modify the attributes/properties of files
  • Version Control – How versions are managed

Copying Files

Here’s the main differences when working in Autodesk Vault and Windows:

  • Reference management – How the systems manage file references such as when files like dwg xrefs are linked into a dwg in an AutoCAD project or with Inventor Assemblies, how sub-assemblies, parts and drawings are managed.
  • Renaming Files – How do you rename a file or a batch of files and how it affects other files that reference the renamed file.
  • Copying Files – Copying existing files from existing projects and re-using designs.
  • IPJ file management (Autodesk Inventor) – Inventor uses IPJ project files and the way they are used in both systems differ.
  • Attributes/Properties – How users modify the attributes/properties of files
  • Version Control – How versions are managed

IPJ File Management

Here’s the main differences when working in Autodesk Vault and Windows:

  • Reference management – How the systems manage file references such as when files like dwg xrefs are linked into a dwg in an AutoCAD project or with Inventor Assemblies, how sub-assemblies, parts and drawings are managed.
  • Renaming Files – How do you rename a file or a batch of files and how it affects other files that reference the renamed file.
  • Copying Files – Copying existing files from existing projects and re-using designs.
  • IPJ file management (Autodesk Inventor) – Inventor uses IPJ project files and the way they are used in both systems differ.
  • Attributes/Properties – How users modify the attributes/properties of files
  • Version Control – How versions are managed

Attributes/Properties

Here’s the main differences when working in Autodesk Vault and Windows:

  • Reference management – How the systems manage file references such as when files like dwg xrefs are linked into a dwg in an AutoCAD project or with Inventor Assemblies, how sub-assemblies, parts and drawings are managed.
  • Renaming Files – How do you rename a file or a batch of files and how it affects other files that reference the renamed file.
  • Copying Files – Copying existing files from existing projects and re-using designs.
  • IPJ file management (Autodesk Inventor) – Inventor uses IPJ project files and the way they are used in both systems differ.
  • Attributes/Properties – How users modify the attributes/properties of files
  • Version Control – How versions are managed

Version Control

Here’s the main differences when working in Autodesk Vault and Windows:

  • Reference management – How the systems manage file references such as when files like dwg xrefs are linked into a dwg in an AutoCAD project or with Inventor Assemblies, how sub-assemblies, parts and drawings are managed.
  • Renaming Files – How do you rename a file or a batch of files and how it affects other files that reference the renamed file.
  • Copying Files – Copying existing files from existing projects and re-using designs.
  • IPJ file management (Autodesk Inventor) – Inventor uses IPJ project files and the way they are used in both systems differ.
  • Attributes/Properties – How users modify the attributes/properties of files
  • Version Control – How versions are managed

Get in Touch

DC is an authorised Autodesk Reseller providing products and services for the Architecture, Engineering, Construction, Infrastructure and Manufacturing Sectors.

Feel free to contact us on 1800 490 514, [email protected], by live chat or fill out the form below.

Contact Form Demo

Design Consulting Logo

VIEW MORE

Sharing Civil 3D Surfaces with Revit using Autodesk Docs

Civil 3D Surface Model

Autodesk Docs can now be used as a conduit for sharing Civil 3D surface models with Revit. In the past, it’s been surface sharing has been challenging, but now, when you share surfaces through Autodesk Docs, they retain the triangulation found in Aurdoesk Civil 3D and they are much easier to update.  If a new shared surface is modified in Civil 3D, a new version can be published to DOcs and then refreshed in Revit.

In the video below, civil industry expert Jeff Bartels explains how you can make the connection between the two platforms.  The video also explores how the Shared Reference Point feature can be used to align the Civil 3D and Revit environments.

See the video below to learn more.

Discover the Architecture, Engineering and Construction Collection.

Get access to both Civil 3D, Revit and much more in the Architecture, Engineering and Construction Collection.  Get all the software you need to create seamless workflows and collaborate with ease.

Get Your Free Consultation

Contact us  on 1800 490 514, [email protected], by live chat or fill out the form below to book in a free consultation. We have a team of experts ready to help you create efficient workflows in your organisation.


Contact Form Demo

VIEW MORE

Twinmotion Now In Revit And AEC Collection

Twinmotion
Twinmotion

Exciting news!  Twinmotion is now officially included with Autodesk Revit subscriptions!

Announced at Autodesk University in September, it’s finally here!  Autodesk have collaborated with Epic Games to include Twinmotion with all Revit subscriptions. Whether you subscribe to the AEC Collection or standalone Revit, use Flex pricing or have an education license, you now have at your fingertips the real-time visualisation power of Twinmotion for Revit.

Twinmotion’s real-time rendering capabilities enable architectural storytelling through real-time visualisation.

With Twinmotion for Revit, Revit users can now easily bring their designs to life with high-quality visualisations in a fast, interactive creative process. Everything from photorealistic stills and animations to compelling immersive VR is all now possible. 

Launch Twinmotion for Revit directly from the Revit ribbon in Revit 2023.1. Immerse yourself in the intuitive creator environment, turning your design data into photo-realistic stills, scenes, and scenarios. Present a powerful picture of how your design is working, making it easier to evaluate options, make decisions and take clients and stakeholders through impressive experiences that  add shine and sophistication to your design communications. You can then utiilise your impressive content to win more work!

From project stills and animations, to VR experiences: Autodesk and Epic Games have now introduced powerful new tools into Revit that showcase your creativity, illuminate your insights, and help you better connect digital and physical worlds.

Get Twinmotion For Revit

Contact us  on 1800 490 514, [email protected], by live chat or fill out the form below to get Twinmotion for Revit today.


Contact Form Demo

VIEW MORE

AutoCAD Vs AutoCAD Electrical

AutoCAD vs AutoCAD Electrical

AutoCAD Vs AutoCAD Electrical

Many users who design electrical schematics and wiring diagrams use AutoCAD and AutoCAD LT as their tool of choice for 2D schematic and wiring design, however, Autodesk also has AutoCAD Electrical, a specialised product for electrical designers and engineers, available now with AutoCAD as a specialised toolset that can be downloaded and used if you have an AutoCAD Subscription.

What's the Difference?

AutoCAD Electrical has all the tools of AutoCAD plus specialised tools and catalog for electrical schematic design, reporting and panel layouts with integration with Autodesk Inventor which has electrical harnessing and nailboard drawing tools and BOM tables for wiring lengths and components.

In addition, Autodesk Vault Professional also has AutoCAD Electrical integration with additional options for working with electrical projects.

AutoCAD Electrical has these additional tools, not found if just using AutoCAD or AutoCAD LT:

  • Project Tab
  • SQL Database
  • Schematic Components
  • Circuits
  • PLC
  • Wire and Wire Numbers
  • Terminals
  • Catalog
  • Panel Layout
  • Reports
  • Symbol Libraries
  • Electromechanical Projects
  • Integration for Vault Professional 

Project Tab

AutoCAD Electrical has a project manager tab, to manage all your electrical projects with tools to make projects active, customise, copy, delete and archive.

There are also buttons to refresh a drawing list, tasks list, update/retag and other file management tools.

Click here to learn more.

Project Tab

SQL Database

AutoCAD Electrical manages the catalog through a SQL database, giving users the ability to work with catalog database tables, with a detailed list of customisable Family Code/Table Names

SQL Database 2 Family Table Moving at the Speed of Business

Schematic Components

Using the schematic tools, an AutoCAD Electrical user can:

  • Search for AutoCAD component
  • Insert a component
  • Insert at Fence Crossing Points
  • Copy Data from One-line to Schematic
  • Copy Component
  • Copy Component at Fence Crossing Points
  • Insert from User-Defined Pick List
  • Insert from Equipment List
  • Insert Components or Terminals from Panel Lists
  • Cut, Copy, and Paste Electrical Objects
  • Scoot Components/Wire Segments
  • Align Components/Wire Numbers
  • Stretch PLC Modules, Components, or Blocks
  • Split PLC Modules/Components
  • Reverse/Flip Components
  • Swap Contact States
  • Work With Cross-Referencing
  • Surf on Cross-Reference Exception Reports
  • Change Cross-Reference Visibility
  • Insert a Location Box
  • Retag Components
  • Retrieve the Pinlist Values from a Peer Parent
  • Check the Coil/Contact Count


Circuits

Circuits can be cut, copied and pasted and users can insert, configure single and dual circuits.

Using the circuit builder, the program builds dynamically and matches the rung spacing, adds wiring between components, and can annotate the circuit with calculated values based upon the assigned load amperage of the circuit. Circuit Builder extracts these annotation values from a database based on engineering standards, motor horsepower, and supply voltage.

Circuits

PLC

AutoCAD Electrical toolset can generate any number of different PLC I/O modules on demand and in various graphical styles. AutoCAD Electrical toolset generates the selected PLC I/O module through a parametric generation technique based on information in the PLC database (ACE_PLC.MDB).

PLC

Wires and Wire Numbers

Create, import, select, and change wire types with AutoCAD Electrical using the schematic tab for:

  • Different Wire Types
  • Ladders
  • Wire Gaps
  • Single Arrows
  • Tee MArkers
  • Wire Sequence
  • Internal Jumpers
  • Wire Colour/Guage Labels
  • In-Line Wire Labels
  • Inserting Cable Markers
  • Fan In/Out Source and Destination Markers
  • Shield Symbols
  • Inserting Wire Numbers
Wires and Wire Numbers

Terminals

Terminals can be inserted from the Catalog browser and users of AutoCAD Electrical can define a Multi-Level Terminal by Catalog Value, by Terminal Block Properties, and associate Terminals on the same Drawing or across Drawings.

When selecting a terminal, the user can show terminal associations or break them apart.

Terminals

Catalog

When working in the Catalog browser in AutoCAD Electrical, the user has a the ability to:

  • Insert a Schematic Component From the Catalog
  • Assign Catalog Information to a Component
  • Predefine a Search Value for Catalog Browser Lookup Mode
  • Copy Catalog Assignments
  • Show Missing Catalog Assignments
  • Update Components from the Catalog Database
  • Work With Editing the Catalog Database Records
  • Work With Catalog Database Tables
  • Create a Project-Specific Catalog Database
  • Define a Secondary Catalog Lookup File for a Project
  • Move the Catalog Database File
  • Edit or Add Manufacturer Content to the Catalog Database
  • Search through the Catalog


Catalog

Panel Layout

The Panel Layout tools create intelligent mechanical / panel layout drawings, whereby:

  • Layouts can be driven from information carried on the AutoCAD Electrical toolset schematic wiring diagram drawings or they can be constructed independently of schematics.
  • AutoCAD Electrical toolset places no requirements on special naming or attribute requirements on mechanical footprint symbols. Vendor-supplied footprint symbols, in AutoCAD format, can be used as is with AutoCAD Electrical toolset.
  • Bi-directional update capabilities allow certain schematic wiring diagram edits to update the panel drawings automatically and vice versa.
  • Wire number, wire color/gauge information, and connection sequencing data can be extracted directly from the schematics and annotated on to the panel footprint representations.
  • AutoCAD Electrical toolset extracts various reports from these smart panel layout drawings including panel BOM, panel component/item lists, nameplate reports, and schematic versus panel exception reports.
Panel Layout

Reports

Users can generate reports based on the schematic design with the ability to:

  • Generate a report
  • Insert a report on to a drawing
  • Change the format of a report
  • Export the report to a spreadsheet


Reports

Symbol Libraries

During a stand-alone installation of AutoCAD Electrical, all available symbol libraries are installed and users can remove any symbol libraries not required.

The symbol libraries and Symbol Builder template files are located at C:\Users\Public\Documents\Autodesk\Acade {version}\Libs. The symbol library subfolder, \Libs, carries various AutoCAD Electrical schematic and panel layout symbol libraries.

The following electrical schematic libraries are installed by default and multiple symbol libraries can be used within a project.

Symbol Libraries

Electromechanical Projects

The Panel Layout tools create intelligent mechanical / panel layout drawings, whereby:

  • Layouts can be driven from information carried on the AutoCAD Electrical toolset schematic wiring diagram drawings or they can be constructed independently of schematics.
  • AutoCAD Electrical toolset places no requirements on special naming or attribute requirements on mechanical footprint symbols. Vendor-supplied footprint symbols, in AutoCAD format, can be used as is with AutoCAD Electrical toolset.
  • Bi-directional update capabilities allow certain schematic wiring diagram edits to update the panel drawings automatically and vice versa.
  • Wire number, wire color/gauge information, and connection sequencing data can be extracted directly from the schematics and annotated on to the panel footprint representations.
  • AutoCAD Electrical toolset extracts various reports from these smart panel layout drawings including panel BOM, panel component/item lists, nameplate reports, and schematic versus panel exception reports.

Vault Professional Integration

Vault Professional support AutoCAD Electrical .wdp project files where you can add and open an AutoCAD Electrical project to/from Vault using the .wdp file format and use the usual check in/out, revision/lifecycle and search features.

Autodesk Vault Professional allows you to:

  • Keep a history of your design changes
  • Review how your designs have progressed
  • Rollback to a previous version
  • Have a central shared secured repository of drawings and data
  • Search for required information across multiple drawings and projects
Vault Professional Integration. Autodesk Vault Professional Training Course

What's new in AutoCAD Electrical 2023

Whats New In Autocad Electrical 2023

Discover the Right CAD Tool for Your Engineering Needs

Choosing between AutoCAD and AutoCAD Mechanical? Our free eBook offers a detailed comparison to help you make the best choice for your design projects. Gain insights into key features, pricing, and real-world applications.

Download the eBook now to make an informed decision and optimise your workflow.

Get in Touch

DC is an authorised Autodesk Reseller providing products and services for the Architecture, Engineering, Construction, Infrastructure and Manufacturing Sectors.

Feel free to contact us on 1800 490 514, [email protected], by live chat or fill out the form below.

Contact Form Demo

VIEW MORE

Connected Construction: A Better Way To Build, Together

Autodesk construction cloud centralised bid management. Autodesk BIM 360 vs Construction Cloud. Autodesk construction cloud design build plan operate Autodesk BIM 360 vs Construction Cloud. bim 360 vs acc, acc vs bim360, acc vs bim 360. Autodesk Construction Cloud vs BIM 360

Pages from Connected Construction A Better Way to Build Together 1 Moving at the Speed of Business

Autodesk Construction Cloud™ connects workflows, teams, and data at every stage of construction to reduce risk, maximize efficiency, and increase profits.

Autodesk have released a detailed whitepaper on Connected Construction.  The whitepaper covers:

  1. A New Way To Build
  2. The Autodesk Construction Cloud
  3. Connecting The Project Lifecycle
  4. The Future Of Building, On One Platform

Download the whitepaper to learn more and see the future of connected construction.

Want More Information On Connected Construction?

Complete the enquiry form below or contact us to discuss Connected Construction with one of our experts.

VIEW MORE

Connect PDM and PLM with Autodesk

Fusion 360 Manage

Fusion 360 Manage

Fusion 360 Manage with Upchain: Cloud PLM and PDM that easily connects your data, people and processes. 

Fusion 360 Manage with Upchain is a true cloud-based SaaS solution for PDM and PLM. It delivers data and process management capabilities that enable manufacturers to digitally transform product development and collaboration workflows.

Fusion 360 Manage with Upchain allows you to connect your entire organisation, including your PLM and PDM systems. You can connect across multiple departments and international locations seamlessly, helping you bring your products to market with speed. Using cloud data and process management, you can:

  • Collaborate with internal and external stakeholders
  • Maintain one single source of truth with your latest product data

Why use Fusion 360 Manage With Upchain?

  • Get the full picture of all data from all sources. Integrate your processes and do more with your data.
  • Give everyone access to the data they need. Provide secure access to rich CAD data and solicit feedback from internal and external stakeholders without requiring CAD licenses for reviewers.
  • Collaborate without barriers across multiple teams, suppliers, customers or other partners any time, from any location.

What can you do with Fusion 360 Manage With Upchain?

  • Enjoy the flexibility to start quickly and scale easily over time.  Scale up and down as needed with modular processes and tailored workflows without having to implement customised coding.
  • Bring all your product data together in one place with an open system.  Create a single source of truth for all your product data including different file types with multi-CAD integrations and an open API.  Pull in upstream and downstream data from a range of systems including ERP or CRM systems.
  • Access your data from anywhere at any time. Access and review designs, view bill of material items, change lifecycle states, manage change orders and more all from a mobile device.

Fusion 360 Manage With Upchain Options

There are multiple versions of Fusion 360 With Upchain including:

ProfessionalFusion 360 Manage with Upchain Enterprise
For organisations with enterprise level needs. It has all the features of the professional version, plus a sandbox environment, it caters for third-party users, single sign-on and includes expanded cloud storage.


 Professional Fusion 360 Manage with Upchain Professional

The best option for power users and design engineers. Integrate your CAD tools with PDM. Create and manage BOMs, workflows, workspaces, templates and engineering changes.


fusion 360 manage with upchain standard thumb 788x444 1 Moving at the Speed of BusinessFusion 360 Manage with Upchain Standard
Suitable for both extended engineering and non-engineering teams. Harness the full capabilities of PLM. Define and manage your processes, workflows, engineering changes, workspaces and templates.

ParticipantFusion 360 Manage with Upchain Participant
Suitable for management, project stakeholders, data consumers and ticket-raisers. View documents, create and run reports, participate in workflows and view dashboards.

Not sure which option is best for you? Want more information?

Complete the enquiry form below or contact us to discuss Fusion 360 Manage with one of our experts.

VIEW MORE

Inventor and Revit Fabrication Workflows

Advance Steel Revit Workflows Moving at the Speed of Business
Inventor Revit interop Moving at the Speed of Business Inventor users working with Revit have always found the data exchange tedious, with huge Revit models taking time to import, naming conventions not coming through, only an Element ID, and then once this bloated model came through, having to work with your assembly and the imported Revit model, working at a snails pace, but that all changed when Autodesk introduced Revit rvt files being supported in AnyCAD, a file reference tool in Autodesk Inventor.

Revit to Inventor

inventor 2022 image factory dataset 02 Moving at the Speed of Business When importing a Revit rvt file, the Inventor user has the option to:
  • Import it (convert it to an Inventor model) or
  • Reference it (link it in, like an xref), so if the rvt file changes, it will update
Once you reference the file in, you can start modelling around it or place it in an existing assembly and detail it. Inventor Revit 1 Moving at the Speed of Business Inventor Revit 2 Moving at the Speed of Business Click here to learn more or enquire below.

Get in Touch

DC is an authorised Autodesk Reseller providing products and services for the Architecture, Engineering, Construction, Infrastructure and Manufacturing Sectors. Feel free to contact us on 1800 490 514, [email protected], by live chat or fill out the form below.
Contact Form Demo

VIEW MORE

Reduce Waste and Improve Timelines with Lean Construction Principles

Autodesk construction cloud design build plan operate Autodesk BIM 360 vs Construction Cloud. bim 360 vs acc, acc vs bim360, acc vs bim 360. Autodesk Construction Cloud vs BIM 360 cde - common data environment
CRB Case Study Moving at the Speed of Business

Reduce Waste and Improve Timelines with Lean Construction Principles

Global design, construction, and consulting services firm CRB is looking to take lean technology and bake it into their Virtual Design and Construction (VDC) workflows to minimize redundancies and eliminate rework. CRB works on a variety of project delivery types across several industries, but life sciences and food and beverage are their bread and butter.

This year, CRB celebrated its 36th anniversary and knows that successful project execution starts the moment they’re awarded a contract. With their ONEsolution™ strategy to collaboratively design and build projects, CRB takes an integrated approach from planning to handover to deliver better project outcomes and reduce risk. By co-authoring models with trade partners, CRB maximizes efficiency and connects workflows from start to finish. Their speed to market and waste reduction innovations make life-saving technologies and services available months earlier than would be possible using standard construction methodologies.

Vince Naviello, CRB’s Northeast VDC regional manager, and Matt Edwards, CRB’s director of VDC, share six ways the company’s lean approach to project delivery drives greater planning, collaboration, and coordination while saving time, money, and resources.

1. VDC is Critical to the Lean Approach

“Once you’ve been through a Lean project, you learn how projects can be,” says Edwards, “In a traditional design-bid-build project, the design team’s authoring model gets thrown over the fence to contractors, who redesign and re-author that model to be able to work with their fabrication shops and ensure constructability. With a Lean approach, using VDC, you pull all that stuff that you’re doing twice into one effort during the design process, and the first time you do it, the light goes on.”

CRB provides design-assist services that bring every contractor, subcontractor, and stakeholder into the design process from the very start. This approach requires a shared virtual environment where information can be exchanged and worked on collaboratively.

“Collaborative project management tools like BIM 360 help us fully embrace a design-assist approach,” says Naviello. “With a common data environment, teams have access to real-time data for design coordination and review, which streamlines the process and helps our projects be more efficient.”

2. It’s All About Alignment, Before, During, and After

“We ask the contractors and designers we’re partnering with: ‘How do we make these projects go smoother? ‘How can we work better together?’,” says Edwards. 

By having these conversations before, during, and after projects, every stakeholder joins each new project with an understanding of how they will work together, and how they will make the project successful.

CRB also works with subcontractors and design partners to help them understand and embrace the technology that enables better collaboration.

“It’s important to share what the purpose of the technology is,” says Naviello. “It’s not that we’re using technology to use technology. We show them what the results are and how it’s going to make their jobs and lives better. That’s the key.”

3. You Need the Right Tools

“We use Autodesk Construction Cloud, including BIM 360 Design,” says Edwards. “We vet and onboard trade partners early on in the preliminary design process and co-author models together. This method provides shared ownership of design, which is a big key benefit. But then it also allows us to leverage all the other tools within the ecosystem, including PlanGrid and Assemble.”

For CRB, Autodesk Construction Cloud forms the backbone of a common data environment for collaboration. The platform also integrates with the many other tools that CRB uses so that nobody has to download or upload files from multiple tools.

“We also use Assemble in a lot of different ways,” continues Edwards. “Traditionally, to check on a high level how we’re tracking against estimates and using it as an interface to help us see our construction status. We use it to help generate earned value metrics, and as a straight-up model quantity takeoff for our estimating team. We’re even able to pull some BI data out of it.”

CRB uses PlanGrid and BuildingConnected company-wide to centralize data and get information in a way that’s digestible by all users. With the connection between BuildingConnected and PlanGrid, CRB can seamlessly transfer complex data from the design and planning phase into the hands of workers on the site. 

“In the design-build design-assist environment, we are building as we’re still designing and engineering. PlanGrid allows us to look at the latest field markups, see where construction progress is, and react from a design standpoint. We are no longer designing and building in a separate vacuum. Everything is connected,” says Matt Edwards.

BuildingConnected, in particular, has allowed them to build their network and establish deeper relationships with trade partners.

4. Co-Authoring Impacts Value, Timeline, Budget and Cost

“Through doing the uploads during design and co-authoring with trade partners, we’re able to take one of the big Lean principles of Target Value Delivery (TVD), and track how we’re trending against that estimate,” says Edwards. “How are we doing against each estimate through the quantities of modeling? That’s a very big thing for us right now.”

Co-authoring also cuts down on time to fabrication. By bringing specialty contractors in earlier and having them author inside the fabrication suite, the mechanical design team can also offer up their parts, and everything becomes seamless.

“One of our mechanical trade partners commented that doing it this way cuts down their time to fabrication by half,” says Edwards. 

It also improves budgeting and budget tracking. For instance, in the old way, you might have to give a plus or minus 10% estimate for piping, not knowing exactly how many feet of pipe would be needed. With the piping contractor assisting with design, this can be determined from the beginning and budgeted more accurately.

These time, value, and budget benefits occur across the construction lifecycle, thanks to the efficiencies gained through co-authoring.

Additionally, using collaborative cloud tools like Autodesk Construction Cloud reduces costs in a wide variety of ways.

“Over the last year, we’ve been able to convert over all paper reports into electronic reports,” says Naviello. “This is one example of how we’re able to take the integrations with these tools and realize real savings with time and material.”

5. Lean Means Staying Coordinated Throughout the Project Life Cycle

Going Lean requires substantial planning and co-authoring and collaboration upfront, but it must also be carried through every stage of design, build, and maintenance to yield the greatest benefit.

With BIM 360, CRB has found many opportunities to save time, money, and rework by resolving clashes before they become issues during construction. The transformation has led to less finger-pointing and more collaboration between project teams as everyone has access to real-time project data in one centralized platform.  

Before implementing BIM 360, conducting model coordination was time-intensive, as CRB had to share through an FTP site and did not have a common data environment. Having a centralized platform where all project stakeholders can upload models allows coordination to happen more organically, so teams are always coordinating rather than periodically – which is a significant value. CRB estimates this integration will save them at least two weeks of work on each project and improve communication with their subcontractors.   

For a global company with projects worldwide, the ability to coordinate multiple aspects of the job in the cloud is critical. 

“Without this technology, it was challenging to connect the field to the office,” says Naviello. “That’s the bottom line. We had disconnected teams and a lot of challenges. Sometimes we had to issue out multiple packages to projects. There was the possibility of getting out of sync. PlanGrid helps pull that all back in line so we can get information directly to the field as soon as it’s available. We have a line of communication back to the office making it easy to collaborate.”

6. Design Assist Saves Months

“Normally, the first three months of a major job are tied up in converting, tracing, and re-coordinating stuff to the fabrication level,” says Edwards. “By taking a design-assist approach and involving all stakeholders from the very start, we save months on the project timeline.”

The obvious advantage for clients is speed to market. CRB’s clients are often in high innovation fields of biotechnology and pharmaceuticals. Getting to market fast can provide benefits to all stakeholders, but Edwards says one benefit outweighs all the rest.

“We work for our clients, of course,” he says. “But it’s not just about money. What we do saves lives. Some of these companies are developing life-saving medications, and the fact that we can have a small part in decreasing the time it takes for these drugs to get to market… well, that is saving lives. It’s a great source of motivation when dealing with complex projects with short deadlines.”

Technology can be a disruptive force to standard operating procedures, particularly those operating procedures that weren’t previously supported with technology. By challenging some of their core standard operating procedures with new technology, CRB has gained trust with owners and trade partners, which is a net gain for the company. 


Learn more about Autodesk Construction Cloud here.

Contact Us

If you would learn more about Autodesk products, please contact us by calling on 1800 490 514, by filling out the form or clicking the live chat in the bottom right-hand corner.

Contact Us Moving at the Speed of Business

VIEW MORE

Streamline Bid Management from Start to Finish

Building Connected - an Autodesk Compnay

Streamline Bid Management from Start to Finish

With Autodesk’s new Construction Cloud platform, the Building Connected module gives you a system to find reliable partners for every job on the Builders Network with access to over 1,000,000 construction professionals on their network, simplify bid workflows, and manage subcontractor risk in real-time.

Bid Management Tools

Buildingconnected 1 Moving at the Speed of Business

With Building Connected, you have bid management tools to:

  • Identify the best builders for the right project.

  • Qualify subcontractors and manage project risk.

  • Unite bid and collaboration tools for subcontractors.

Building Connected Qualify Subs 1 Moving at the Speed of Business

Qualify Subs

Choose the most qualified subs for the job with integrated risk analysis with TradeTapp.

Building Connected custom bid forms 1 Moving at the Speed of Business
Custom Bid Forms

Create custom bid forms to go out with your ITB and add scope-specific line items for the sub to fill out.

Building Connected level bids 1 Moving at the Speed of Business
Level Bids

Compare bid side-by-side in an apples-to-apples fashion and choose the best subcontractor for every project.

Building Connected bid analytics 1 Moving at the Speed of Business
Bid Analytics

Get unparalleled insights across your company with our detailed performance metrics and historical cost tracking.

With tools for Check out the Autodesk Construction Cloud page to learn more

Contact Us

If you would learn more about Autodesk products, please contact us by calling on 1800 490 514, by filling out the form or clicking the live chat in the bottom right-hand corner.

Contact Us Moving at the Speed of Business

VIEW MORE